POP Projects is a collection of new and classic projects from more than a century of Popular Mechanics. Master skills, get tool recommendations, and, most importantly, build something of your very own.
From a technical standpoint, there's nothing particularly difficult about building stairs for a deck, porch, or shed. Anyone with basic carpentry skills can make the necessary cuts and assemble the parts. And yet, stair building is arguably the most challenging task do-it-yourselfers will ever attempt.
Stairs must satisfy strict building codes meant to ensure safety and climbing comfort. Tall steps make climbing hard, and shallow steps are uncomfortable and dangerous. Since there's so little room for error, building stairs requires careful layout and some potentially tricky calculations.
Start by consulting your local building department for codes and guidelines. Then, follow the procedure laid out here, where I built steps for a raised backyard deck.
Some Basic Stair Anatomy
There are three main components in a typical staircase: stringers, treads and risers. Stringers, normally cut from 2x12s, are the angled boards that extend from the deck down to the ground. They support the other stair components and carry the weight of people walking on the stairs. Stringers are typically spaced 16 in. on center and most staircases have at least three stringers.
When determining the width of a staircase, remember that wider is better. Deck and porch steps are seldom less than 4 ft. wide.
Treads form the horizontal top surface of each step, and risers are installed directly under the front lip of each tread. Deck staircases don't always have risers, but it's a good idea to install them because they protect the exposed end grain of the notched stringers, which helps prevent them from cracking.
Stair stringers for decks and porches are almost always made of weather-resistant pressure-treated lumber. The treads and risers can also be cut from treated lumber, but are often made from whatever material is used for decking, such as cedar, redwood, composite lumber, PVC boards, or exotic hardwood.
Step 1: Calculate Rise and Run
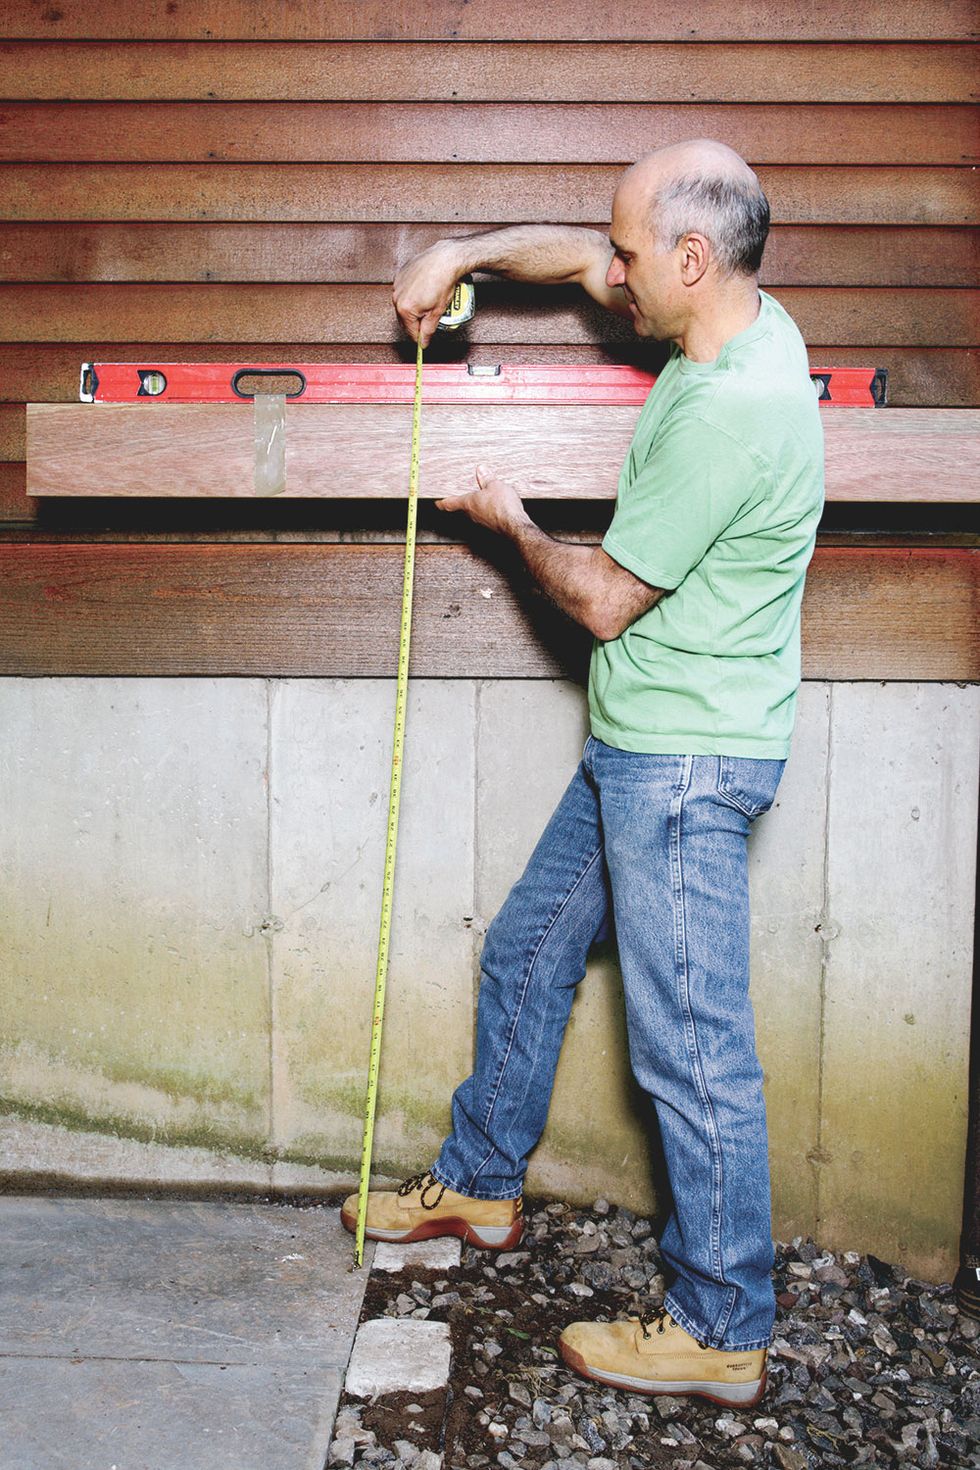
The first step in building stairs is finding the total rise, which is the overall vertical height of the staircase. Lay a long level or straight board on top of the deck and let it extend out from the edge several inches. Then measure down to the ground or landing location. Let's say the total rise is 57 in. With that dimension known, you can now calculate rise of each step. Divide 57 by 7 in. (the typical rise per step) to get 8.14. Round down to get the number of steps: eight. Then, to determine the actual rise of each step, divide 57 in. by the eight to get 7 1/8 in. per step.
Now you must find the total run of the staircase, which is the horizontal distance the staircase will cover from the bottom step up to the deck. Simply multiply the number of steps by the horizontal depth of each step. The optimum depth for deck and porch steps is 10 in., which is enough space to install two 2x6 treads. In our example, the staircase has eight 10-in.-deep steps, so the total run is 80 in.
If you’re building a staircase for a tall deck, it's best to break up the staircase with an intermediate landing after about seven or eight steps.
⚠️ Check with the local building inspector for more specific information. Staircases have strict building codes with regards to acceptable rise and run measurements, and when a landing is required.
Step 2: Cut Stringers
Before laying out the steps on a 2x12, decide how the stringers will join the deck. They're either attached directly to the rim joist so the top step is flush with the decking, or to the framing under the deck, which is the way I did it here. When mounted under the deck, the stringers are either attached to the joists or to blocking placed between joists. Note that with this technique, the stringers must be cut long to reach the framing.
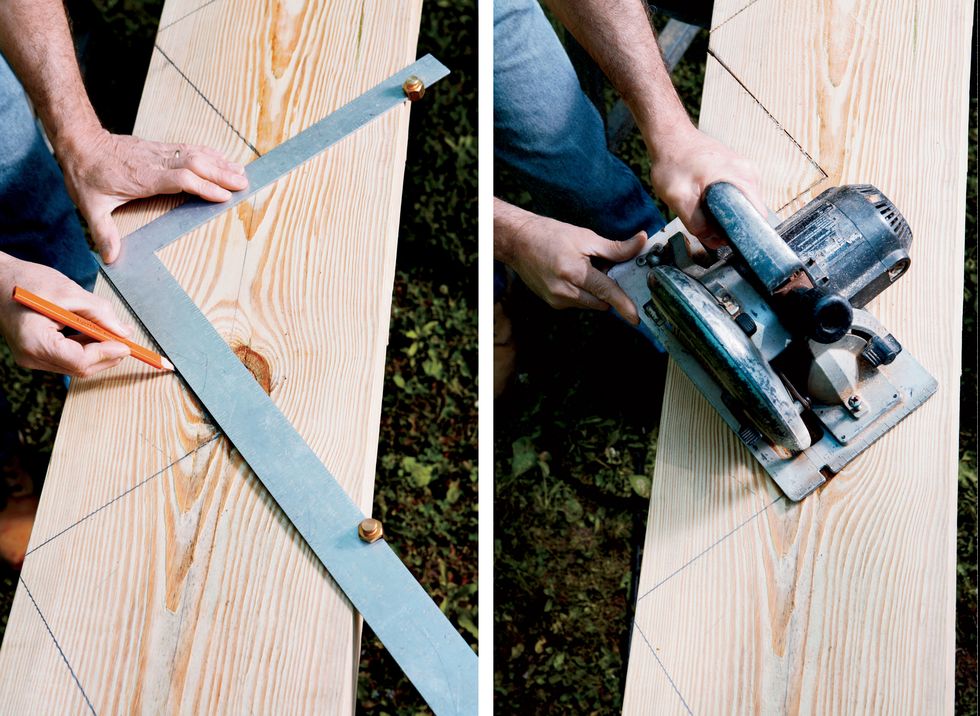
Mark the tread notches using a framing square fitted with stair gauges. These small brass fixtures clamp onto the square, providing an accurate way to mark several identical notches. Clamp one stair gauge on the square's tongue directly at the rise dimension. Attach the other gauge to the body of the square at the run dimension. (The tongue is the narrower leg of the framing square; the body is the wider part.)
Then, lay the square on the 2 x 12 with the gauges pressed against the board's edge and mark the tread and riser. Slide the square down, align it with the previously drawn notch, and draw the next one. After drawing all the tread-and-riser notches on the first stringer, cut the notches using a portable circular saw. However, be very careful not to cut beyond the pencil lines. If you do, you’ll weaken the stringers. After cutting up to the pencil lines the waste piece will still be attached to the stringer. Use a handsaw or jigsaw to cut through the last bit of wood to free the waste piece.
Next, trim the bottom of the stringer an amount equal to the tread thickness. For example, if you're installing 2x6 treads, cut 1 1/2 in. from the bottom of the stringer. Once you’ve completed cutting the first stringer, use it as a template to mark the remaining stringers. That ensures each stringer will be exactly the same size.
💡Mark the first stringer with a large letter T to identify it as the template.
On this deck, I used galvanized carriage bolts to fasten the stringers to the deck-frame blocking, which was spaced 16 in. on center. Carriage bolts are stronger than lag screws and eliminate any chance of splitting the framing. And note that the bottom of the stringers rest on top of a bluestone slab, which provides rock-solid support, but also protects the stringers from ground moisture and water damage. Never set stringers directly on bare ground. Instead, pour a concrete pad, or set them on stone slabs or solid-concrete blocks.
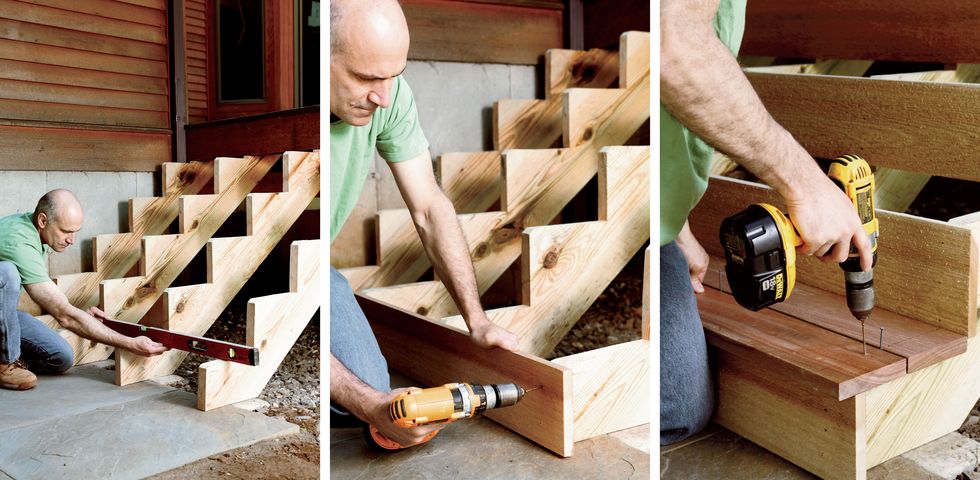
After setting the stringers in place, lay a long level across all of the stringers to confirm that each step is level. If you find any high spots, pare them down with a block plane or rasp.
Step 3: Install Treads and Risers
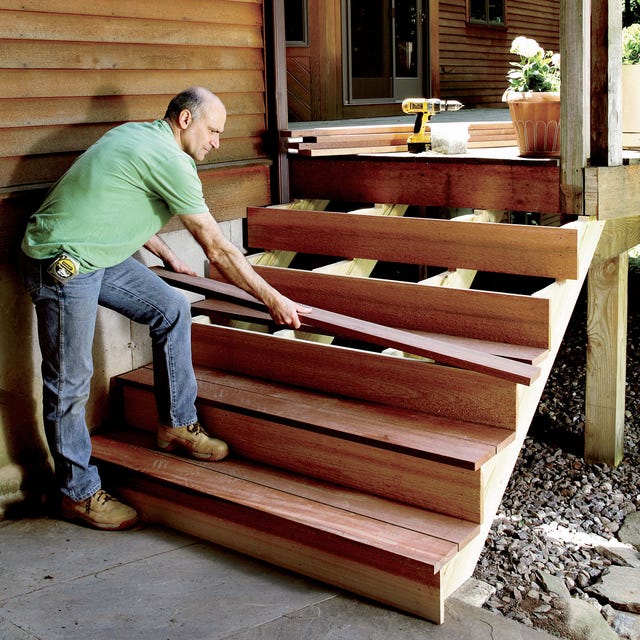
Cut the risers to length using a power miter saw for speed and accuracy. Fasten each riser them to the stringers with 2 1/2-in. trim-head decking screws, which have tiny heads that sink below the surface. Note that I cut the risers and treads to overhang the outer stringer by 1 1/4 in. Later, a 1x12 cedar trim board will be nailed to the stringer, giving the staircase a more finished look. If you’re not installing a trim board, cut the treads to overhang the stringer by 1/2 in.
After installing the risers, fasten the treads with 3-in. trim-head screws. Leave a 1/8- to 1/4-in. space between the treads. Continue installing treads, working your way up the staircase. The 4x4 posts used to support the staircase handrail are often bolted to the stringers before installing the treads. However, I completed the stairs first, and then attached the posts and built the handrail, as required by code.
The final step is to apply an exterior-grade finish, typically stain or clear wood preservative for deck stairs, and acrylic-latex paint for porches.
🎥 Now Watch This:
Joe is a former carpenter and cabinetmaker who writes extensively about remodeling, woodworking, and tool techniques. He has written eight books and is a contributing editor to Popular Mechanics. He also appears on the Today’s Homeowner TV show, and co-hosts the weekly Today’s Homeowner Radio Show. Joe writes from his home in Roxbury, Connecticut.

