
How To Make Basic White Sandwich Bread

If you've been thinking of trying your hand at homemade sandwich bread, here's a great recipe to make first.
Makes2 (8-inch) loaves
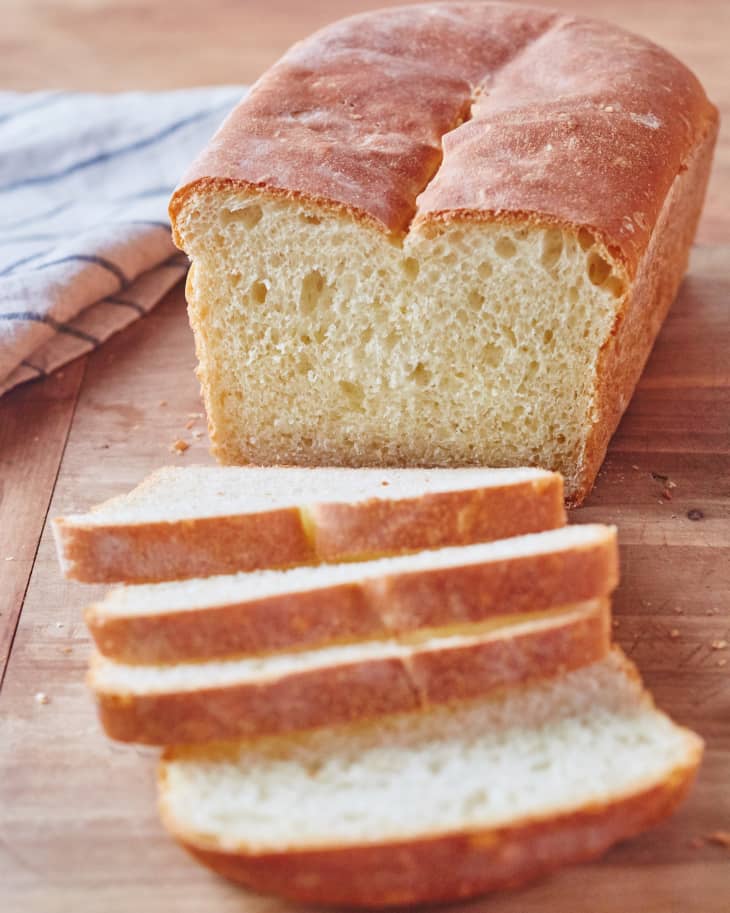
What does a loaf of white sandwich bread make you think of? For me, these pillowy, slightly sweet loaves conjure PB&J sandwiches in wax paper, French toast on Saturday mornings, and picnics in the park. If you’ve been thinking of trying your hand at homemade sandwich bread, here’s a great recipe to make first.
White sandwich bread should be sturdy enough to support a generous spread of mayo and few layers of deli meat, but still soft enough to chew easily. It also shouldn’t crumble to pieces halfway through eating.
This loaf accomplishes this balance by using a mix of water and milk, which helps keep the bread soft and tender. A pat of butter adds some richness, and a few spoonfuls of sugar give it a touch of sweetness without tipping things into dessert territory.
Basic White Sandwich Bread
If you've been thinking of trying your hand at homemade sandwich bread, here's a great recipe to make first.
Makes 2 (8-inch) loaves
Nutritional Info
Ingredients
- 1 cup
warm water
- 2 teaspoons
active dry yeast
- 1 cup
milk (any kind)
- 2 tablespoons
unsalted butter, melted
- 2 tablespoons
granulated sugar
- 1 tablespoon
salt
- 5 1/2 to 6 1/2 cups
all-purpose flour, divided
Neutral-tasting oil, such as canola
Cooking spray (optional)
Equipment
Stand mixer with paddle attachment, or large bowl
Wooden spoon or rubber spatula
Measuring cups and spoons
Plastic wrap or kitchen towel
- 2
(8 by 4-inch) loaf pans
Serrated knife
Wire racks
Instructions
-
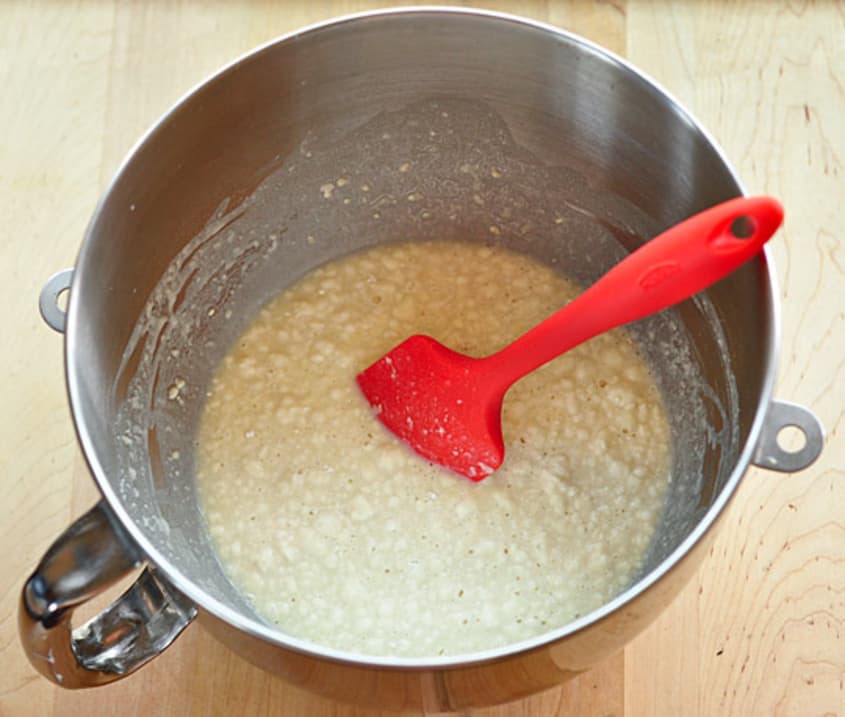
Proof the yeast. Make sure the water is warm to the touch. If you can't comfortably hold your finger in the water for several seconds, wait for it to cool. Pour the water into the bowl of a stand mixer or large bowl and sprinkle the yeast over top. Let stand for 5 minutes until the yeast is dissolved.
-
Start the dough. Place the milk, butter, sugar, and salt in a medium bowl and stir to combine. Transfer to the bowl with the yeast, add 1 cup of the flour, and stir until it forms a loose, lumpy batter.
-
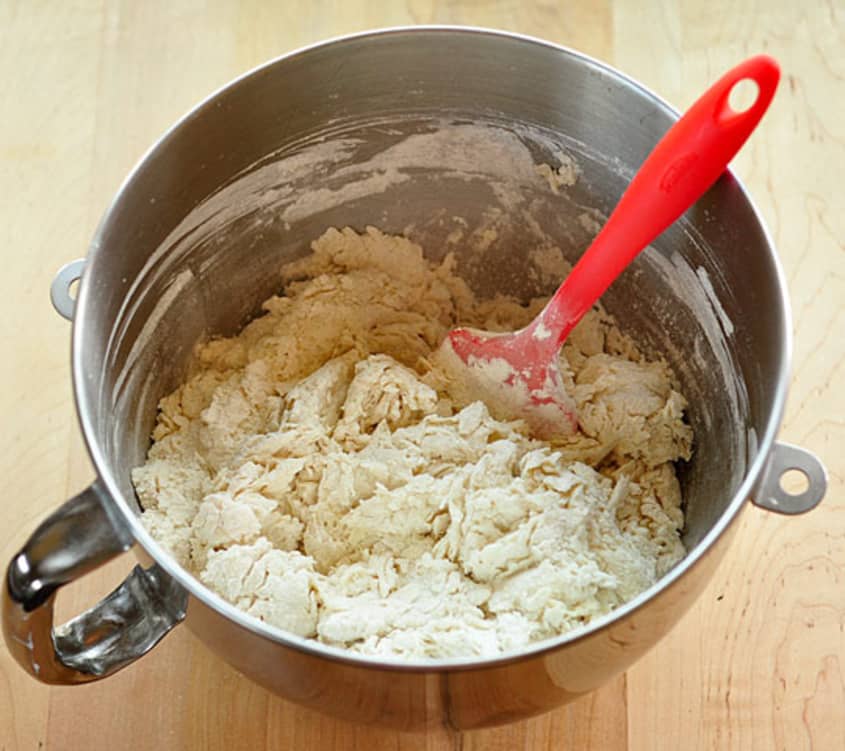
Add the flour. Add 4 1/2 cups of the flour, reserving the remaining cup if the dough is sticky during kneading. Stir until a floury, shaggy dough is formed.
-
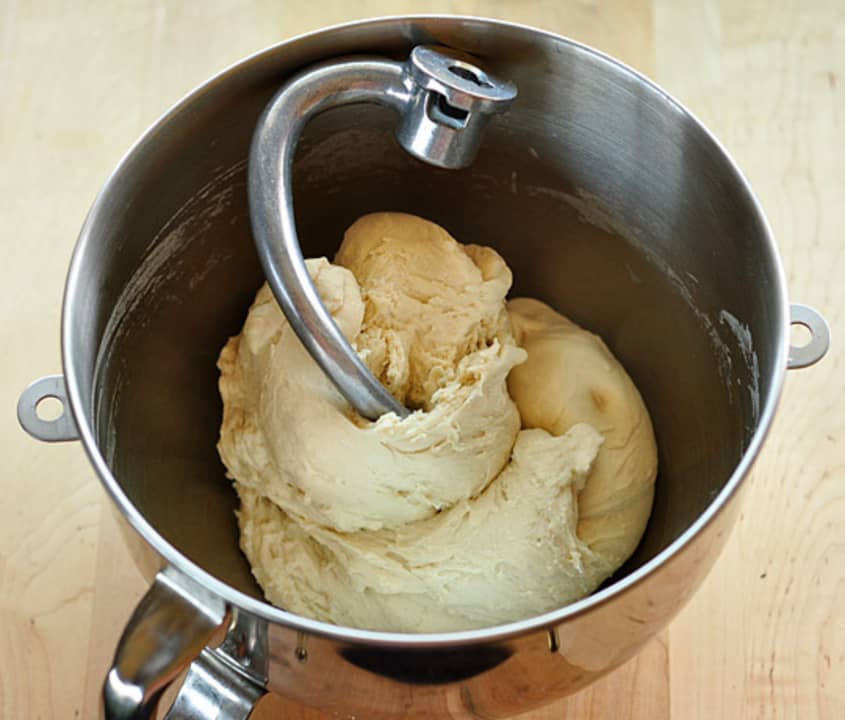
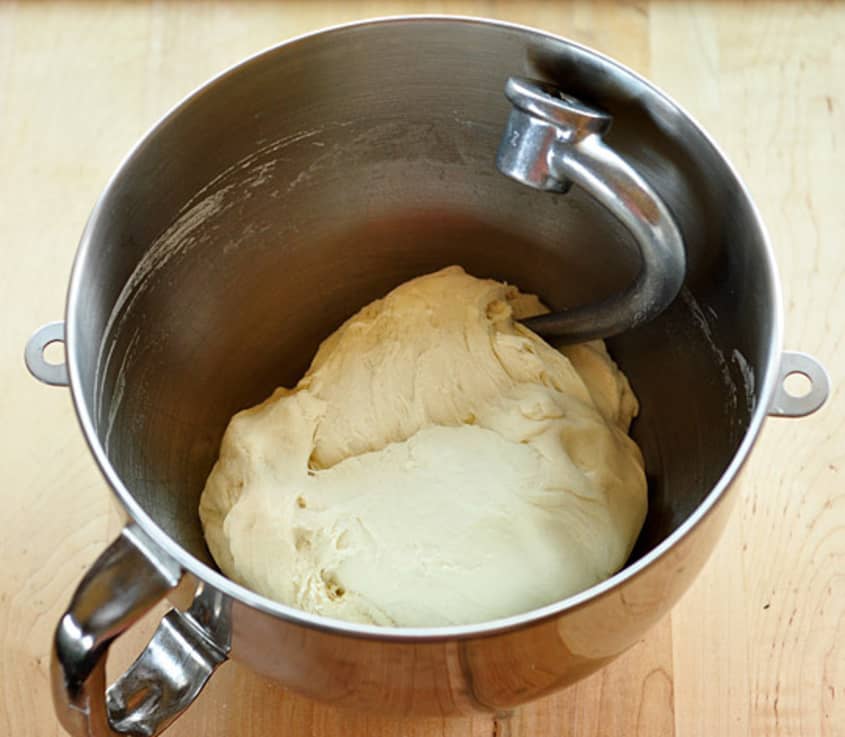
Knead the dough. Using the dough hook attachment on a stand mixer on medium speed, knead the dough for 8 to 10 minutes. (Alternatively, knead the dough by hand on the counter.) If the dough is bubble-gum sticky against the sides of the bowl or the counter, add extra flour a tablespoon at a time until it is no longer sticky. The dough is kneaded and ready when it is smooth, feels slightly tacky, forms a ball without sagging, and springs back when poked.
-
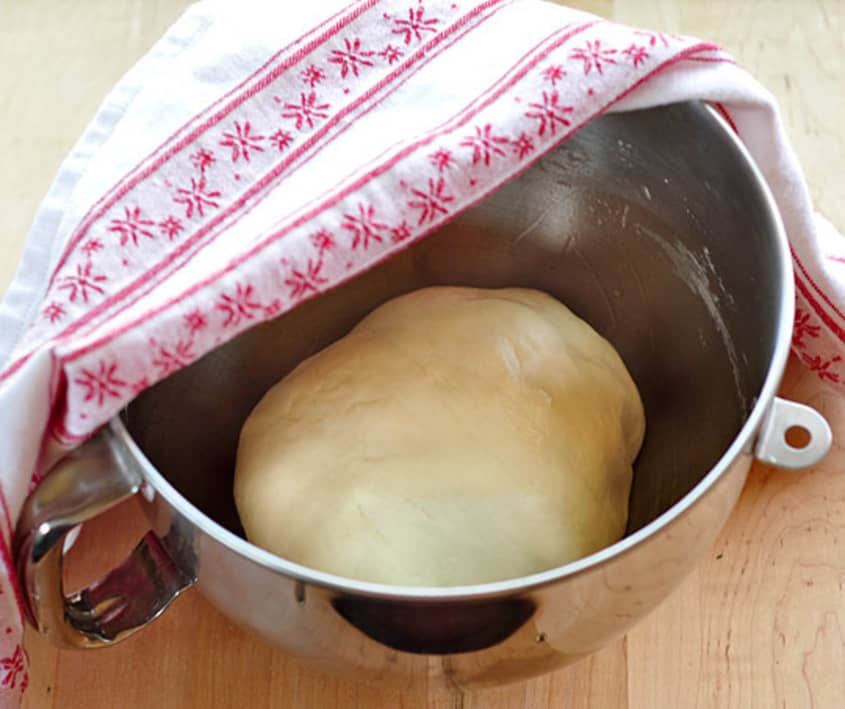
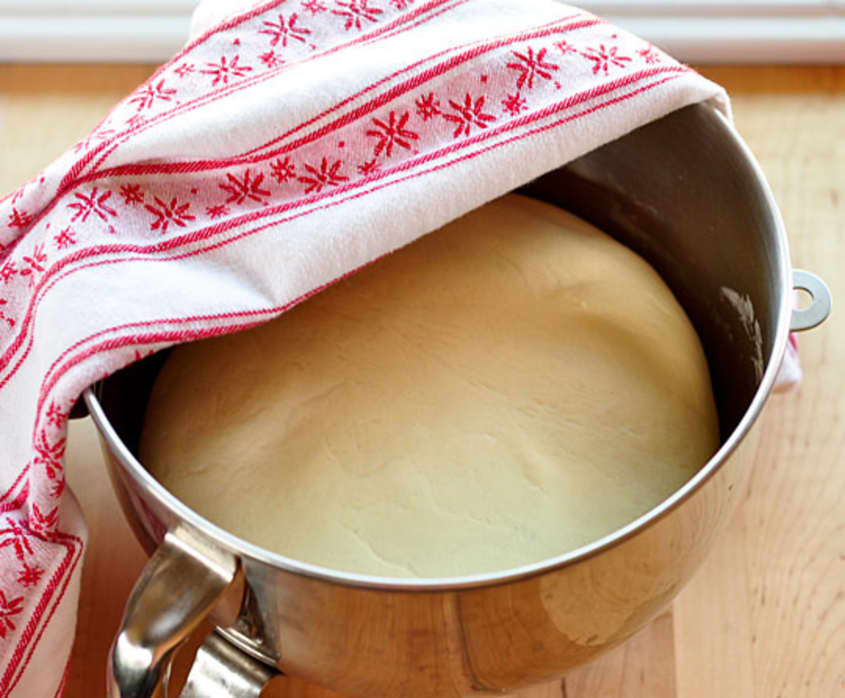
Do the first rise. Remove the dough from the stand mixer bowl. Clean and dry the mixing bowl. Coat with a thin film of oil. Form the dough into a ball, place it in the bowl, and turn it to coat all over with oil. Cover the bowl with plastic wrap or a kitchen towel and let the rise in a warm spot until doubled in volume, about 1 hour.
-
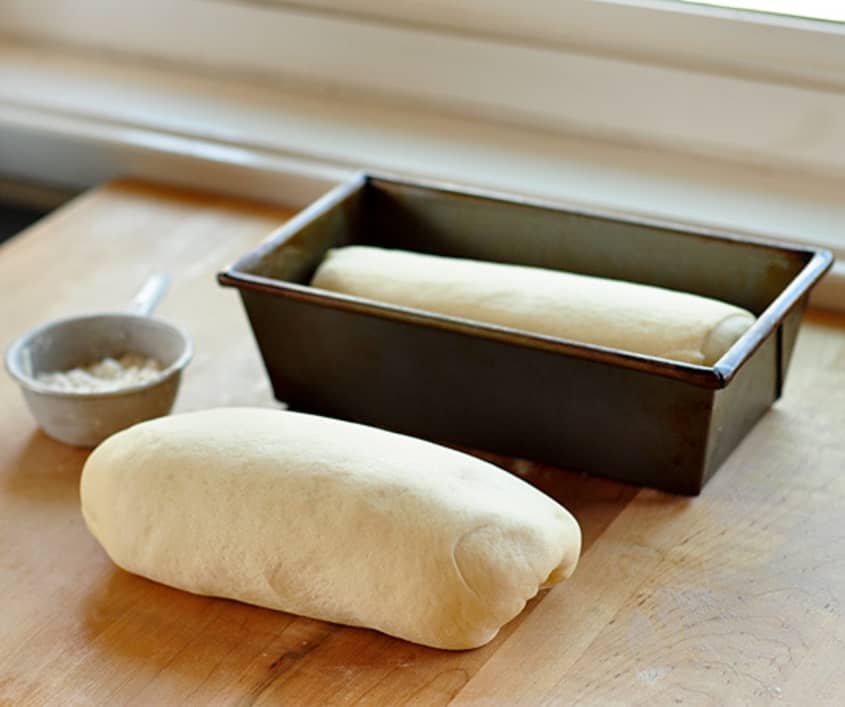
Shape the dough. Sprinkle a little flour on a work surface and place the dough on top. Divide the dough into 2 equal pieces and shape each piece into a loose ball. Let the balls rest for 10 minutes.
-
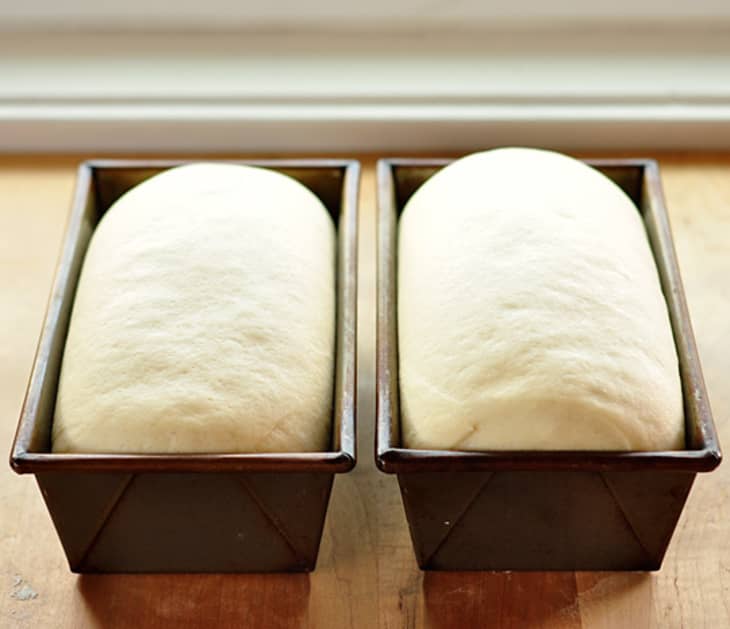
Do the second rise in the loaf pans. Grease 2 (8 by 4-inch) loaf pans with oil or coat them with cooking spray. Shape each ball of dough into a loaf (see Recipe Notes below for instructions or this tutorial for photos) and transfer to the loaf pans. It's important that the surface of the loaves be stretched taut; this helps them rise and prevents an overly-dense interior. Let the loaves rise a second time until they start to dome over the edge of the pan, 30 to 40 minutes.
-
Heat the oven to 425°F. Arrange a rack in the middle of the oven, remove any racks above it, and heat the oven to 425°F about halfway through the second rise.
-
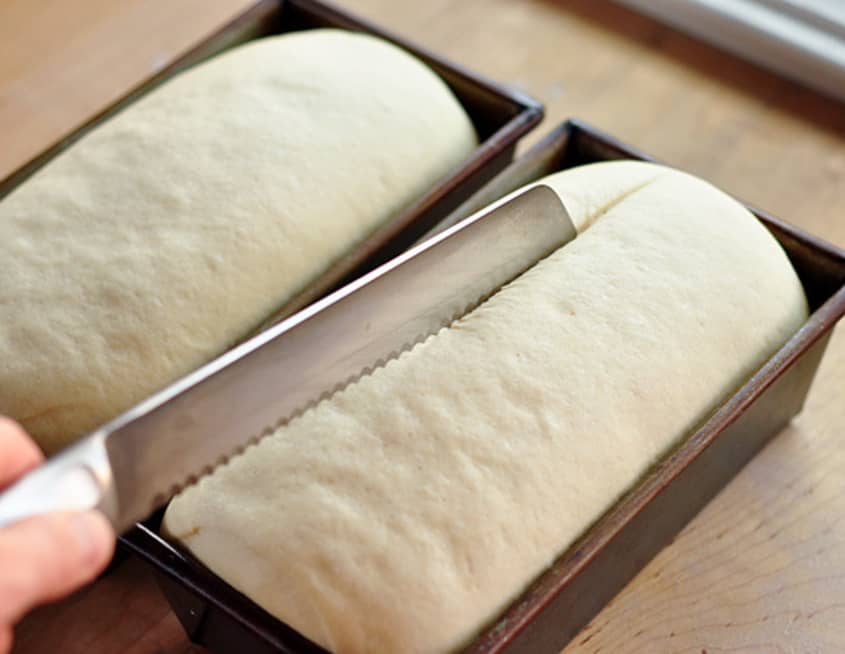
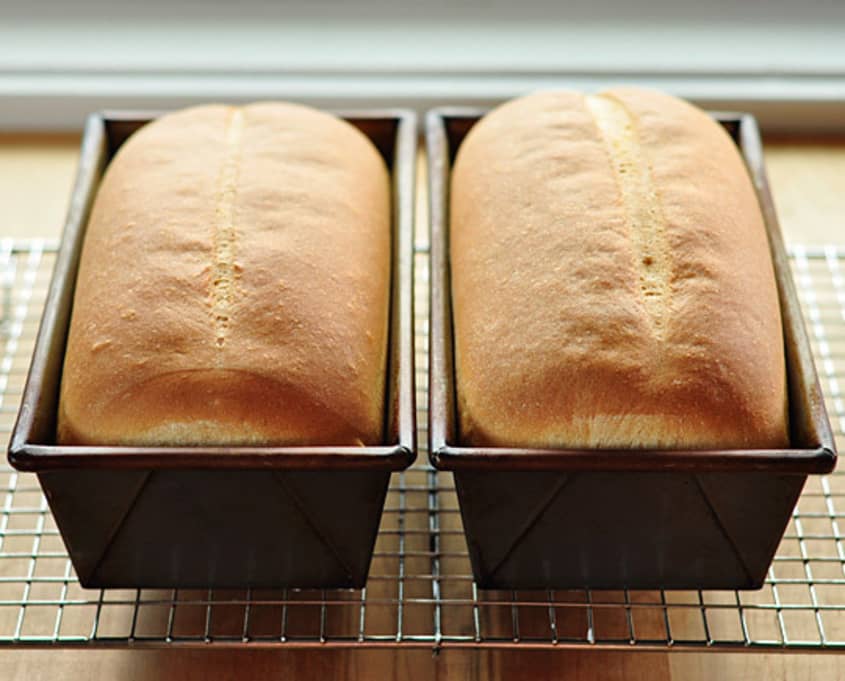
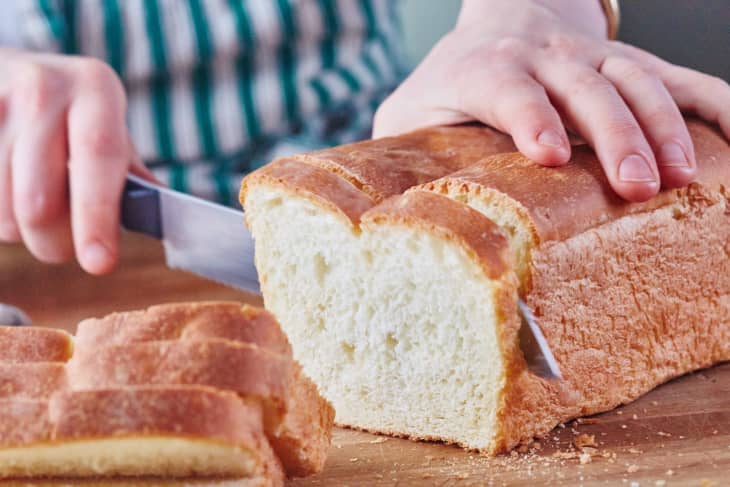
Slash the loaves and bake. Using a serrated knife, make a long, shallow slash down the center of each loaf. Place them in the oven. Immediately turn down the heat to 375°F and bake 30 to 35 minutes. Finished loaves will be dark golden-brown and sound hollow when tapped on the bottom. Remove the loaves from the pans onto wire racks and let cool completely before slicing.
Recipe Notes
Storage: Loaves wrapped in foil and plastic will keep at room temperature for several days or freeze for up to 3 months.
How to Form Loaves
1. Flatten into a rectangle. Use the heels of your hands to gently flatten the round into a rough rectangle. If the dough is sticking to the counter, sprinkle a little flour underneath. Try not to use too much flour, though, or else you'll have trouble getting the dough to stick to itself once you shape 2. Fold the bottom third up. This part is like folding a letter! Fold the bottom third of the dough over on itself.
3. Fold the top third down. Then fold the top of the dough down so that it overlaps the other layers.
4. Pinch closed. Use your fingers to pinch the dough closed where the top layer meets the bottom layers. Don't forget the sides!
5. Fold the dough again. The goal is to get the surface of the loaf as taut as possible. This will help the loaf rise evenly and keep its shape. If your loaf still seems a little loose after the initial folding, just fold it in half again and pinch it closed. We do this by pressing the middle down and drawing up the sides.
6. Invert the loaf into the pan. Roll the loaf over until the seam is facing down and then gently place the loaf into the pan. The seams should be on the bottom with the tight surface facing up.