
Mama’s Gotta Bake has a new location
Posted: 04/27/2014 Filed under: Uncategorized Leave a commentHi guys, I appreciate all of you who read and follow this blog, and I don’t want to lose you. You can find me now at:
mamasgottabake.com

Check out mamasgottabake.com for gluten-free pizza
Please find me there for more recipes and restaurant reviews.
xo
Sheryl
Great News! My site is moving.
Posted: 04/22/2014 Filed under: recipes, Restaurants 23 Comments Yes, it’s true we are moving. Although the website is moving, there is nothing you need to worry about. We are packing you up and taking you with us! You will still receive my post by email or, under the reader section of wordpress.com.
We look forward to seeing you at our new home page.
Thanks,
Mamas Gotta Bake
Palmilla Cocina y Tequila
Posted: 04/01/2014 Filed under: Restaurants, South Bay | Tags: Hermosa Beach Restaurants, Los Angeles Restaurant Reviews, Mexican Cuisine, Palmilla Cocina y Tequila 43 Comments
Crab Benedict Croquette at Palmilla Cocina y Tequila
Why is it so hard for me to find good Mexican cuisine in Southern California. I mean, that’s crazy, right. It should be so easy to find here, but I can’t say anything’s knocked my socks off lately. Oh, until today. Palmilla Cocina y Tequila is a great little gem of a restaurant right on the pier in Hermosa Beach. I went with a friend today for their Sunday brunch. Executive Chef Christina Cipres is all about the flavor. If I closed my eyes I would have thought I was on the beach in Cabo because the flavors are fresh and authentic, from the cocktails to the house-made desserts.
We sat outside on their patio which is the way to go if the weather is good, because it’s excellent people watching as well as enjoying the cool ocean breezes. They nailed me right off the bat with their Bunuelos, homemade tortilla chips tossed in cinnamon sugar and drizzled with chipotle-mint honey. I think of all the other Mexican restaurants that serve those packaged tortilla chips and run-of-the-mill salsas. All I can say is, shame on you!

Watermelon, Ginger & Hibiscus Aqua Fresca

The Traditional Bloody Mary

Bunuelos
They have a great bar menu including a vast tequila selection, agua frescas, fresh juices and a build your own mimosa option. We ordered the Watermelon, Ginger & Hibiscus Agua Fresca (with tons of fresh ginger bits) which was light and refreshing as well as the Traditional Bloody Mary ($9) which was anything but traditional. Just check out the array of spices around the rim of that glass. Awesome.

Papas Rajas Hash with Chorizo
But I haven’t told you about the food yet, and that was the best part. Chef Cipres takes Mexican cuisine to a whole ‘nuther level. For me, I would describe the dishes as homey comfort food with a great layering of flavors and textures, that bring out the best in Latin spices. The presentation is creative and the plating nicely finessed. A dish you must order is the Crab Benedict Croquette ($16) which is two perfectly poached eggs atop sweet potato croquettes with dungeness crab and a to-die-for adobo hollandaise sauce. I would also recommend the Papas Rajas Hash with Chorizo ($12). They serve it in a mini skillet with three sauces and three house made tortillas, it was easily enough for several people.

Bread Pudding

Churros with two dipping sauces
But wait, there’s more. The flavor doesn’t stop there, because you’ve gotta have dessert. To accompany our Lavazza Coffee ($4) which was excellent, we had the bread pudding and the deliciously crispy, crunchy churros with two dipping sauces.

Chef Christina Cipres

The Bar at Palmilla Cocina y Tequila
Mama loves attention to detail, and the folks at Palmilla Cocina have put as much thought into their decor as they have their food. Once inside the restaurant you feel transported to a far off exotic location.. The room is illuminated in a soft golden glow from the handmade chandeliers on the ceiling. Artistic tiles and chains adorn the walls and give the space a hip, ethnic vibe. I don’t think it’s a place I would bring the kids, but it’s certainly perfect for a fun, girls night out.

Palmilla Cocina Y Tequila
And here’s the best part of all. When all is said and done, and you can’t eat another bite, even though you want to…you can go walk it off on the beach which is 10, okay, 15 steps away from the restaurant. I should add that the service was extremely friendly, attentive and efficient and parking wasn’t a problem since there are public lots in the immediate area.

You can walk it off at the beach
Palmilla Cocina y Tequila 39 Pier Avenue, Hermosa Beach, CA 90254 (310) 374-4440
Blueberry Muffins
Posted: 03/25/2014 Filed under: desserts, fruit, muffins, recipes | Tags: baking, blueberries, blueberry muffins, breakfast muffins, muffins, recipe 68 Comments
Blueberry Muffins
The craziest thing happened the other day, true story… My son, son #2 that is, who is home from school on spring break, brought packaged blueberry muffins into my house. You know the kind that are filled with all kinds of preservatives, calories, and lord knows what else. I thought my eyes were deceiving me when I spotted them sitting on the kitchen table. I said, dude, your mom writes a blog called Mama’s Gotta Bake! Think man, think!
Naturally I did what any good food blogger and mother would do, and raced to my kitchen and made my son homemade Blueberry Muffins with fresh, yes, fresh blueberries. I felt like I had restored order to the universe…

Blueberry Muffins
Blueberry Muffins
Adapted from Williams – Sonoma
- 2 cups flour
- 2/3 cup granulated sugar
- 2 1/2 teaspoons baking powder
- 1/4 teaspoon baking soda
- 1/2 teaspoon salt
- 1 teaspoon cinnamon
- 1 cup whole milk
- 1 stick unsalted butter, (equals = 1/2 cup, 4 ounces or 8 tablespoons) melted and cooled
- 2 large eggs, lightly beaten
- 1 cup fresh blueberries
Directions
- Preheat the oven to 400 degrees F. Using a pastry brush, thoroughly brush the insides and tops of a 12 well muffin tin. (I was able to make 12 regular sized and 12 mini muffins).
- Melt your stick of butter in a small dish, and set aside to cool slightly.
- In a large bowl sift together the flour, sugar, baking powder, baking soda, salt and cinnamon. Then give it a good whisk to fully disperse the ingredients. Set aside.
- In a large bowl, whisk together the milk and cooled butter and add the eggs making sure that the milk/butter mixture is sufficiently cooled so that the eggs won’t scramble when you add them. Fold in the flour mixture and blend until all the ingredients are fully incorporated. Gently add the blueberries, mixing to disperse them throughout the batter.
- Spoon the batter into the prepared muffin tins, filling each one 3/4 full. Bake for 15-20 minutes (mine were done at 15 minutes, 12 minutes for the mini-muffins), or until a toothpick inserted in the center of a muffin comes out clean.
- Cool on a rack for 5 minutes. Run a sharp pairing knife around the edges and gently shake out muffins.
Makes 16 regular size muffins, or 12 regular size and 12 mini muffins

Baking Blueberry Muffins

Blueberry Muffins
Recipe: Easy
Homemade Tomato Sauce & Meatballs
Posted: 03/19/2014 Filed under: Appetizers, main dish, Meat, Pasta, recipes, side dish | Tags: cooking, Italian cooking, meatballs, pasta sauce, recipe, tomato sauce 49 Comments
Homemade Tomato Sauce & Meatballs
When I first migrated to LA back in the late 70’s, I moved into one of those sprawling apartment complexes in the San Fernando Valley. It housed transplants literally from all over the world. Young people who came seeking fame and fortune and hoping to get their big break, and people like me who were just looking to escape the cold, brutal weather of the east coast. I came with nothing but a suitcase and $400, so moving into a furnished apartment meant I could live with some of the comforts of home. It was a lovely place really, gold shag carpeting, plaid sofas and avocado colored formica counter tops. It had all the warmth and coziness of a Motel 6, but it was home.
I remember those first months living in LA all by myself so well. It was lonely and exciting all at the same time. Everyone at this complex was very friendly. We all seemed to be in the same boat; without family, little money, and crappy jobs, but very intoxicated by the perpetually blue skies, balmy weather and swaying palm trees. (You didn’t see many palm trees in Philadelphia.) My neighbors across the hall were a brother and sister team from North Jersey named Theresa and Anthony. He called her “Tree” and she called him “Ant”. I guess being east coasters we connected. Every night they saw me come home from work with a McDonald’s bag in hand, so they decided to teach me how to make Tomato Sauce and Meatballs. I’m not sure they were necessarily very good cooks, but I’ve been making their sauce (or gravy as they called it) and meatballs ever since.

Homemade Tomato Sauce & Meatballs
Homemade Tomato Sauce
- 3 cans (28 ounce) crushed tomatoes – I used San Marzano
- 5 large basil leaves
- 3 sprigs thyme
- 1 teaspoon sea salt (or to taste)
- 1 tablespoon brown sugar
- 3 tablespoons unsalted butter
Directions
- Empty the 3 cans of crushed tomatoes with the juice into a large stock pot. I used a deep pot because tomato sauce splatters like crazy. If you have a splatter shield, now’s the time to bring it out.
- Add the basil leaves, thyme sprigs, salt, brown sugar and butter, and heat on medium until the mixture comes to a boil. Reduce the heat to low, and stir until the butter is melted. You’re going to cook the sauce low and slow for about 2 hours, stirring every 15 minutes or so. When sauce is ready, pull out the basil leaves and thyme sprigs and discard.
- As the sauce cooks it will begin to reduce, so you will have to add some water to it to get your desired consistency. I wanted a smooth and creamy sauce, so at the end of cooking I used my immersion blender for about a minute or two. You could also pour it into a blender for a smoother consistency.
Meatballs
- 3/4 pound ground beef
- 3/4 pound ground veal
- 1/4 cup bread crumbs
- 3 tablespoons fresh parsley, minced
- 1/4 cup grated romano cheese
- 1/2 small onion, pureed in food processor
- 1 teaspoon salt
- 1/2 teaspoon fresh ground pepper
- 1 egg, plus 1 egg yolk
Directions
- Place your onion in a food processor and process until it’s finely minced. (I used my mini food processor). Put the onion and all the other ingredients into a large bowl and mix with your hands. Make sure to incorporate all the ingredients evenly throughout.
- Form into balls, a little bit larger than a golf ball. Don’t work the meat too much, because you don’t want the meatballs to be dense (like golf balls).
- Put about 2 tablespoons of oil in a skillet on medium heat, and brown the meatballs just til you get a nice crust to form on the outside. You are not cooking them through in the skillet. When the meatball is a little crusty, then pop it into the pot of sauce, and let all the meatballs cook for about 30 minutes on a very low heat. The meatballs will flavor your sauce as it cooks, and then it will taste awesome!

Homemade Tomato Sauce & Meatballs
Mama’s Tips:
Cooking the meatballs in the sauce is what gives the sauce it’s amazing flavor.
This recipe makes enough meatballs (about 30 – golf ball sized) and sauce, that you can have some now and freeze the rest for another meal. Just place in an airtight container.
Meatballs don’t always have to be served with pasta. I make these as an appetizer all the time. Put the meatballs on a dish with a fancy toothpick through them, hit them with a dollop of sauce and sprinkle with fresh grated parmesan cheese.
For Friday night dinners with the kids, I get some good Italian rolls and make some awesome meatball sandwiches.

Fresh Minced Parsley
Recipe: Intermediate
Sweet Rolls with Cardamom and Orange Glaze
Posted: 03/03/2014 Filed under: Bread, cakes, desserts, recipes | Tags: baking, bread, breakfast rolls, cardamom, recipe, sweet rolls, yeast bread 67 Comments
Sweet Rolls with Cardamom
When I began my first year away at college, I had heard about the dreaded “freshman fifteen”. It’s that bizarre anomaly that occurs the first time students go away to college and experience eating in the campus cafeteria where there’s not much that’s healthy, low calorie or pleasant tasting. Legend has it that most freshman will pack on fifteen pounds their first year. And sure enough, it happened to me. My mother claimed that when I came home for my winter break she hardly recognized me.
So do you know what the culprit was…Sweet Rolls. It was the one thing that the cafeteria at Rider University served that was actually edible. I used to eat them in mass quantities. So much so that the cafeteria ladies used to hide trays of them when they saw me coming so there would something left over for the other students. So that folks was how I began my lifelong obsession with the Sweet Roll.
Today I made these Sweet Rolls with Cardamom and Orange Glaze. This is not an overly sweet treat, they’re definitely more a roll than a pastry. I like to add cardamom which gives the roll a spicy-sweet taste and pairs very well with the orange glaze.

Sweet Rolls with Cardamom rising in the pan
Sweet Rolls with Cardamom
Adapted from the LA Times
- 2 packages of active dry yeast (4 1/2 teaspoons)
- 1/2 cup warm water (105-115 degrees)
- 1/2 cup milk
- 1/2 cup butter, cut into pieces
- 2 teaspoons plus 1/2 teaspoon of cardamom
- 1/2 cup plus 2 tablespoons sugar
- 2 tablespoons brown sugar
- 1 teaspoon salt
- 2 eggs
- 4 – 4 1/2 cups unbleached all-purpose flour
- 3 tablespoons, softened butter
- 3/4 cup golden raisins (or brown ones, doesn’t matter) re-hydrated
- 1/2 cup nuts, roughly chopped (pecans, walnuts, hazelnuts or I used pistachios)
- zest of 1 orange
- juice of 1 orange
- 1 1/2 cups powdered sugar, sifted
Directions
- Place 1/2 cup of warm water (between 105-115 degrees F) in a small bowl and sprinkle the yeast on top. Stir it to dissolve it and let it sit to get foamy.
- Take your raisins and place them in a bowl covered in warm water and let them sit until you’re ready to use them. This will hydrate them and plump them up. When ready to use, drain and pat them dry with a paper towel.
- In a small pan, heat the 1/2 cup of milk until just simmering, then add the butter and stir until it’s melted. Next, stir in 2 teaspoons of the cardamom, 1/2 cup sugar, and 1 teaspoon of salt. Let this liquid mixture cool to about 110 degrees F.
- Pour this mixture into the bowl of an electric mixer. Add the yeast mixture to it. Using the paddle attachment, beat in the eggs one at a time. Now, change the paddle attachment to the dough hook and add 3 cups of flour to this mixture until dough is smooth. Using a spatula, scrape down the sides and bottom to incorporate all the flour. Add more flour in small increments until the dough starts to come together. (I ended up using about 4 1/4 cups). Mix with the dough hook for about 5 minutes. Lightly flour your surface, and with floured hands turn the dough out onto you board. Knead the dough until it becomes elastic.
- Take a large bowl (or large covered container) and spray it with cooking spray, or brush it lightly with oil. Put the dough into the bowl, and turn it to coat it with the spray or oil. Cover the bowl with plastic wrap and let the dough sit in a warm place until it has doubled in size, about 1 1/2 – 2 hours.
- *Side Note: once the dough has risen, you can now punch it down and cover the bowl and put in the refrigerator overnight if you wish to make the rolls fresh for the next day. If you do that, the next day, take the dough out of the fridge and let it sit a room temperature for about an hour, punch down dough again, and roll out to make rolls.
- Punch down the dough, and roll it into a 20″ x 15″ rectangle. Make sure the dough is rolled out fairly thin, about 1/16″ so you don’t have overly “doughy” rolls.
- I melted my 3 tablespoons of butter in the microwave, in small time increments, just so that the butter became smooth enough to spread with a pastry brush or offset spatula but not so much that it was liquid. Spread the butter over the top of the dough. Whisk together the 2 tablespoons of sugar, 1/2 teaspoon of cardamom and 2 tablespoons of brown sugar. Sprinkle over the top of the dough. Sprinkle the raisins and nuts over the top also. Using a microplane, zest the orange over the top of the dough.
- Now the process may get a little tricky, so hang in there. Starting at the longer side of the rectangle, tightly roll the dough into a cylinder. If the dough became a little sticky a lightly brushed a little flour on top of it. I took a ruler and made little slit marks every 1 1/4″ so that I cut my slices all the same width so that they would bake evenly. Then place the cut rolls into a 9″ x 13″ buttered or sprayed baking dish. Cover with plastic and let rise until they double in size, about one hour. Place in a preheated 350 degree F oven, and bake for 30-35 minutes until golden brown. I rotated my pan after 15 minutes. Let cool in pan on rack for 20 minutes.
- To make the glaze: Sift 1 1/2 cups of powdered sugar into a bowl and add just enough fresh orange juice to bring the sugar to a good drizzling consistency. Mix with a whisk or fork. Drizzle over the buns. You can also sprinkle some more chopped nuts on top if you like.

Sweet Rolls with Cardamom
Mama’s Tips:
If the rolls are browning too quickly on top, cover the top lightly with a piece of foil. You still want the rolls to bake all the way through and not be doughy inside.
If your room where you’re baking is cool, while the dough is rising, I take my bowl that’s covered in plastic wrap and wrap it in a bath bowl to keep the bowl warm to encourage rising.
Many times when I’m using raisins in my baking, I will re-hydrate them to plump them up because I think they taste better. You can rehydrate them in just warm water, simple syrup, orange juice or wine. Either way, I think they come out real tasty!

Sweet Rolls with Cardamom

Sweet Rolls with Cardamom
Recipe: Intermediate
Golden Beets with Smoked Trout & Dill
Posted: 02/19/2014 Filed under: Appetizers, Fish, Hors d'oeuvres, recipes | Tags: Appetizers, cooking, golden beets, party food, recipe, roasted beets 40 Comments
Golden Beets with Smoked Trout & Dill
As a kid, I never looked twice at a beet. Back then, they were a vegetable I was usually forced to eat, but never consumed by choice. I think a lot of it had to do with how they were prepared or maybe integrated into a dish. As a youth, no one ever showed me what an absolutely awesome vegetable the beet actually was. When they’re perfectly roasted, the beet’s natural sweetness and earthiness is developed.
I was invited to a birthday brunch last weekend, and was given the task of bringing an appetizer. I thought these Golden Beets with Smoked Trout and Dill was the perfect choice to bring. Growing up in Philadelphia, bagels and lox was a Sunday morning staple, so this was my take on that dish. The combination of the sweet beets, the smokey taste of the fish and the tart cream cheese was loved by all. I like when that happens.

Roasted Golden Beets
Roasted Golden Beets with Smoked Trout & Dill
- 12 medium size golden beets or 6 large
- 1 package of Smoked Trout (usually in the deli section)
- 4 ounces cream cheese
- couple sprigs of dill
- salt & pepper to taste
- olive oil
- 24 water crackers
Directions
- Preheat the oven to 375 degrees F. Cut the green, leafy tops off of the beets. Place all the beets in a large bowl, and drizzle with olive oil and sprinkle generously with salt and pepper and then toss to coat. Wrap 3 beets (if using small ones, or 1 at a time if using large ones) in aluminum foil to make little packets.
- Place the aluminum packets on a baking sheet and roast in the oven for 40-45 minutes. The size of the beet will determine how long you need to roast it. A larger, denser beet will take longer. The beets are done when you can pierce them with a fork. When they’re done, open the packets and let the beets cool. Once cooled, place the beet in between a paper towel and rub the beet skin right off.
- Slice the beets into 1/8 – 1/4 inch slices.
- Place a beet slice on a water cracker, top with a little dollop of cream cheese, a piece of the smoked trout, and a tiny sprig of dill.

Mama’s Tips
The size of the beet will determine the cooking time. Larger sized beets will take longer in the oven. They’re done when you can pierce them easily with a fork.
You can find the packaged Smoked Trout in the deli section of your market with the packaged lunch meats and smoked salmon. I bought a 5 ounce package, and it was plenty.

Golden Beets with Smoked Trout & Dill
Recipe: Easy
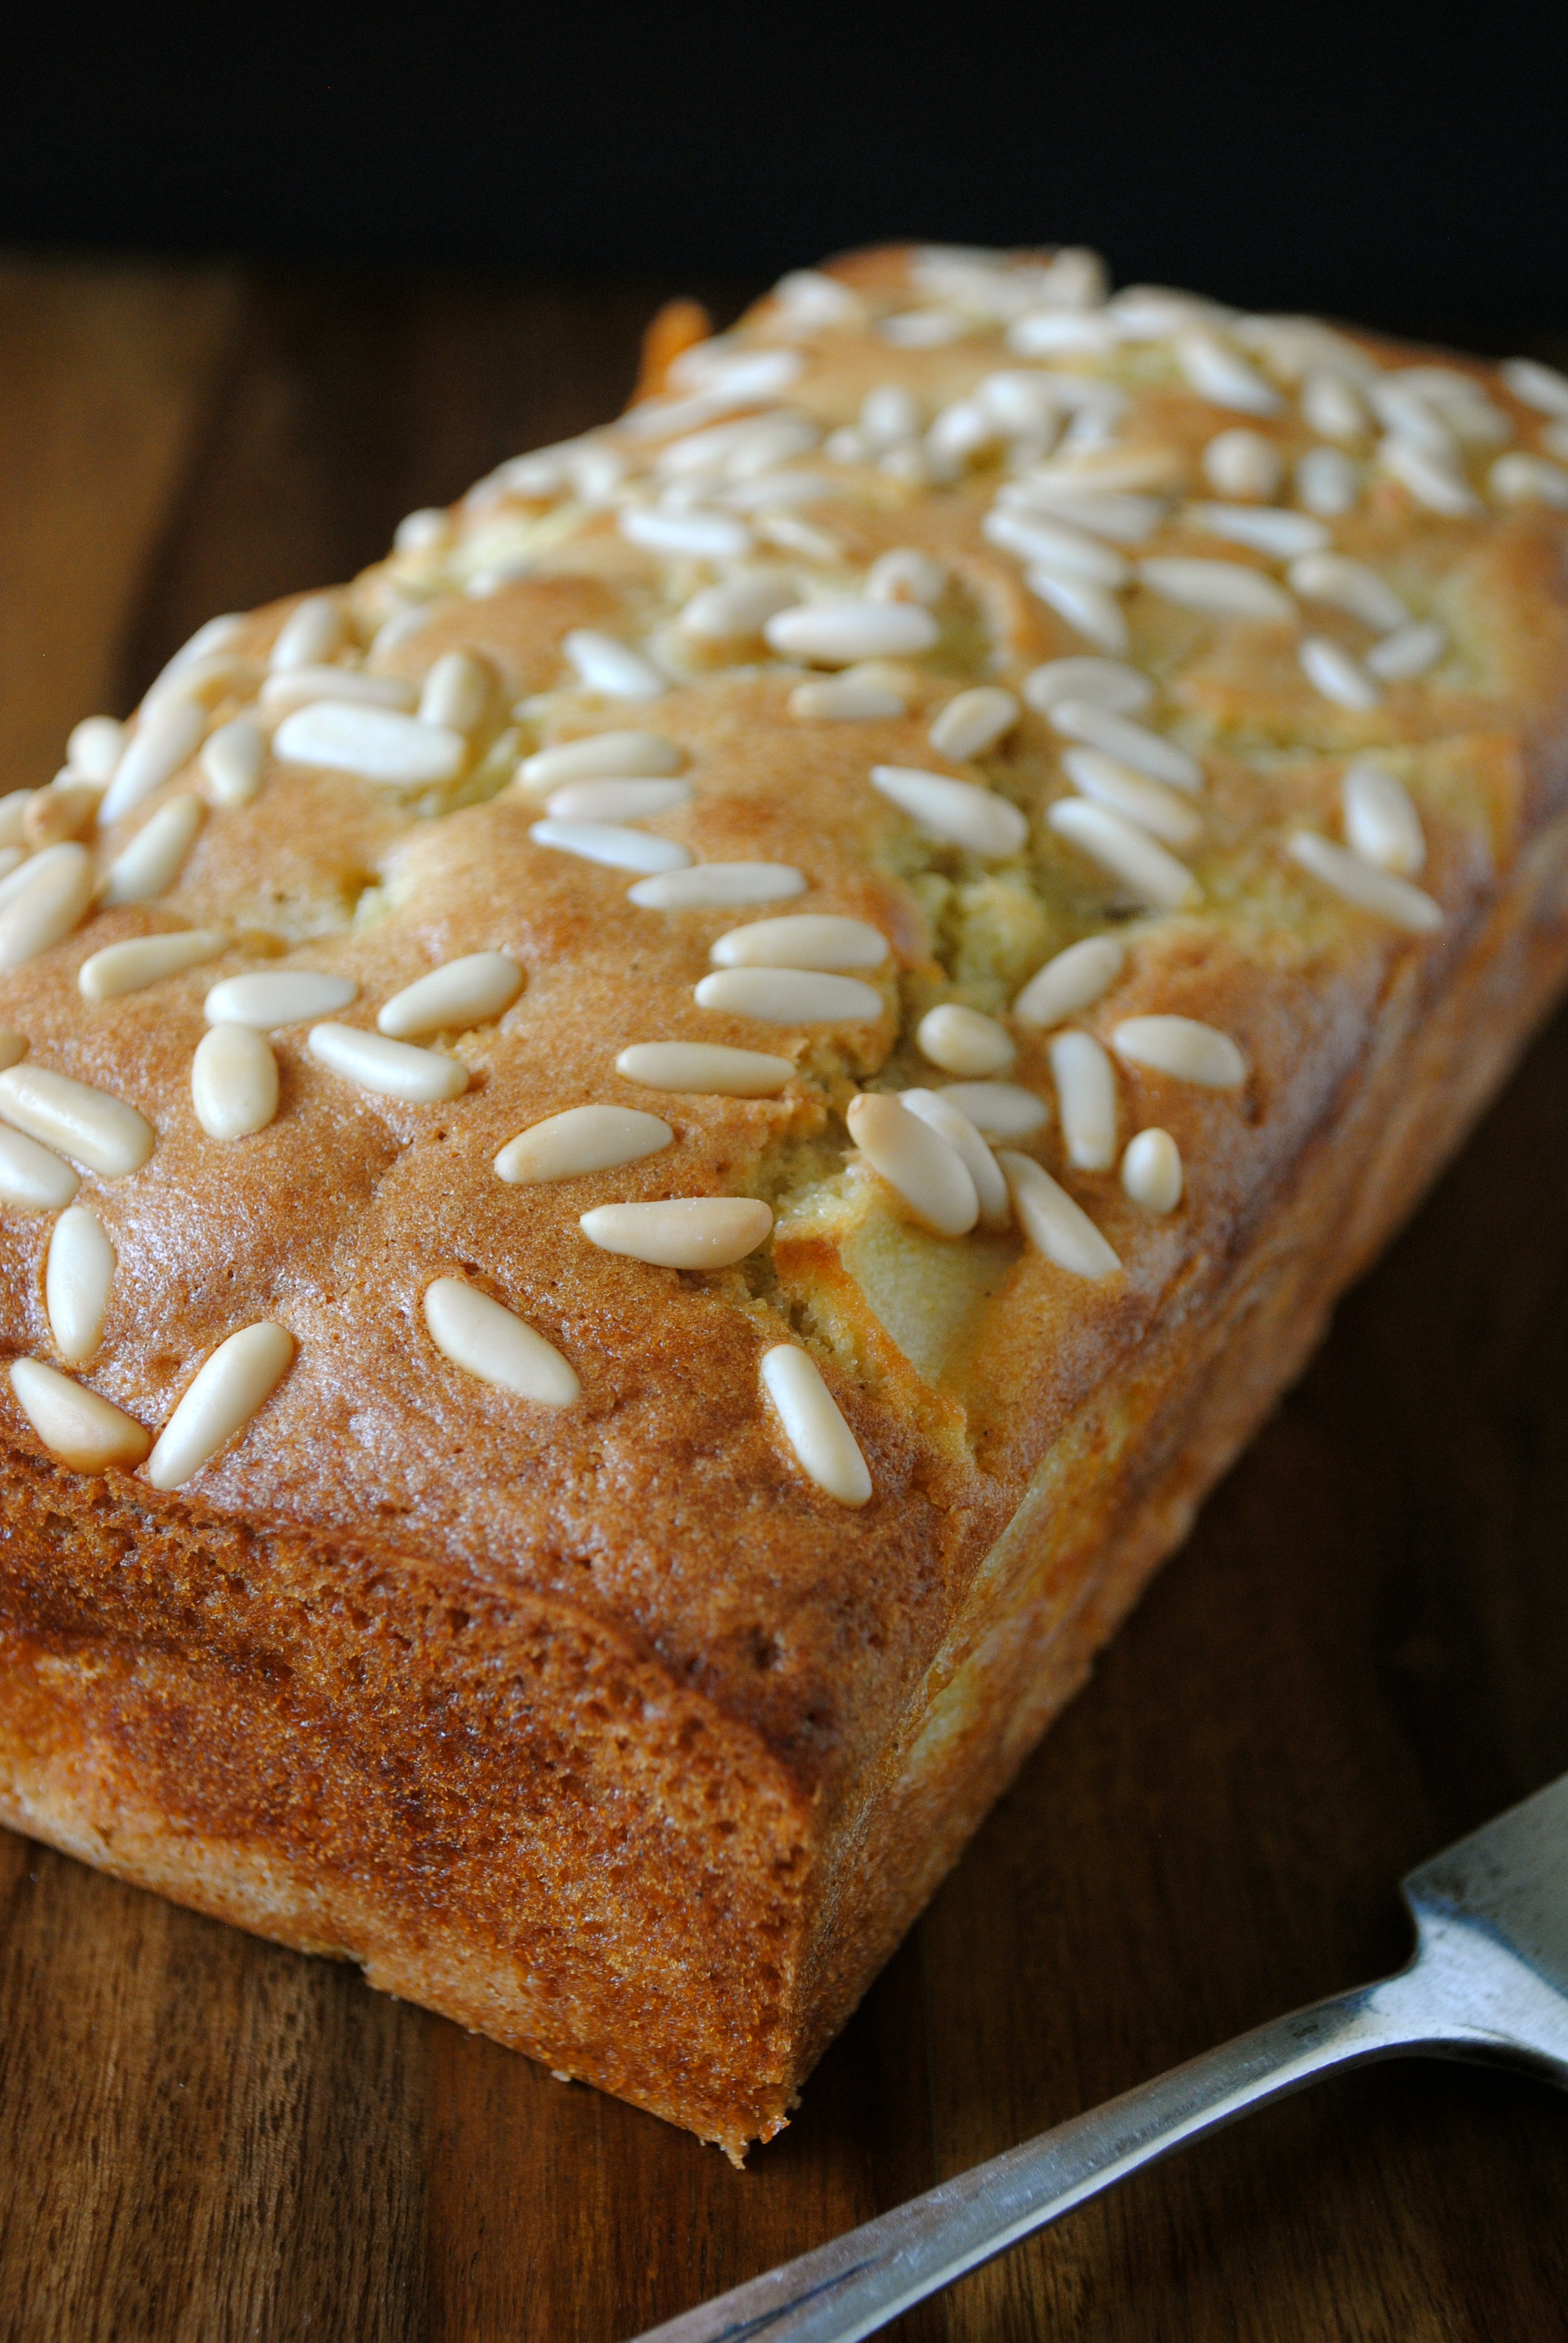
Apple Loaf Cake with Pine Nuts
Posted: 02/06/2014 Filed under: Bread, cakes, desserts, fruit, recipes, snacks | Tags: apple cake, apple dessert, apple loaf cake, baking, cake, dessert, recipe 50 Comments
Apple Loaf Cake with Pinenuts
I love”homey” food, but you already knew that, didn’t you. Some people like to curl up with a warm blanket and a book, I myself, like to curl up with a hot cup of tea and a piece of cake. When curling up, it’s always best not to have a piece of cake that’s too sweet and sugary. No, proper curling should be done with a less sweet, almost bread like cake that will perfectly compliment a cup of tea. Ta Da! That’s where this Apple Loaf Cake with Pine Nuts comes in.
This cake is the BFF to a cup of tea. The “not-so-sweet” cake is filled with chunks of juicy apple and topped with earthy, crunchy pine nuts. Really, a perfect combination of flavors. This recipe will make two, 8″ x 4″ loaf cakes, so guess what, keep one for yourself and give the other to your BFF. Wrap it up in parchment paper and tie it with baker’s twine, and I guarantee, they’ll be very impressed.
Apple Loaf Cake with Pinenuts
Apple Loaf with Pine Nuts
Adapted from Real Food, Winter 2013
- 3 large, crisp tart apples peeled, cored, and cut into 1/2″ slices
- zest of 1 lemon
- 2 tablespoons fresh lemon juice
- 1 cup sugar, plus 2 tablespoons
- 5 large eggs
- 10 tablespoons melted butter, cooled
- 1 teaspoon pure vanilla extract
- 2 1/2 cups all-purpose flour
- 1 tablespoon baking powder
- 1 1/2 teaspoons ground cardamom
- 1/2 teaspoon salt
- 1/3 cup pine nuts
Directions
- Preheat your oven to 350 degrees F. For this recipe I used two, 8″ x 4″ loaf pans. I sprayed the inside of the pans, then I cut parchment paper to fit in the pans and sprayed that too. I like to use the parchment insert because the cake will lift out effortlessly.
- In a medium bowl, sift together the flour, baking powder, cardamom and salt. Set aside.
- Next, in a large bowl, I added the lemon juice and lemon zest. I cut the apples into 1/2″ slices and as I added them to the bowl, I tossed them in the lemon juice so that they wouldn’t oxidize. Then, sprinkle the apples with 2 tablespoons of sugar, and gently toss.
- In the bowl of an electric mixer, beat the eggs and 1 cup of sugar for 2 minutes.
- Slowly, stir in the butter and vanilla. In several increments, add the flour mixture and mix just until incorporated.
- Pour the batter over the apples and gently fold it in.
- Evenly divide the batter between the two pans, and sprinkle the pine nuts on top.
- Bake for about 40 minutes, or until a skewer inserted in the center comes out clean.
Makes 2, 8″ x 4″ loaf cakes

Apple Loaf Cake with Pine Nuts
Mama’s Tips:
In baking, size does matter. Make sure you always adjust your baking times if you’re using a pan that’s not the one specified in the recipe.
- An 8″ x 4″ loaf pan holds 4 cups of batter
- An 8 1/2″ x 4 1/2″ loaf pan holds 6 cups of batter
- A 9″ x 5″ loaf pan holds 8 cups of batter
Whenever working with fruits like apples, pears and bananas, toss them in a little lemon juice to keep them from oxidizing. Brown fruit is definitely not appetizing.
When baking, remember all ovens do not work the same, so baking times are always just an estimate. I always check my cakes 5-10 minutes before they’re supposed to be done to make sure they don’t brown too quickly.
I always like to put a parchment paper insert into my pans (which I spray along with the pan) so that cakes will always lift out effortlessly. It’s a bummer when the whole cake doesn’t come out intact!

Apple Loaf Cake with Pine Nuts
Recipe: Easy
Chicken Sliders with Herbed Mayo
Posted: 01/28/2014 Filed under: Appetizers, Hors d'oeuvres, main dish, Meat, recipes, Sandwiches, snacks | Tags: chicken sliders, sliders, Super Bowl snacks 42 Comments
Chicken Slider with Herbed Mayo
When one is planning a Super Bowl get-together, one must give serious consideration to the refreshments. Because really, what is a Super Bowl party without the proper accouterments. Like the Super Bowl itself, watching the game at home should be an “event”. I would be negligent in my duties if I only served chips and dip, and my husband and sons have come to expect more from me as the years go by. Chips and dip are still on the menu, because every sports-loving guy still loves and expects them, but I needed to serve something more substantial but still in the realm of down home comfort food.
Chicken Sliders seemed like the obvious choice, because you can hold them in one hand while your screaming at the tv and holding a beer in the other. I would call this kind of breaded and fried chicken, Chicken Schnitzel or Chicken Milanese. Basically it’s boneless, skinless chicken breast that’s dredged in flour, eggs and panko bread crumbs and then fried. The end result is chicken that’s crispy and crunchy on the outside, and moist and tender on the inside. And, for a little extra added tastiness, I plopped on a dollop of this homemade Herbed Mayo. Yay, score one for Mama!

Pound the chicken breast to tenderize it
Chicken Slider with Herbed Mayo
- 1 pound boneless, skinless chicken breast (cut into approx. 2″ x 4″ pieces)
- 1 1/2 cups panko crumbs
- 1 cup all-purpose flour
- 2 eggs, beaten
- 1 tablespoon milk
- vegetable or canola oil for frying
- salt and pepper to taste
- 8 mini slider rolls ( I used King’s Hawaiian Rolls & Rockenwagner’s Mini Pretzel Rolls)
- red onion, thinly sliced
- Roma tomato, thinly sliced
- arugula
Herbed Mayo
- 1/2 cup mayonnaise
- 1 teaspoon finely minced parsley
- 1 teaspoon finely minced chives
- 1 teaspoon finely minced chervil (optional)
- 1/2 teaspoon mustard (dijon or brown)
- 1 teaspoon lime juice
- salt and pepper to taste
Directions
- Rinse chicken under cool water and pat dry. Pounding the chicken breast will enable it to cook through consistently if all slices are of same thickness. Cut the chicken into 2″ x 4″ pieces (approximately). Lightly season the chicken on both sides with salt and pepper.
- Now make yourself a “dredging station”. Take three shallow bowls, and put the panko crumbs in one, the flour, seasoned with salt and pepper, in another, and beat the two eggs with a tablespoon of milk and place in the third bowl. Using tongs (or a fork) dip the chicken into the flour and gently shake off the excess. Next, dip it into the egg mixture on both sides. Last, dip the chicken into the panko crumbs, pressing the crumbs to adhere to the chicken breast. Lay the finished coated pieces on a wax paper covered baking sheet.
- In a large skillet, set over medium heat, pour the vegetable oil about 1/4″ deep. Don’t put the chicken in until the oil is hot enough, but also don’t let the oil get too hot. If the oil is too hot, the outside coating will burn, and the chicken inside will not cook through. Also, do not crowd the pan, make sure there is room in between the chicken pieces. When the chicken is golden brown, remove from the pan and let drain on a paper towel.
- To make the Herbed Mayo: place all the ingredients in a small bowl, and whisk together until smooth. Adjust the salt and pepper to your own taste. Cover bowl and keep it in the fridge until ready to use.
- Just assemble the sandwiches, spread with the Herbed Mayo and enjoy.
Makes 8 Slider Sandwiches

Fry the breaded chicken in about 1/4″ of oil on medium heat

Fry chicken until it’s golden brown and crispy
Mama’s Tips:
When working with chicken you always have to be concerned about contamination. When I pound my chicken, I cover the bottom surface with plastic wrap, place the chicken on top, then cover the chicken with another sheet of plastic wrap. I never want to get the bacteria on my surfaces or on the rolling pin I’m using to pound the chicken. Always wash your hands after handling chicken and touching something else.
Make sure the chicken is always cooked through (no pink inside) to avoid salmonella poisoning. If your not sure, take a small pairing knife and cut into a piece of chicken just to check the inside.
When frying chicken, try to keep the oil at an even temperature. If it gets too hot and starts to burn, or there’s a lot of burnt pieces of bread crumbs in it, clean the pan and start with new oil. Burned, dirty oil will affect the final taste of the chicken.
If you can’t get panko bread crumbs (usually found in the Asian section of the market) you can use regular bread crumbs. but I find the panko crumbs give the chicken a much crunchier, crispier texture. It’s well worth seeking these crumbs out.
The reason I pound the chicken is that the breasts are naturally thicker in some parts and thinner in others. By pounding it, the breasts are the same thickness at all points and therefore will cook through consistently.

Chicken Sliders with Herbed Mayo

Chicken Sliders with Herbed Mayo
Recipe: Intermediate
Manhattan Beach Post
Posted: 01/22/2014 Filed under: Restaurants, South Bay | Tags: Los Angeles Restaurant Review, Manhattan Beach Post, MB Post 26 Comments
Pecan & Brown Sugar Sticky Bun at MB Post
So here’s the strategy before you go to MB Post in Manhattan Beach, California, do not eat the day before. It’s comfort food extraordinaire, just liked you mama would have made if she’d been a world-class chef.
My husband and I were invited down to Manhattan Beach for Sunday brunch with our good friends L & L. “L” (the husband from the team of L & L) is quite the culinary explorer. He introduces us to many of the tasty and interesting restaurants the city has to offer that we may not have otherwise found on our own. They had been to MB Post for brunch before, and they thought we would enjoy the experience also.

Ricotta Stuffed French Toast at MB Post
It was tough to get a reservation, but we were able to get a table at 10am when they opened their doors. By 9:45 there was a line half-way around the block so I knew sumthin’ was up. By 10:15 every seat in the joint was filled. Our server, a totally laid back “dude”, told us they served small plates and that each person may want to order 2 dishes each. With all due respect to the dude, no way could anybody eat two dishes a piece. The dishes are saucy, cheesy, sweet and decadent. But man, they taste good. The Pecan & Brown Sugar Sticky Bun ($6) which luxuriates in it’s own sauce, was enough for all of us to split. We followed that up with the house-made Ricotta Stuffed French Toast ($12).

Corned Beef Cheek Hash at MB Post
The house-made Trout Lox with Dill Cream Cheese, Capers and Cucumbers ($12) was a perfect counterpoint to the previous two dishes. Just the right amount of saltiness to bring me down from the sugar high. Another excellent dish was the Poached Egg with Tomato & White Bean Ragout and Creamy Polenta ($13) but it was large enough to serve a family of four and their pet chihuahua.


Bagel with house-made trout “lox” and Dill Cream Cheese at MB Post

Poached Egg with Tomato & White Bean Ragout, Creamy Polenta
The interior of MB Post is warm and welcoming just like its food. A little industrial, rustic and casual with lots of rough hewn wood throughout the restaurant, which is really quite perfect for this mellowed-out little California beach town.

A lively bar scene at MB Post
And here’s the best part of all, after you’ve consumed enough calories for the next three weeks, you can go walk it off at the Manhattan Beach Pier which is about a half block away.

Manhattan Beach Post – 1142 Manhattan Avenue, Manhattan Beach, CA 90266 (310) 545-5405


