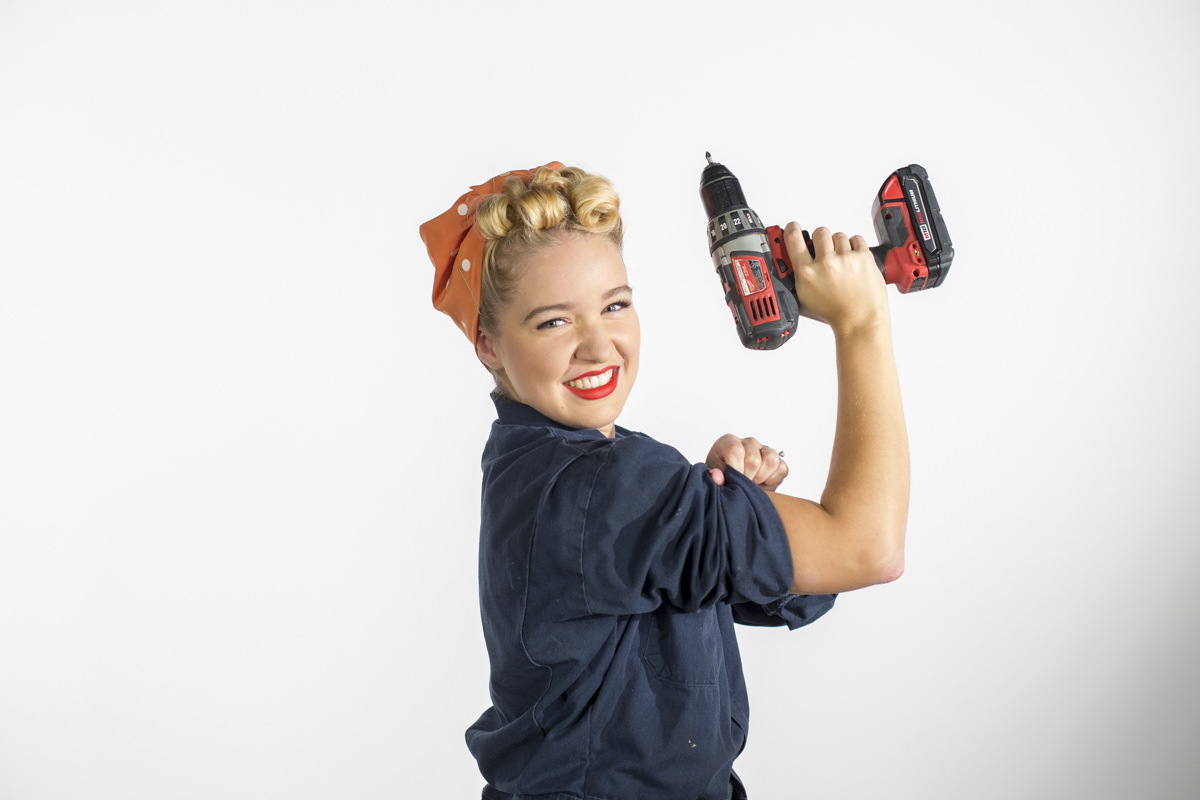
Over the past three-and-a-half years, I’ve had a lot of people ask me how I do my hair. Hair tutorials don’t really fit into our usual direction, but since it’s Halloween, it seemed like a good excuse to go off-book and do something different while still incorporating a Dunn Lumber product: coveralls!
This entry is a two-in-one post—the first part shows how I do my hair on a daily basis; the second is a Rosie the Riveter–specific hairdo, just in time for Halloween.
My hair is naturally completely straight, despite what most people think. I’ve been pin-curling my hair on a regular basis for the last four years. My experience with it has taught me that it’s an art form that takes time and patience to learn. Generally, working with my hands comes fairly easily to me, but this was not one of those times. When I started curling my hair this way, the amount of YouTube videos I watched and frizzy hairdos I ended up with were way too many to count.
I used curlers for curling my hair for about two years, experimenting with a bunch of different types. I found that the bigger ones didn’t give me the curl I wanted, and that the smaller ones gave me curls that were too tight. When I brushed them out, my hair just looked huge and frizzy (and straight out of the 80s), which wasn’t the look I was going for. When I started pin-curling, I got a similar result—frizzy and definitely not what I wanted. Over time, learning how to curl it correctly (and especially how to brush it correctly), took me from frizzy to those classic, magical Hollywood waves—all in less than 30 minutes. I got it right, eventually.
There’s something about pin-curling that’s unlike any other way of curling—the curls really have a resilience and mold-ability that I haven’t found with other curling styles. You can brush it a lot without losing the curls, and you can get in there and shape it how you want it to be. I think it’s super fun, and I think the effort is totally worth it.
My encouragement to anyone trying this out is to stick with it and keep practicing, even if you’re not getting the results you want. And don’t worry—if you find that pin-curling is too difficult but you want to replicate this look for Halloween, you can use a curling iron on the front of your hair and finish the Rosie the Riveter hairstyle from there.
Step 1: Section Hair
Start by sectioning off pieces of hair. The size of the section will determine the tightness of the curls. I vary the size of my sections depending on the look I’m going for or how much time I have (not surprisingly, large sections take less time to curl). Today I’m going with a tighter curl, so I’ll be taking sections that are about a square inch—or roughly the size of a quarter.
A key to finished curls (that flow together and don’t leave obvious gaps between sections) is creating triangular sections. I do this for all the sections of hair framing my face.

Step 2: Wet Hair
I’ve found that starting with wet hair out of the shower is too difficult to work with and takes too long to dry. This is a big complaint for a lot of the girls I know who’ve tried pin-curling—they take a shower, pin it, go to sleep, and wake up the next morning with damp hair. So frustrating!
My way around that issue is to start with dry hair and then spritz it. You can use a spray bottle with water, or you can use a mixture of water and setting lotion, which will help your curls last longer without adding that hairspray crunch. I like to spritz each section as I go. Spritz then brush through.

Step 3: Create Flat Pin Curls
After spritzing and brushing your hair, it’s time for the curl. Flat pin curls are exactly what they sound like: pin curls that lie flat against your head.
To start, take a section of hair and hold it at an angle close to the head. One of the keys to pin-curling is finding the right angle. You want to end up with a pin curl that lies flat against your scalp without crimping any hair underneath in a weird way. This definitely takes practice—and some trial and error!
Now, starting at the end, wrap the hair around one finger (you can also use two fingers if that’s more comfortable for you). Try not to wrap the hair too tight—you need to be able to slide your finger(s) out once you’re done. Tuck in any ends sticking out. You may need to adjust where you start wrapping to get all the ends successfully tucked.
Next, remove your fingers from inside the curl, pinching it alternately on either side with your hands. Turn the curl down toward the scalp while wrapping the rest of the section of hair into the curl. It’s important not to twist the hair while you wrap; this will throw off the integrity of the curl.
Finish the curl by clipping it in place with an alligator hair clip. When I first started pin-curling, people told me to use alligator clips. I thought, why wouldn’t I just use bobby pins? I already had them in my drawer. The problem is, bobby pins don’t work. All the little ridges on the bobby pin will crimp your hair, and those crimps will appear on every ringlet of the curl—it’s not a good look. Even if you buy the bobby pins that don’t have the ridges, it will still pinch—and you’ll have a weird little bend in your curl. I highly encourage purchasing alligator clips—it’s a worthwhile investment of a couple dollars.

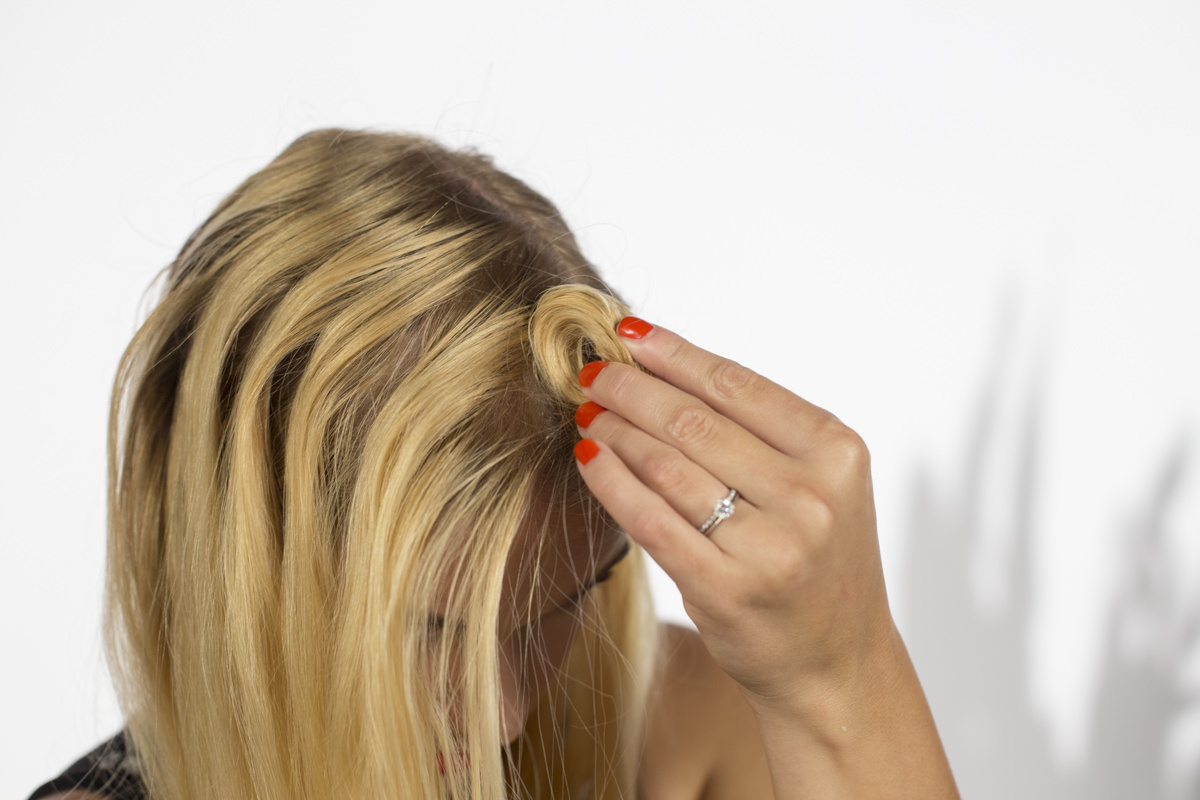


Step 4: Create Elevated Pin Curls
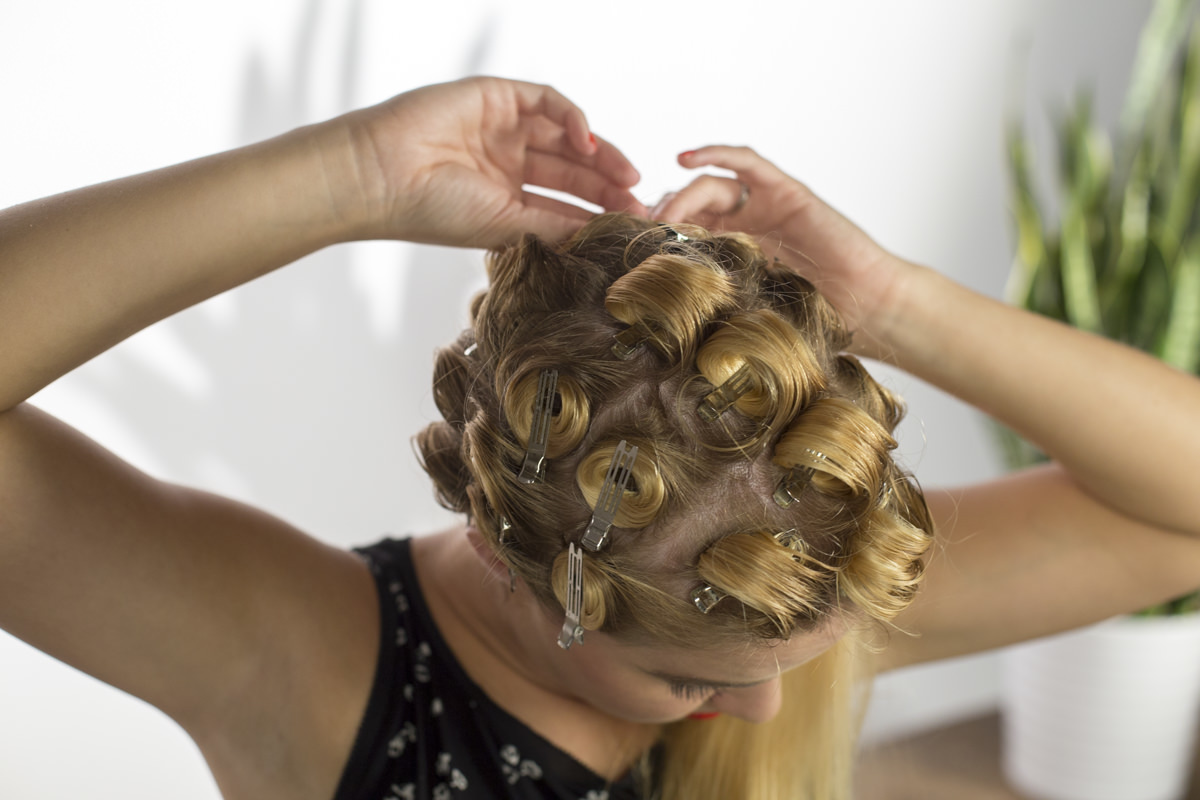
Elevated pin curls are also self-explanatory. These pin curls are incorporated to add volume to your hair. My hair doesn’t have much of its own volume naturally, so I always add a row of elevated pin curls along the right side of my part to give that area some height. I intentionally only do elevated pin curls on the top of my head, because if you do them on the side of your head and then go to bed, you’ll squish them. Keep that in mind!
Speaking of sleep—pin curls have another advantage over curlers: curlers are horribly uncomfortable. True, if you lie on your pin curls the wrong way the clips can kind of poke you in the head, but on the whole they’re much more comfortable than wearing curlers.
For an elevated pin curl, take a section of hair and hold it straight up in the air, then bring it forward a little bit. Next, wrap your hair around one or two fingers and curl like you did the flat pin curl. When you’ve found the correct angle, this curl should rest on the roots of the section of hair you just took, leaving the hair behind it free to be pulled into another elevated pin curl.
You'll know you’re pin-curling successfully if each pin curl has its own section on your head. When you go to make the next pin curl, make sure you haven’t pinned on top of any of that hair, otherwise it will get really messy really quickly.
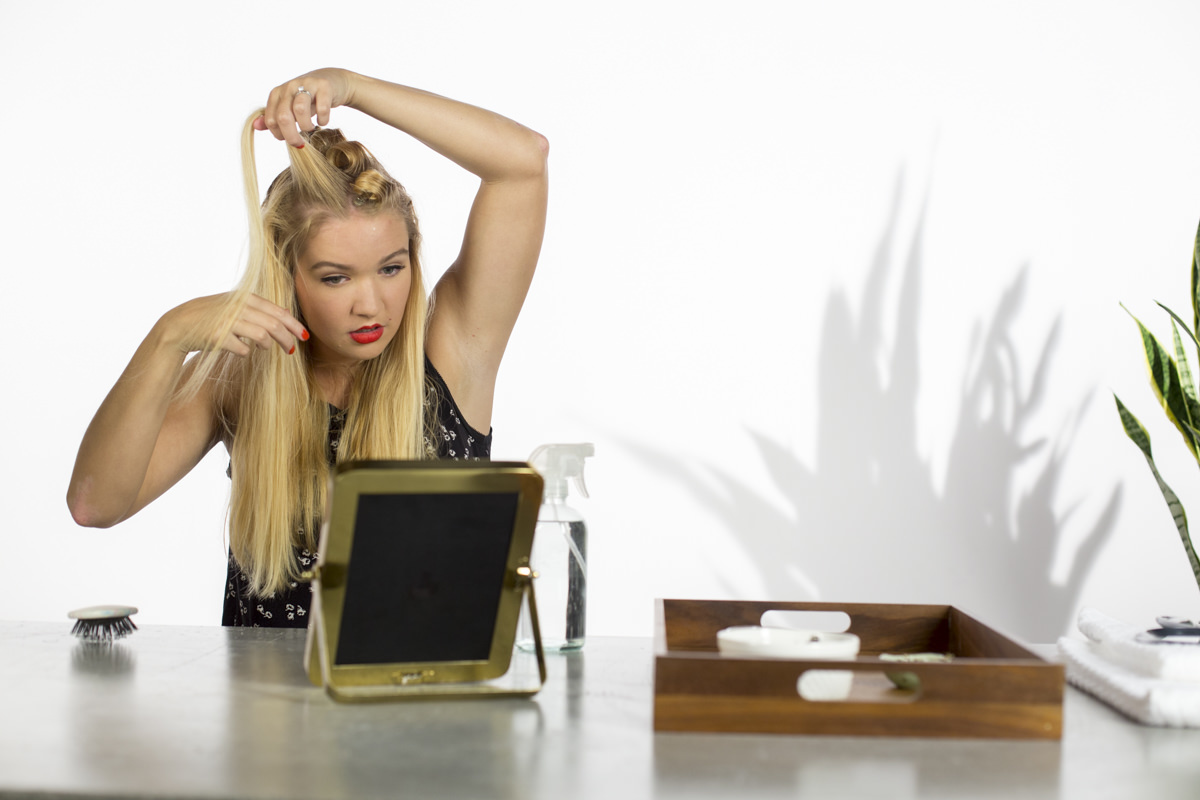
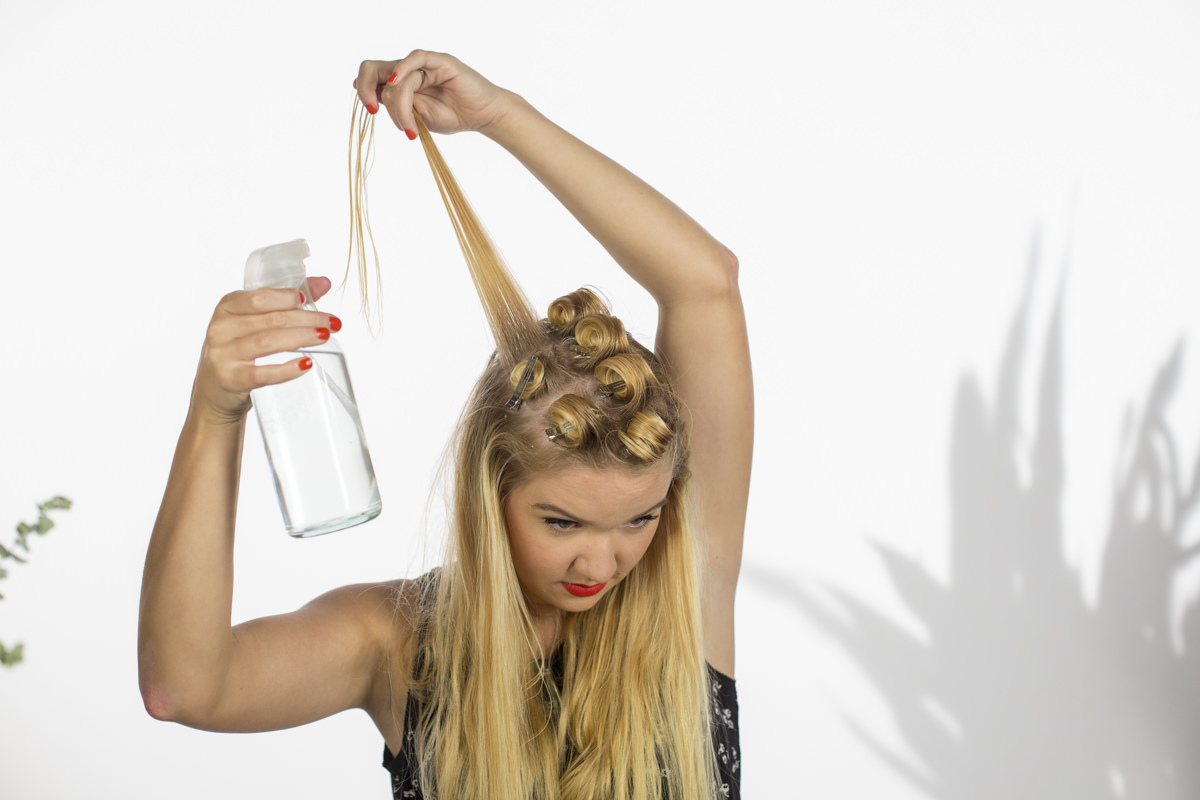

Step 5: Pick a Curl Pattern
Once you’ve figured out (more or less) how to do a pin curl, you need to know the pattern of pin curls for your head. It’s incredible looking through vintage hair books and seeing the different pin-curl patterns and the complex hairstyles they created. I’ve tried a lot of different patterns with some success (and a lot of frustration), and I’ve come to a conclusion. If you’re going for something very specific like a 1920s wave, it’s important to master a specific pattern. But if you just want those classic curls, it doesn’t need to be that complex. As such, my go-to pin-curl pattern is very, very simple.
My curls bend under and go clockwise on the left side of my head, and counterclockwise on the right. Somewhere in the back, they switch wherever is easiest for me. I also have the row of elevated pin curls along the line of my part, until I get far enough back on my head that they’d get crushed when I sleep.
Though curl patterns can add to your hairstyle, the most important part is getting the angle of the hair right while you’re curling it. Pick a curl pattern in which you can get that angle right, because that will give you the best curls. That’s what my curl pattern is based off.

Step 6: Dry with Scarf
Once all your pin curls are in place, it’s time to let them dry. I like to do my pin curls at night and sleep on them, so I wrap my head in a scarf—to make sure all the curls stay in place. I usually find that my hair takes around seven hours to fully dry, as long as it’s only been spritzed. If you’re not sleeping, leave the scarf off—your pin curls will dry faster without a scarf on your head. If I’m letting them dry during the day, I’ll put on a scarf when I go out and take it off at home as a way to help them dry faster.

Step 7: Unclip Curls
Once the curls are dry, it’s time to let them out. Unclip the pin curls two or three at a time and brush out as you go, using your hand against the brush as a guide to keep the curls from frizzing. I hold the hair below my brush and brush the end of the curl around my hand when I get to the end. I’ve found that this technique is the best way to prevent your curls from getting super frizzy and out of control.
At this point, you don’t have to worry about how all the curls look together because you’re going to do a final brushout after you’ve finished unclipping. You just want to make sure they’re not going crazy. I’ve found that brushing little sections at a time makes things more manageable, and that spraying with hairspray as you go helps keep the curls extra tight.

Step 8: Brush it Out
When all the pin curls are unclipped, it’s time to do the real brush out. Like before, brush out the curls using your hand as a guide. If you want controlled waves, stop there. I like my hair to be in the middle: somewhat natural and somewhat controlled. After I’ve got it controlled, I try to bring some of the bounce and volume back. I’ve found that brushing my hair back towards the nape of my neck can actually create more volume when I bring it forward again, and it makes a great swoop at the front of my hair. Turning my head upside down and gently flipping it back up works wonders, but only when I do it lightly—otherwise it gets too frizzy.
If you find that your hair gets too out of control when you try to bring volume to it, you can brush down small sections until you find a happy medium. It all depends on what you want your hair to look like.
A final trick when you’ve found that happy place: using several light coats of hairspray. It’s wet in Seattle (and therefore not ideal for curling your hair) but this trick can actually help a lot with keeping your curls intact when threatened by humidity or rain. Layering multiple light coats works better than one thick coat.
This process is what I do for my hair on a daily basis, and at most, takes 30 minutes. Now let’s talk about how to do hair just like Rosie the Riveter, as well as the clothing to complete the outfit.


Step 9: Create Rosie the Riveter Hair
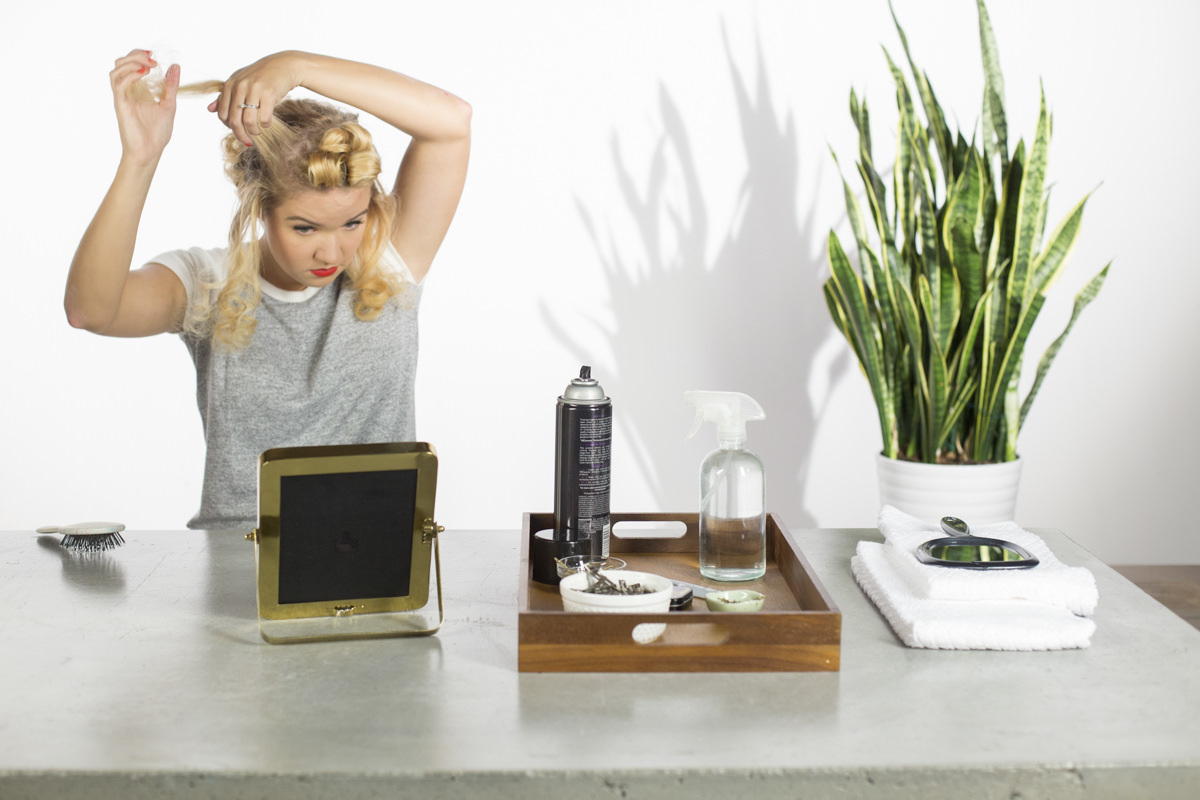
Section off the front of your hair at your ears, then pin back the rest to keep it out of your way. If you're skipping the pin curl process and just curling with an iron, you only need to curl this front part. Now take different sections and form elevated pin curls in an abstract pattern. I brush through each section before I form it, and at that point, I’ll spray the roots of that section with hairspray to tame the flyaways.
You don’t have to make the sides match, but do keep the general shape even. I think this styling is easier than the actual pin curls, because you can twist them to make them fit better (and angle them however you want). As long as they look good, it doesn’t matter what they’re doing.
Hiding your bobby pins is one of the keys to this style looking professional. It’s tempting to use your bobby pins like you used the alligator clips, grabbing the entire bottom of the curl. Instead of pulling your bobby pin apart, slide it in out of sight, underneath the top layer of hair. It will grab some of the curl without grabbing all of it. You may need a couple bobby pins in each curl, but it should hold with no problem. For added hold, create X’s with your bobby pins.
For the hair in the back, pin it in a flat bun so it’s out of the way and flat against the back of your head.




Step 10: Add Rosie the Riveter Scarf
To tie the scarf, fold your bandana into a triangle. Position the middle of the fold at the nape of your neck, and pull the two ends up toward your face. Pull the back point between the two side points, then tie the points together just behind the curls at the front of your head. This will create two points behind the tie. Fold these in on themselves, then tuck the ends of the tie into these folds. Wrap the back point up around the tie and tuck behind it. Fasten in place with a bobby pin on either side.
For the scarf, I bought a 27" square piece of plain fabric and drew on polka dots with fabric paint. Rather than go through the trouble of hemming it, I used Fray Check along the raw edges to stop it from fraying.


Step 11: Add Rosie the Riveter Coveralls
I picked up these coveralls at Dunn Lumber. Their smallest size was a men’s large, but they weren’t too tall—just a little baggy. I took in an inch on either sleeve, and two inches on the waist and pants, before pinning a section in the back to really cinch it in. Voila! One of the easiest Halloween costumes I’ve ever made.
I love how this costume turned out—and that we got to use coveralls from Dunn Lumber to bring it all together! What’s great about this hairstyle and costume is that they totally embody the spirit of DIY. Rosie the Riveter’s catchphrase is “we can do it!” It’s from WWII, when all the men were at war and all the women had to step up and do what were traditionally men’s jobs. (Riveters were needed in munitions factories, shipyards, and especially airplane factories—where they joined metal parts together with rivets. It’s an incredibly difficult job and takes a lot of elbow grease.) The spirit of the poster is one of empowerment—and believing you can do something—even when it’s difficult. That's the essence of Dunn DIY!
