How to make your own crochet catnip mouse!
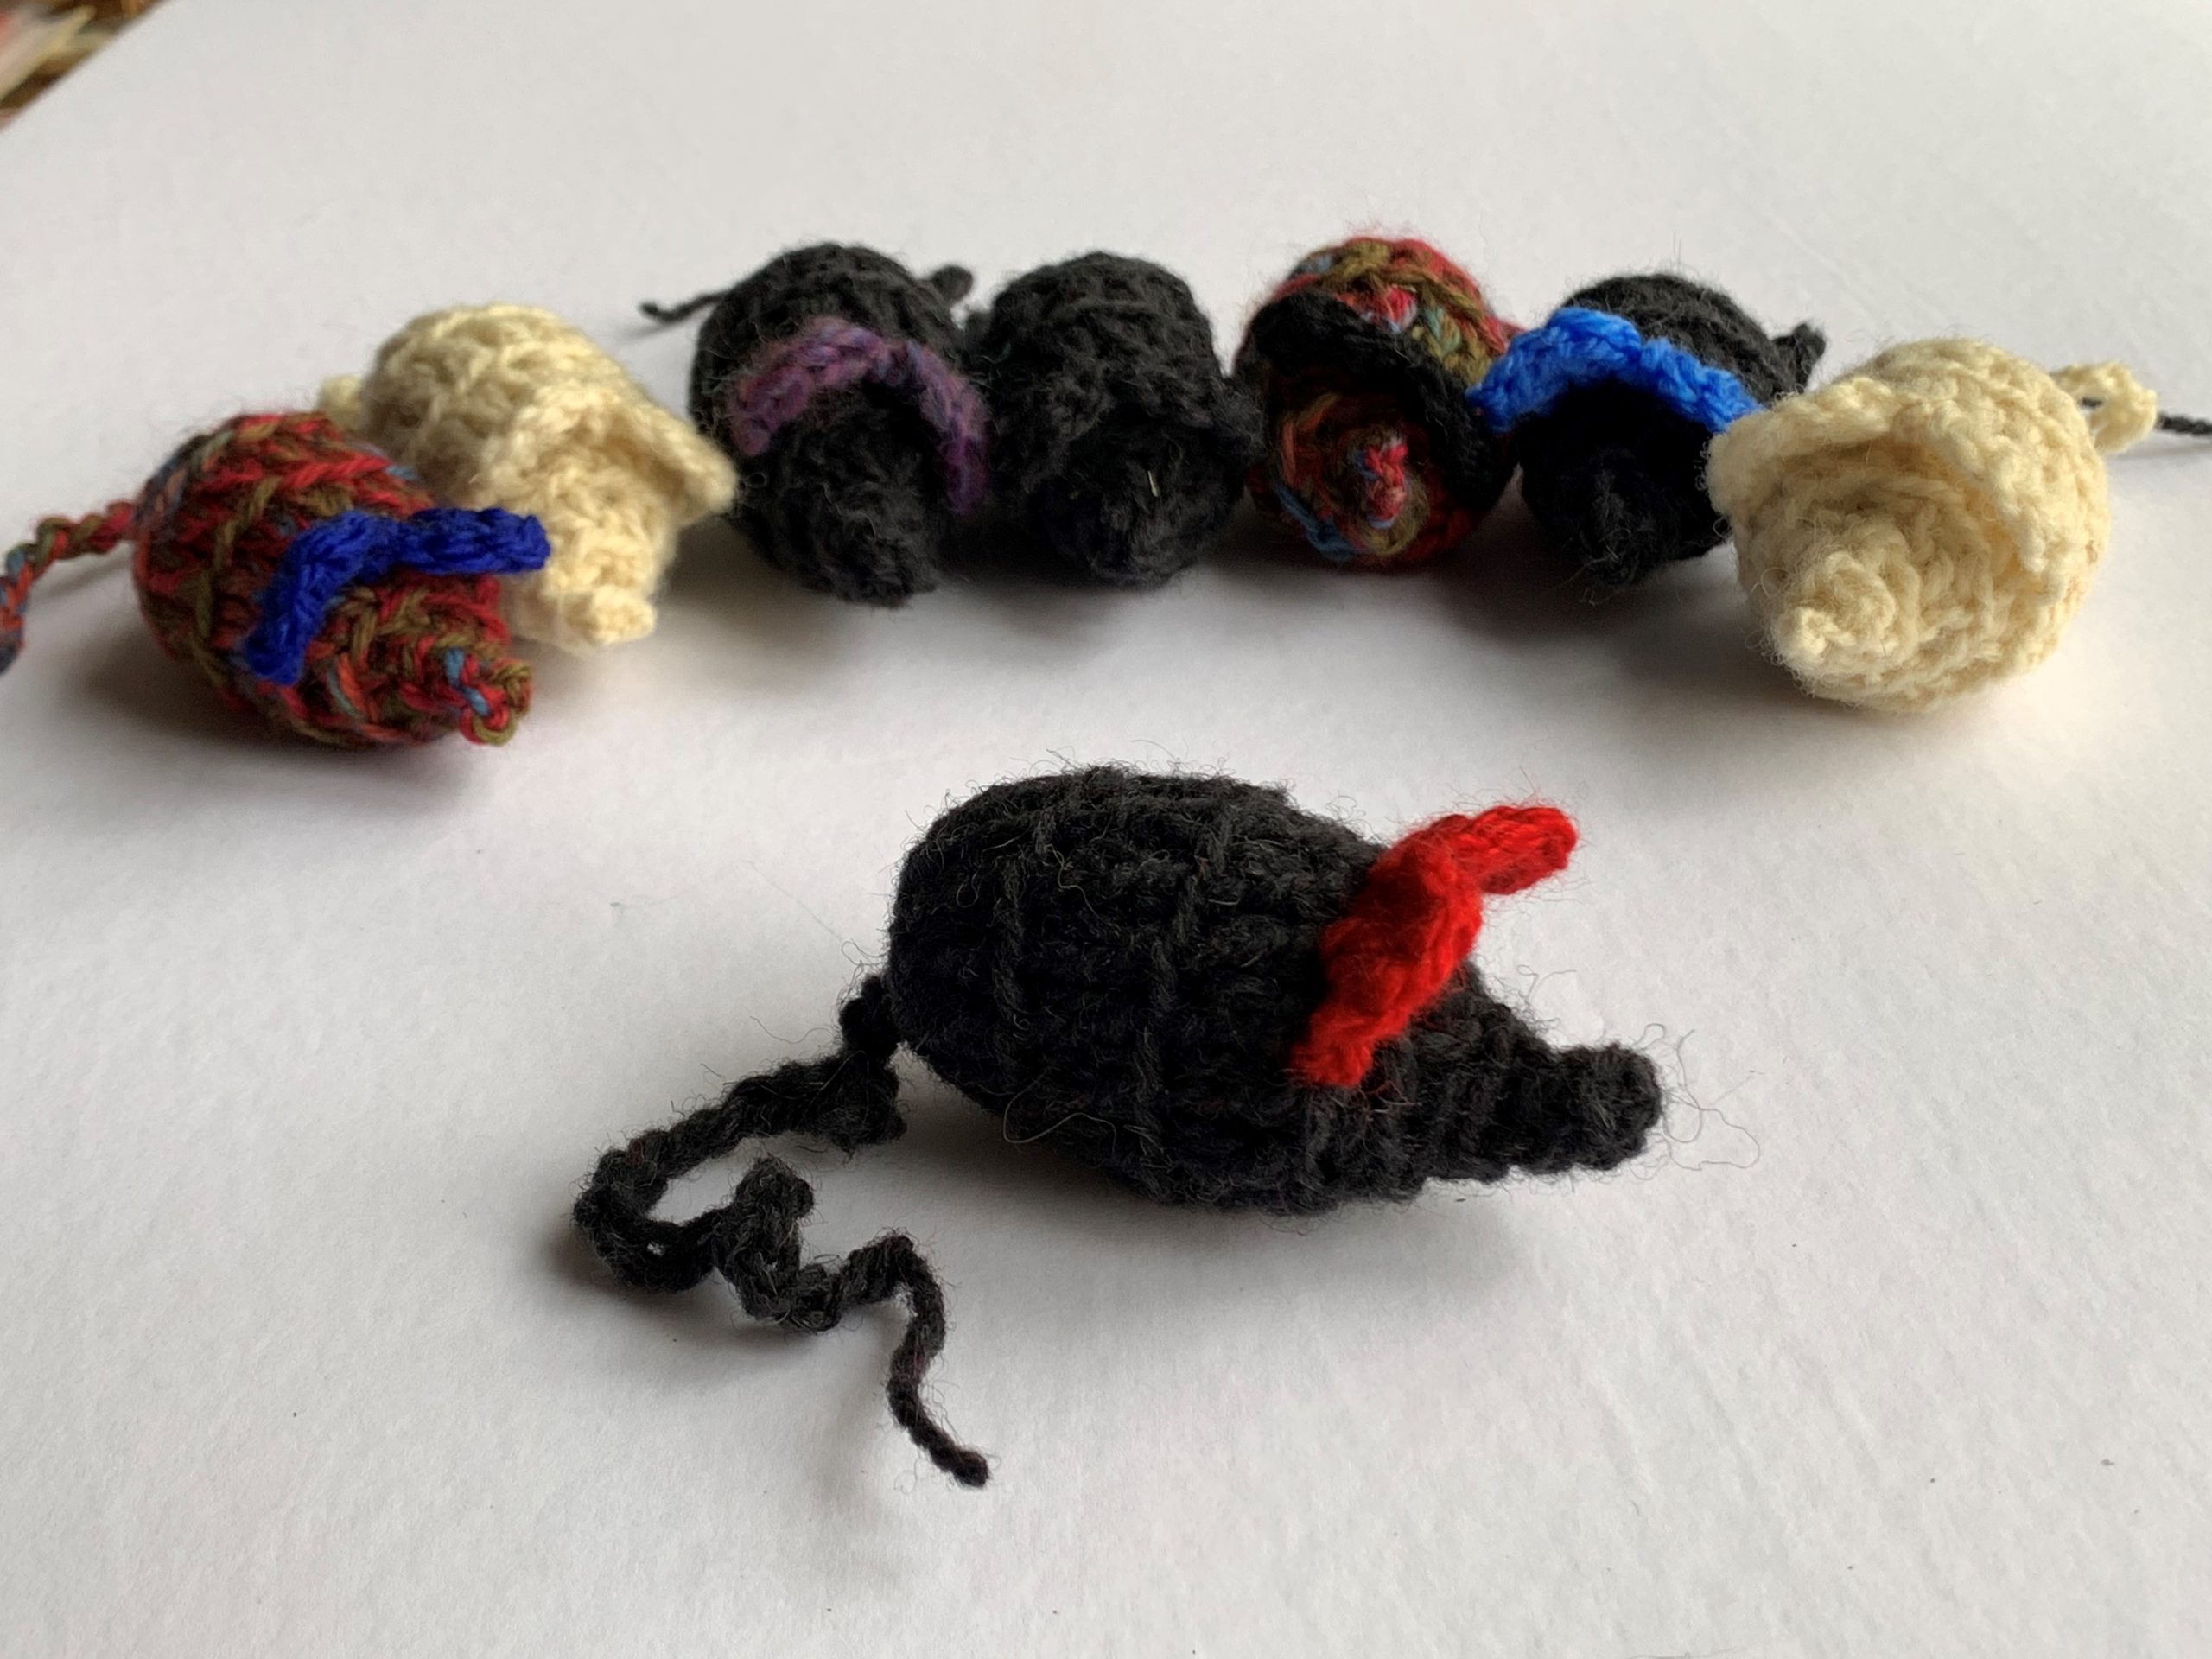
What excites a kitty cat more than catnip?! Monthly donor Cindy Nicholls has been making and donating crochet catnip mice for the kitties at our animal centres. It’s just one more way that she gives back throughout the year! Cindy thought our blog readers might be interested in learning the pattern themselves, so they can do the same.
Check out her pattern below!
Stash-buster: Crochet Catnip Mouse!
By Cindy Nicholls
Once the pattern is learned, this is a 15-20 minute project. Perfect for beginners, and fun for experienced crocheters. The best fibre to use for the mouse is wool (because we all know how much cats are attracted to wool) but anything will work. Don’t stress over stitch count – if you’re one or two out, it’s fine because all it will do is change the finished size. Enjoy!
NOTE: stitch count is not critical for this pattern as long as it’s close.
When finishing ends, do not cut the yarn, rather, run it through the body back and forth until the entire length is woven in. Then trim very short ends if any.
MATERIALS
- Worsted weight yarn (but any weight works provided you have the appropriate size crochet hook, and bearing in mind that thinner yarns will yield smaller finished products, and thicker yarns will yield larger ones) APPROX 10 yds PER MOUSE
- Crochet hook size 4.5 or suitable for yarn weight
- Cotton balls, 2–3 per mouse
- Dried catnip, approx 2 tbsp for about 20 mice
- ZipLoc bag
PREPARE STUFFING: Place dried catnip and cotton balls into ZipLoc bag and seal, trapping some air. Shake the bag to distribute catnip throughout cotton balls. © 2019. Original design and written instructions by CINDY NICHOLLS. This pattern is for personal use only and may not be copied and distributed in any way without the express written consent of the designer. Items may be created for sale however please credit the designer! Thank you for respecting my copyright – Cindy Nicholls, 2019. OSPCA has express written consent for use of this pattern to make items for fundraising, designer credit request is waived.
BEGIN PATTERN:
1. Start with a slip knot approx 1” from the yarn end, and ch25.
2. Sl st into 4th ch from hook.
3. Ch1, bring chained sts forward (this is the tail) take hook behind and sc into small ring formed in step 2.
4. (Ch1, sc into ring) 6 times.
5. Sl st into first ch1.
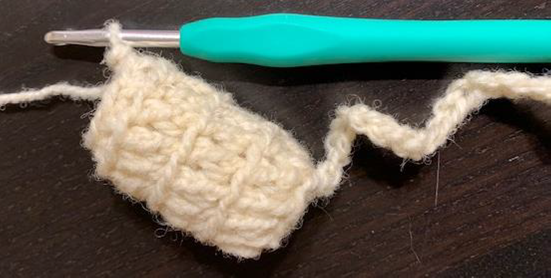
6. Ch3, then working into BACK LOOPS ONLY: (dc into first sc from previous row, dc into ch1 from previous row) 6 times, sl st to top of ch3. Left: Step 6 complete.
7. Ch3, then working into BACK LOOPS ONLY: (dc into next dc from previous row) 12 times, sl st to top of ch3.
8. Repeat Step 7.
9. Ch2, then working into BACK LOOPS ONLY: (SC into next dc from previous row, skip one dc) 6 times, SC into dc at base of ch2, sl st to top of ch2.
10. STUFF MOUSE: Pull hook to expand loop so work does not unravel, remove hook. Use prepared cotton ball/catnip mix to stuff mouse until medium firm (cats love to bite into something that feels “real” ).
11. Re-insert hook into loop and draw up. Ch2, then working into BACK LOOPS ONLY: (sc into next sc from previous row, skip one sc) twice, sc into next sc from previous row, sl st to top of ch2.
12. Ch2, sl st into back loop of sc from previous row, that is opposite this point, ch1.
13. Cut yarn and fasten off.
14. Use hook to redistribute stuffing so it fills “face” area slightly.
15. Finish end securely, running yarn through body.
EARS
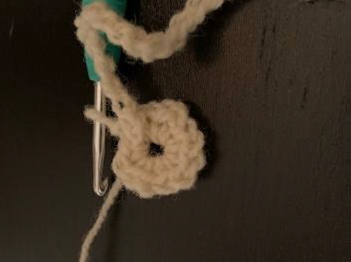
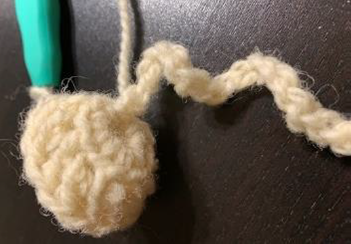
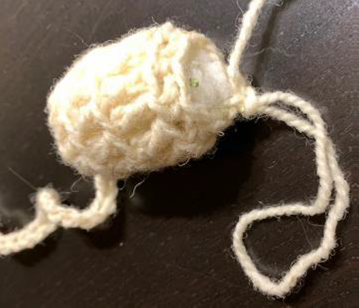
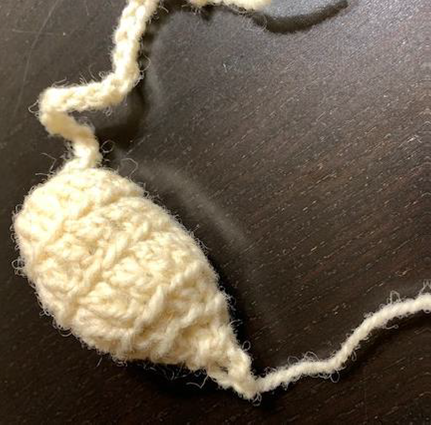
16. ADD EARS: Working from right-hand side of “face” to left-hand side, insert hook into FRONT LOOP of any dc from the last row of dc created (step 8) and pull through a loop of yarn, leaving approx 3” tail (see photo 1 below), ch 1, (dc into next FRONT LOOP to the left, ch 1) twice (see photo 2 below), sl st into next FRONT LOOP to the left – this is the center st between the ears – (ch1, dc into next FRONT LOOP to the left) twice, ch1, sl st into next FRONT LOOP to the left.


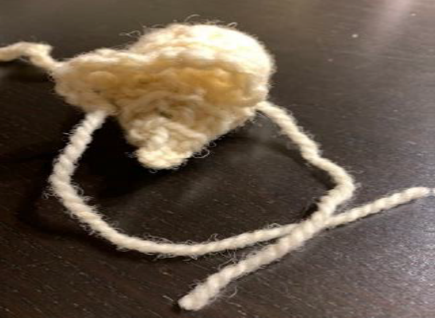
17. Cut yarn and fasten off, leaving a 3” tail. There is now a 3” tail at outside edge of each ear. See photo below.
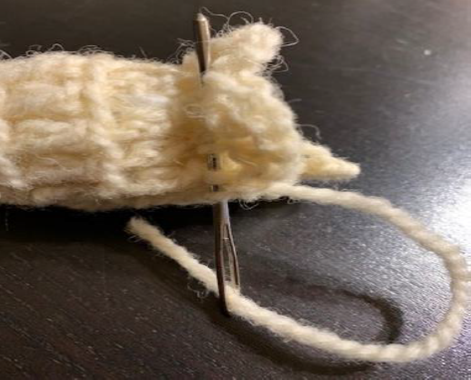
18. Thread darning needle with one of these ends, and run the needle across sts at base of ear, along the “back” of this ear, towards the centre and stopping at the point where the sl st was made. See photo below. Now pull the yarn through, remove the needle and leave the tail.
19. Repeat with the other tail end BUT run it along the FRONT of the ear. You now have one end at the centre behind the ears and one in front.
20. Tie these ends so they tighten between the two ears, and make a secure knot. Finish ends as for tip of nose, by running them into the body and through the stuffing.
*Make sure there’s no more than a 3″ tail on completion. You want to make sure your cat won’t get sick if it’s ingested.


Copyright
© 2019. Original design and written instructions by CINDY NICHOLLS. This pattern is for personal use only and may not be copied and distributed in any way without the express written consent of the designer. Items may be created for sale however please credit the designer! Thank you for respecting my copyright – Cindy Nicholls, 2019. Ontario SPCA and Humane Society has express written consent for use of this crochet pattern to make items for fundraising, designer credit request is waived.