Heading out the door? Read this article on the new Outside+ app available now on iOS devices for members! Download the app.
Go to your local gym or crag and you’ll see that the majority of climbers use the figure eight follow-through to tie in to the rope. The figure eight follow-through is the first knot new climbers learn and the one that every climber should know; you’ll tie this knot more than any other, often many times in one climbing session. The figure eight follow-through has become the standard tie-in knot because it doesn’t require a backup knot, it’s easy to tie, and it’s strong—it retains 75 to 80% of the rope’s strength. Read up on the following steps to master this ubiquitous knot.
ALSO READ: What’s the Best Tie-In Knot? The Bowline vs The Figure 8
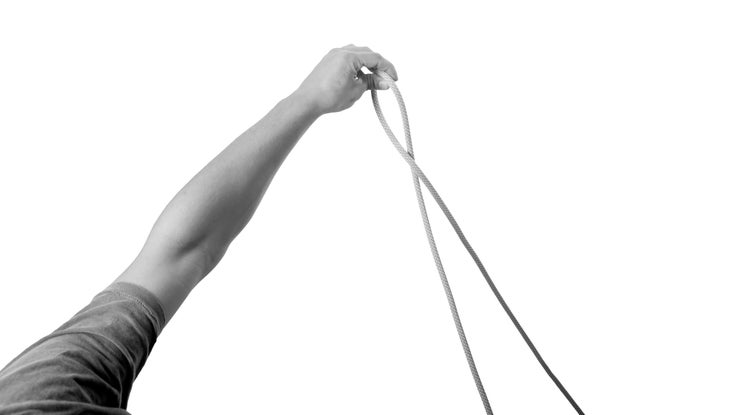
1. Make a bight in the rope about three feet from the end. You can measure by holding the end out in one outstretched hand and grabbing around where your nose is.
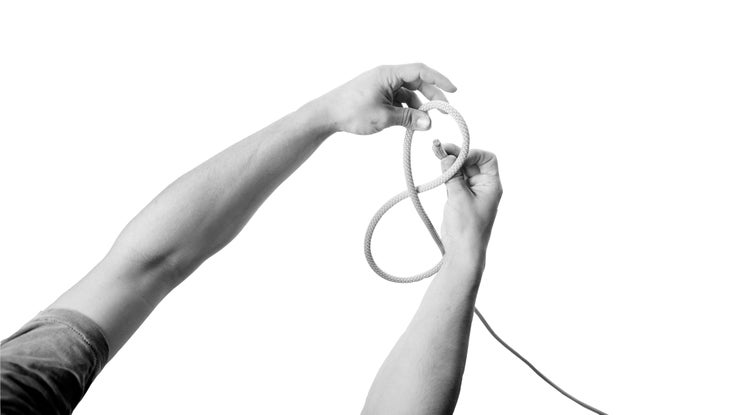
2. Take the tail and cross over the other strand of rope on top, then wrap it underneath as well. Put the tail through the loop you’ve created by going from the bottom, through the loop, and out the top. This is the standard figure eight; leave it somewhat loose.
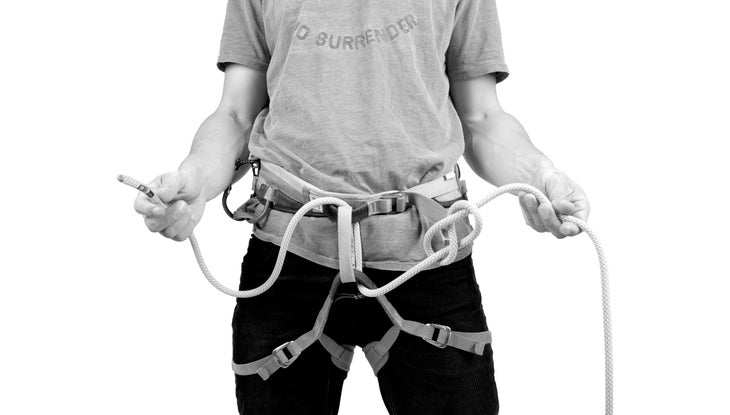
3. Run the tail through both tie-in loops (from the top or bottom, doesn’t matter, just make sure to go through both points and NOT the belay loop), and pull the rope tail so the knot sits close to your harness.
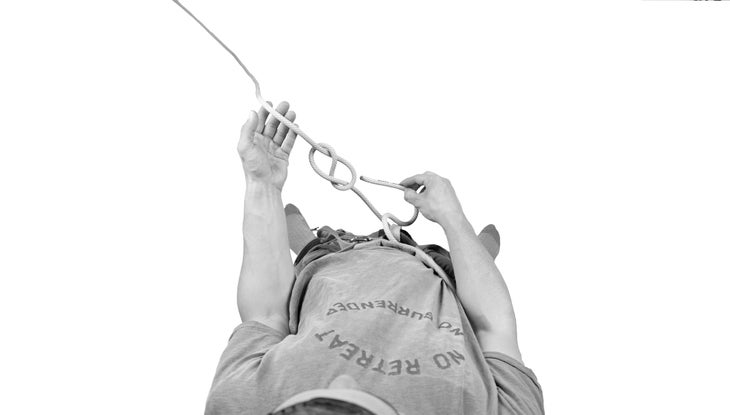
4. This is the “follow-through” portion of the knot, where you will retrace the knot you just tied with the tail you have left.
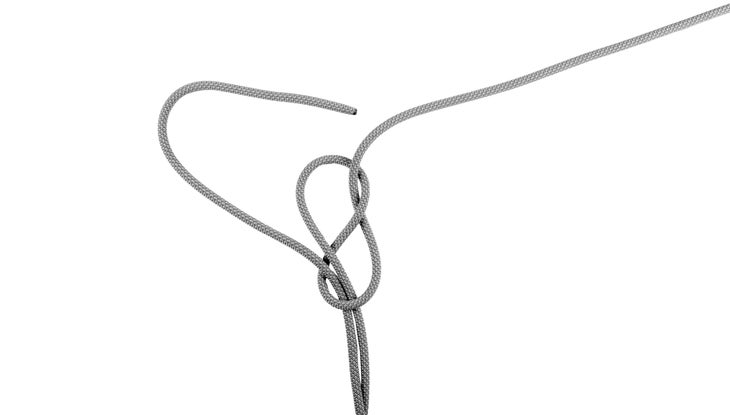
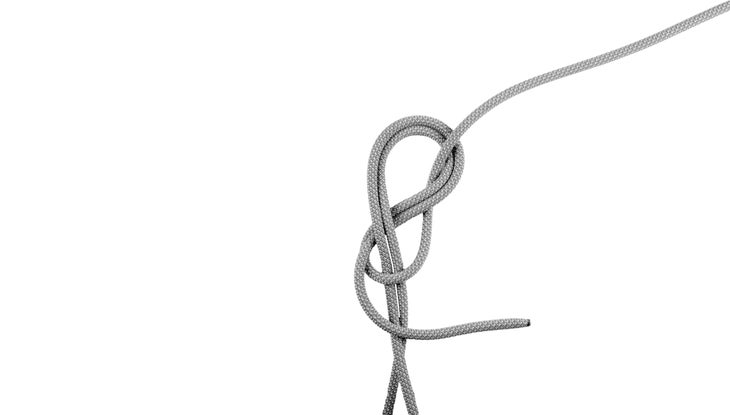
Starting from the strand that’s coming out the bottom of the knot, run the tail right next to the rope in the existing knot (“around the racetrack” is a common phrase used to teach kids). Pay close attention to whether the tail should go under or over another strand, as well as on the inside or outside of the existing knot.
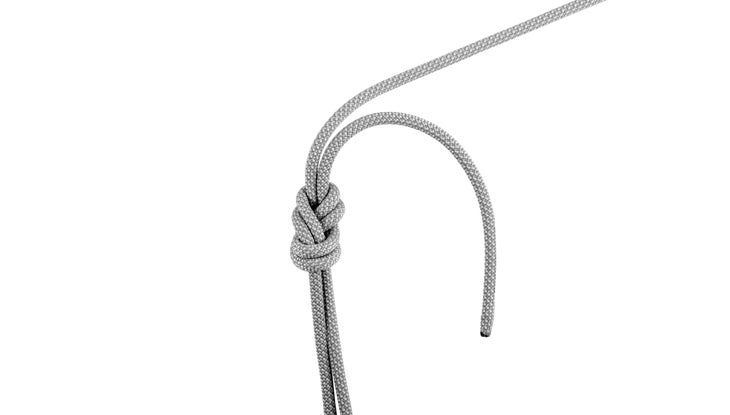
5. Once you finish, the tail should be running up out the top of the knot with at least six inches of excess. If you don’t have that much left, undo the knot and start over farther from the end of the rope. Properly dress the knot by making sure each strand is tightly nested against each other and there are no crossed strands. Then tighten the knot by separately pulling on all four strands that are coming out of the finished knot, two on top and two on bottom.
6. Before you climb, you should visually inspect your knot by making sure it resembles a figure eight and ensuring you have at least six inches of tail. Your partner should also visually inspect your knot every single time you climb, whether leading or toproping, inside or outside.
Backup Facts
The figure eight follow-through does not require a backup knot if tied and dressed properly with enough tail (minimum 6”). The AMGA actually recommends no backup knot because it is harder for your climbing partner to visually inspect the knot when doing pre-climb checks. However, some gyms require a backup; the best option for a backup is to tie a fisherman’s knot.
ALSO READ: ESSENTIAL CLIMBING KNOTS, THE COMPLETE GUIDE
Climbing Knots: The Double Bowline, Advantages, Disadvantages