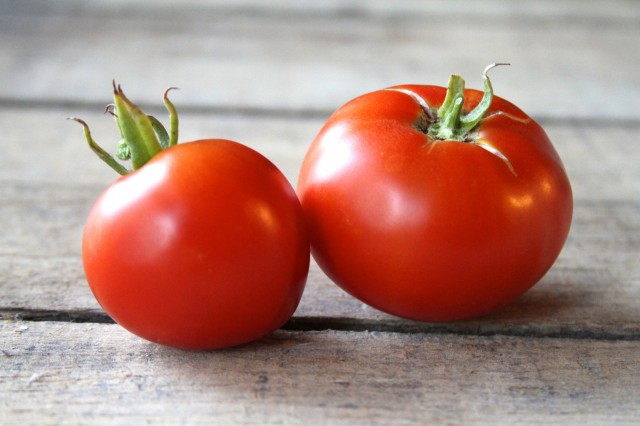
Occasionally, we here at Ars like to nerd out about things that aren't smartphones, processors, or dark matter. For a few of us on staff, one of those nerdy pastimes involves the plant biology that is literally right in our backyards. People pick up gardening for numerous reasons, but one reason I got into it was because of the science. There's so much to learn about plant biology when you go hands-on, even at a small scale. I grow a lot of stuff in my Chicago garden, and while not everything is a success, it provides great opportunities to learn and iterate.
But not a lot of people are into gardening, relatively speaking. Or so I thought—when I semi-jokingly tweeted that I would begin making garden posts here on Ars, the response was overwhelmingly positive. So we thought we would experiment with a weekend feature on cloning plants to get things started.
How to root a tomato cutting (aka “clone” a tomato plant)
Tomatoes are some of the most popular fruits to grow at home, and they're my personal favorite as well. Depending on where you live, you might have a long enough growing season to get back-to-back plantings going, and it's not always fun to start from seed. Or you might want to give away some plants to friends and neighbors. You might even have a friend who grows amazing tomatoes and you want one of those for yourself.
Whatever the case, it's extremely easy to grow new tomato plants from cuttings. If you're not familiar, it is exactly what it sounds like—a piece of an existing plant that you cut off. No roots, no nothing. Just a piece of a plant and some dirt.
For the first part of this tutorial, I'm using a two-week-old baby tomato plant as the example. Toward the end, I do the same thing, but with a cutting from an adult plant in order to "clone" it. The process is exactly the same for both, though you may have to be gentler with the young plants versus mature cuttings.
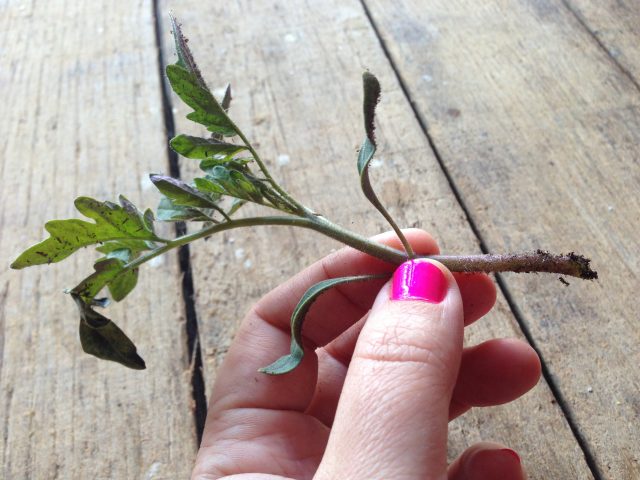
Why might you start with a baby tomato plant that has been cut off? I had to cut this plant from its roots because it was too close to its sibling in the starter cup. (The roots were too intertwined for me to feel comfortable separating them without damaging the one I wanted to keep.) Typically this is just called "thinning," when gardeners go in and cut off all but the best seedling. But sometimes you want to save the ones you're cutting off. Like I said, the process is exactly the same whether you're dealing with baby plants or mature branches.
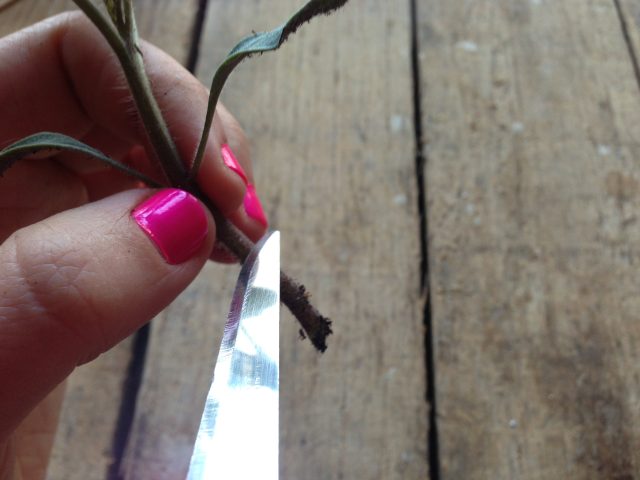
So you have the cutting (seen above). Some gardeners like to scrape the sides of the stem with a sharp knife or a razor blade in order to stimulate root growth, but it's not required:
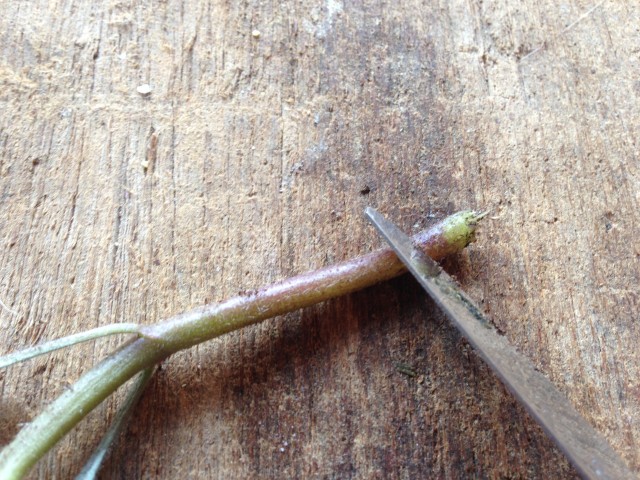
Once that's done, I also like to slice the bottom at a clean, diagonal angle.
I put my root down
At this point, people sometimes like to use rooting hormone. In my experience this is entirely unnecessary for tomato plants—they root so easily, there's no need to spend the money on it. Plus, many commercial rooting hormones contain pesticides, meaning they're not fit for organic gardening. But if you want to use it, you can—there are other plants that don't root so easily, so if you plan to take cuttings from other things, it might be useful.
Commercial rooting hormone contains auxin, which is a naturally occurring hormone that plants also generate themselves. Auxin is key for plants' cell growth; in particular, its presence helps a plant decide when it's time to put out more roots (versus, say, more leaves up top). Synthetic auxin is what you find in the bottle at the garden center. Applying it to a root-less stem or cutting boosts the auxin levels in that area of the plant, essentially telling it to start putting out more roots where it has been applied. (This is a very basic explanation; there are white papers upon white papers about the effects of auxin if you're interested in going down the rabbit hole.)
But tomato plants are already dying to put out new roots along the length of the vine—sometimes, gardeners notice tomatoes trying to put out new roots above ground on their own if the stem is constantly being splashed with water. You can bury a fairly large tomato plant with only the top poking out of the soil, and it will eventually put out roots along the entire length of plant that you buried. Many other plants do not do this—by default, they only put out roots from the original root ball—which is why you might want to use a rooting hormone to help those cuttings put out new roots. If you choose to use rooting hormone with a tomato cutting, though, it usually just means it will put out roots even faster than it would have on its own.
For rooting hormone, there are two kinds: gel and powder. If you're using the gel, you would use something (a knife, or whatever you have) to lightly coat the outside of the cutting. If you're using powder, dip your cutting into some water and then into the powder to coat the stem.
Now, whether you're using rooting hormone or not, stick the stem into a smallish cup filled with soil. (I used compost because that's what I had available, but you could use any garden soil or seed starter mix. I personally do not recommend just using soil from your lawn, although if you did, I'm sure it would work fine.) Make sure there are holes poked in the bottom of the cup—I poke holes in plastic cups using a barbecue skewer. I like to use the translucent cups for cuttings because it lets me know when the plant has finally rooted, but they're not the best choice once you get to growing. We'll get to that later.
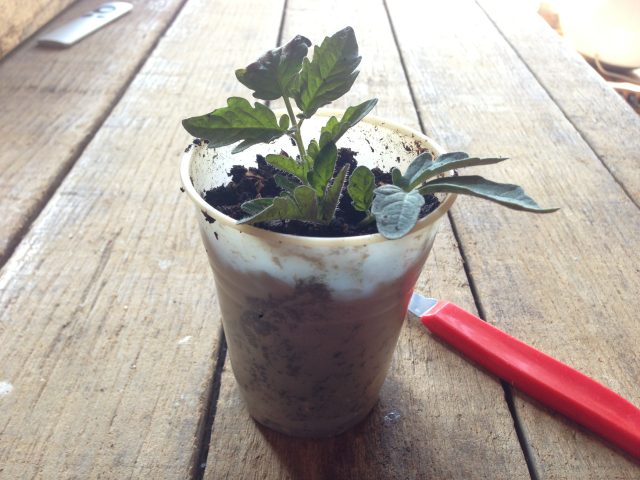
Once you have your cutting nestled in a cup full of soil, water it well (to the point where water is dripping out the holes in the bottom), and place a plastic baggie over the top:
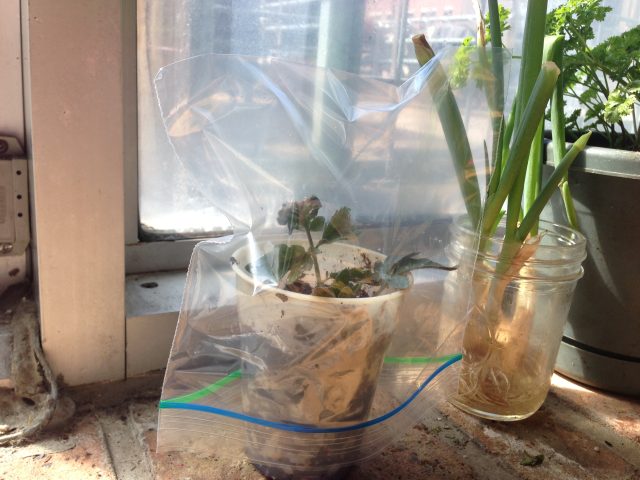
The baggie is to help keep moisture in so the plant can continue to live while it works on putting out new roots. Without the baggie, the cutting would lose all of its water through its leaves and die, so this is a necessary step. Within a few hours of doing this (whether with a baby plant or a mature cutting), your cutting will most likely wilt and look like it's about to die:
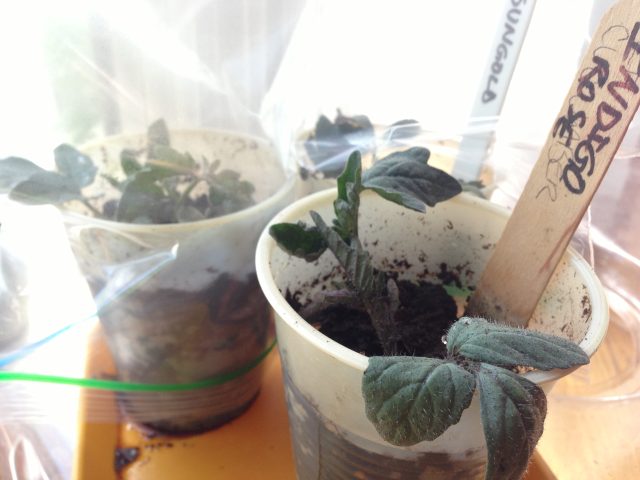
That's because it's no longer getting water through its roots. During the editing of this piece, one Ars staffer asked why the cutting doesn't just shrivel up and die. As long as it's getting water somehow—in this case, by basically "submerging" the stem in wet soil and making sure it doesn't lose too much water through its leaves—a cutting can stay alive for an almost alarmingly long time. But exposing a root-less stem to water will only work for so long, because it's more difficult to absorb water through its stem than through roots, and it will die eventually without more help. (This is why cut flowers from the flower shop can stay alive and beautiful for days after you purchase them, as long as you keep them in a vase with water. But the vase isn't magical, so they eventually die.)
That's why auxin is important; the plant is generating its own auxin in order to put out new roots so it can stay alive for the long term. Or if you're using rooting hormone, the synthetic auxin is there to help tell the plant "put out roots now!"
Don't worry; as long as you watered your soil and have a bag over the top, the wilted cutting should come back in about a day or so.
Taking a cutting from a mature plant
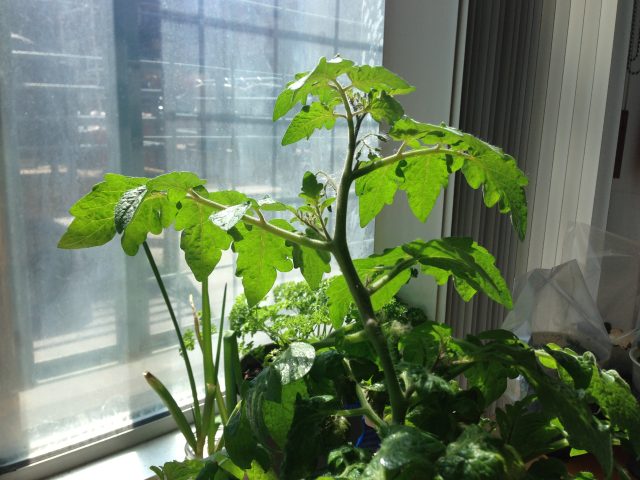
Here I have a horrible-looking tomato plant that I grew indoors all winter. It's not particularly large—maybe a foot tall at best—and I'm ready to just clone it and start over outside. (See? Easier than starting from seed.)
First, you have to select a good cut. You can do this from the "top" of the plant or from one of the suckers (or side shoots), as long as it's big enough. Keep in mind that it can't just be any old leaf you select from the plant. New growth has baby leaves coming out of it—it's not a leaf itself. I decided to make my cut a few leaves down from the top, like so:
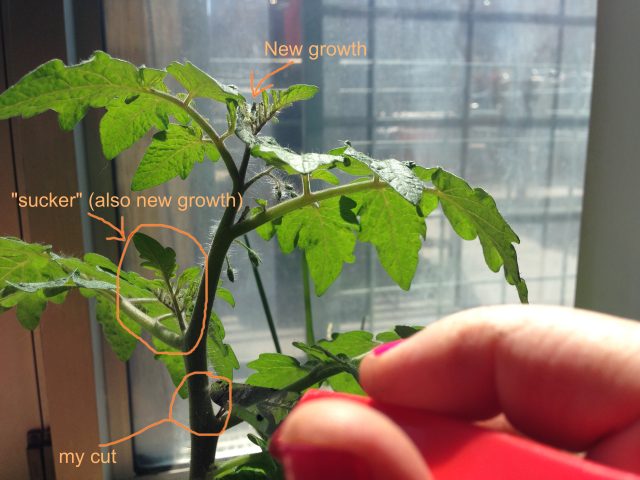
I've made a diagonal cut and am now holding my cutting that I will turn into a clone of the original plant.
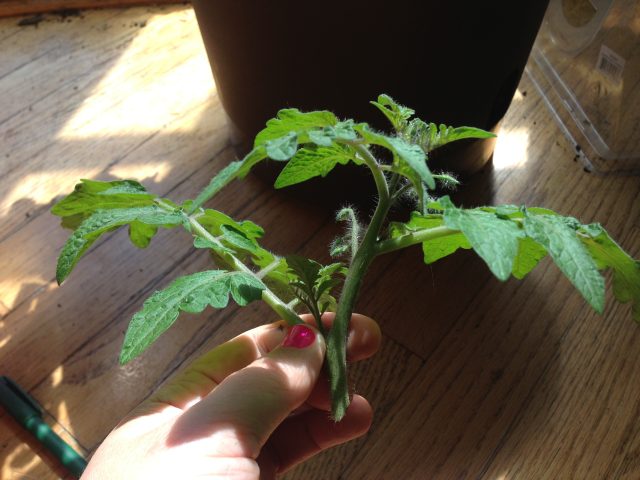
But this piece is huge—it will lose a ton of water through its leaves if I leave it as-is. As such, it's wise to cut off all the bottom leaves and suckers in order to come out with a bare minimum of leaves to survive.
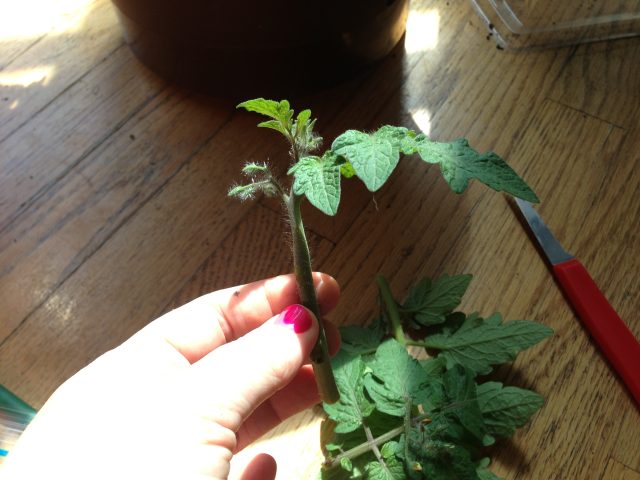
Above is the piece I had left after I trimmed everything I wanted to trim. I should have also trimmed those flower buds that you can see on the top left side. By leaving them on, I'm risking this cutting trying to flower and produce tomatoes immediately after it roots, and I don't want that because I want the plant to put its energy into growing bigger first. Luckily, I can cut off those flower buds at any time.
After scraping the sides (like I did above with the 2-week-old seedling), once again stick it into a cup with some soil, water it, and put a baggie over it. For the first day, you may want to put it in a shaded area. After that, put it in a sunny windowsill (but not outside) so it gets some light, but not enough to stress the plant while it's putting out new roots. Make sure to keep the soil moist (but not soaking) during this time.
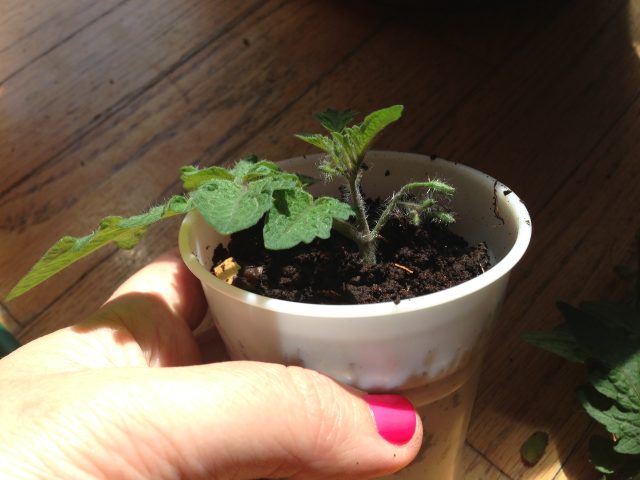
After about a week (give or take a few days either way), your tomato cutting should have formed new roots. It will look something like this:
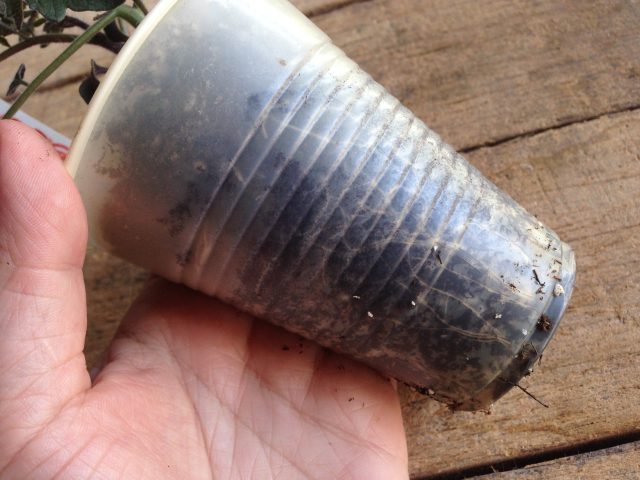
This is why I like to use translucent cups for rooting cuttings, because it allows me to see when the plant has rooted without me having to constantly remove it from its cup. But if you used opaque cups, that's fine—after a week or so, put your hand over the top of the cup with the stem in between your fingers, turn it upside down, wiggle the cup a bit, and slide the cup off. You should see at least a few roots; if you don't, put it back in and wait a little longer.
Once your cutting has rooted itself, it's basically a new plant. If you're using translucent cups like I am, you'll want to re-pot into something opaque (and preferably larger). Roots can easily die off when exposed to sunlight, so you don't want to continue growing in something that can allow light through. If you're cheap like me, you could pot up into something like a 16oz Solo cup (with holes poked in the bottom) and it would be fine. Or, since it's getting to be nice out already, you could plant your newly rooted tomato plant directly outside, or into its final container that it will grow from.
Science!
There are a number of reasons why this is cool. As I wrote earlier, doing this can speed up the process and remove some of the tediousness (plus lots and lots of failure) of starting your own seeds. It's even cooler, though, because you basically get unlimited free plants out of it—you could take a cutting from a friend or neighbor, or take your own cuttings in order to multiply the plants you're growing in your own garden. If you live in a climate with warm winters like Florida or Mexico, you could take cuttings from your plants that are already finished and dying in order to start new plants for a second growing season. Or if you're like me, you just like making clones for the sake of doing so, because generating independent new plants from existing ones is a fun activity. Kids love it, too.
Again, you can do this with tons of different plants. Roses are a common one (though you should be careful—many rose varieties are now patented, and the companies forbid you from propagating them via cuttings without paying. To them, it's like torrenting an illegal copy of the rose). Herbs like basil and rosemary are also very common; in fact, I find starting rosemary from seed next to impossible, so cuttings are really my only hope.
You can also clone pepper plants, eggplants, grape vines—the list goes on forever. I once took a cutting from my grandmother's hydrangea bush in California, wrapped it in a damp paper towel, put it in a plastic baggie, and flew with it back to Chicago before rooting it at home. The only thing to keep in mind is that some plants take a lot longer than tomatoes to put out new roots—cuttings from woody plants, like roses, can sometimes take months. But once you get the hang of the process, it's kind of addictive to just start trying to root everything.
If posts like this interest you and you'd like to see more, or if you have other garden science questions that you'd like to see answered, please leave your comments in the discussion or shoot me an e-mail directly. In the meantime, if you're interested in learning more about how gardening can change communities, I recommend watching guerrilla gardener Ron Finley's TED talk and then heading outside to, as he put it, "plant some sh*t."
reader comments
111