
Perfecting the technique of using a Dutch oven over an open fire gets you cooking outdoors, keeps your fire-building skills sharp, and, well, just feels like a good skill to have in the event of the End Times.
Dutch ovens work effectively because they retain heat and cook evenly in the imperfect environment of an open fire, says Emily Rahravan, an editorial assistant at America’s Test Kitchen, where she’s also known as the camp cook extraordinaire. For four years she did much of the cooking for her outdoors club at Allegheny College, including many big-batch meals in Dutch ovens.
A cast-iron Dutch oven will also unequivocally survive the apocalypse. “I love Dutch ovens because they’re basically bulletproof,” says Matt Carter, chef and partner at Fat Ox, The Mission, and Zinc Bistro restaurants in Arizona. When Carter takes river trips, he packs two cast-iron Dutch ovens. They’re no worse for wear after getting a little banged around, he says, and when he’s done cooking, he simply scrubs them out with a little river sand.
Here’s how to put yours to work.
Dutch Oven Camping Tips: How to Cook with this Timeless Tool
Pick Your Pot
Sticking that gorgeous, $400 enamel-lined number you got for your wedding into a fire isn’t the best idea if you want to stay married. When Carter describes Dutch ovens as bulletproof, he’s talking about the cast-iron versions. Both he and Rahravan own models by Lodge, which are relatively affordable (they start at $49) and almost impossible to break. You can also often find them at secondhand stores and yard sales.
If you do buy a used one, make sure it comes with the right sized lid—it’s important that it fits tight. The other features are optional. Rahravan has one with three stubby legs, which makes it easier to stuff hot coals under. But you can achieve the same effect by propping a pot up on a few rocks. Pot hangers, which dangle over a fire and make your Dutch oven look like a cauldron, are unnecessary, both Rahravan and Carter say. You will, however, want good heat-proof gloves or oven mitts (preferably constructed with silicone) and a safe tool for moving hot coals around, like a small shovel.
Choose Your Recipe
There are few things that don’t work in a Dutch oven, but hearty recipes—think chili, stew, and pork shoulder—which can stand up to long, slow cook times, are a great place to start, says Carter. He almost always tucks a whole pork shoulder into the coals of a campfire before going to bed the first night of a camping trip. If you have enough hot coals, he says, it should be warm enough to keep that pork slow-cooking all night. The next day he feasts on tacos and pozole.
Of course, you don’t have to be a carnivore to dive into Dutch oven cooking. Rahravan would often make mushroom risotto on camping trips in college. (The trick is to stir regularly to keep the rice from scorching.) Soups are an easy, no-meat option too.
The only thing Carter says he avoids making in a Dutch oven are eggs and delicate cakes. Both are likely to burn on the bottom before being completely cooked on the top. Any other recipe that was written for a Dutch oven at home, however, should work outdoors, says Rahravan.
Build Your Fire
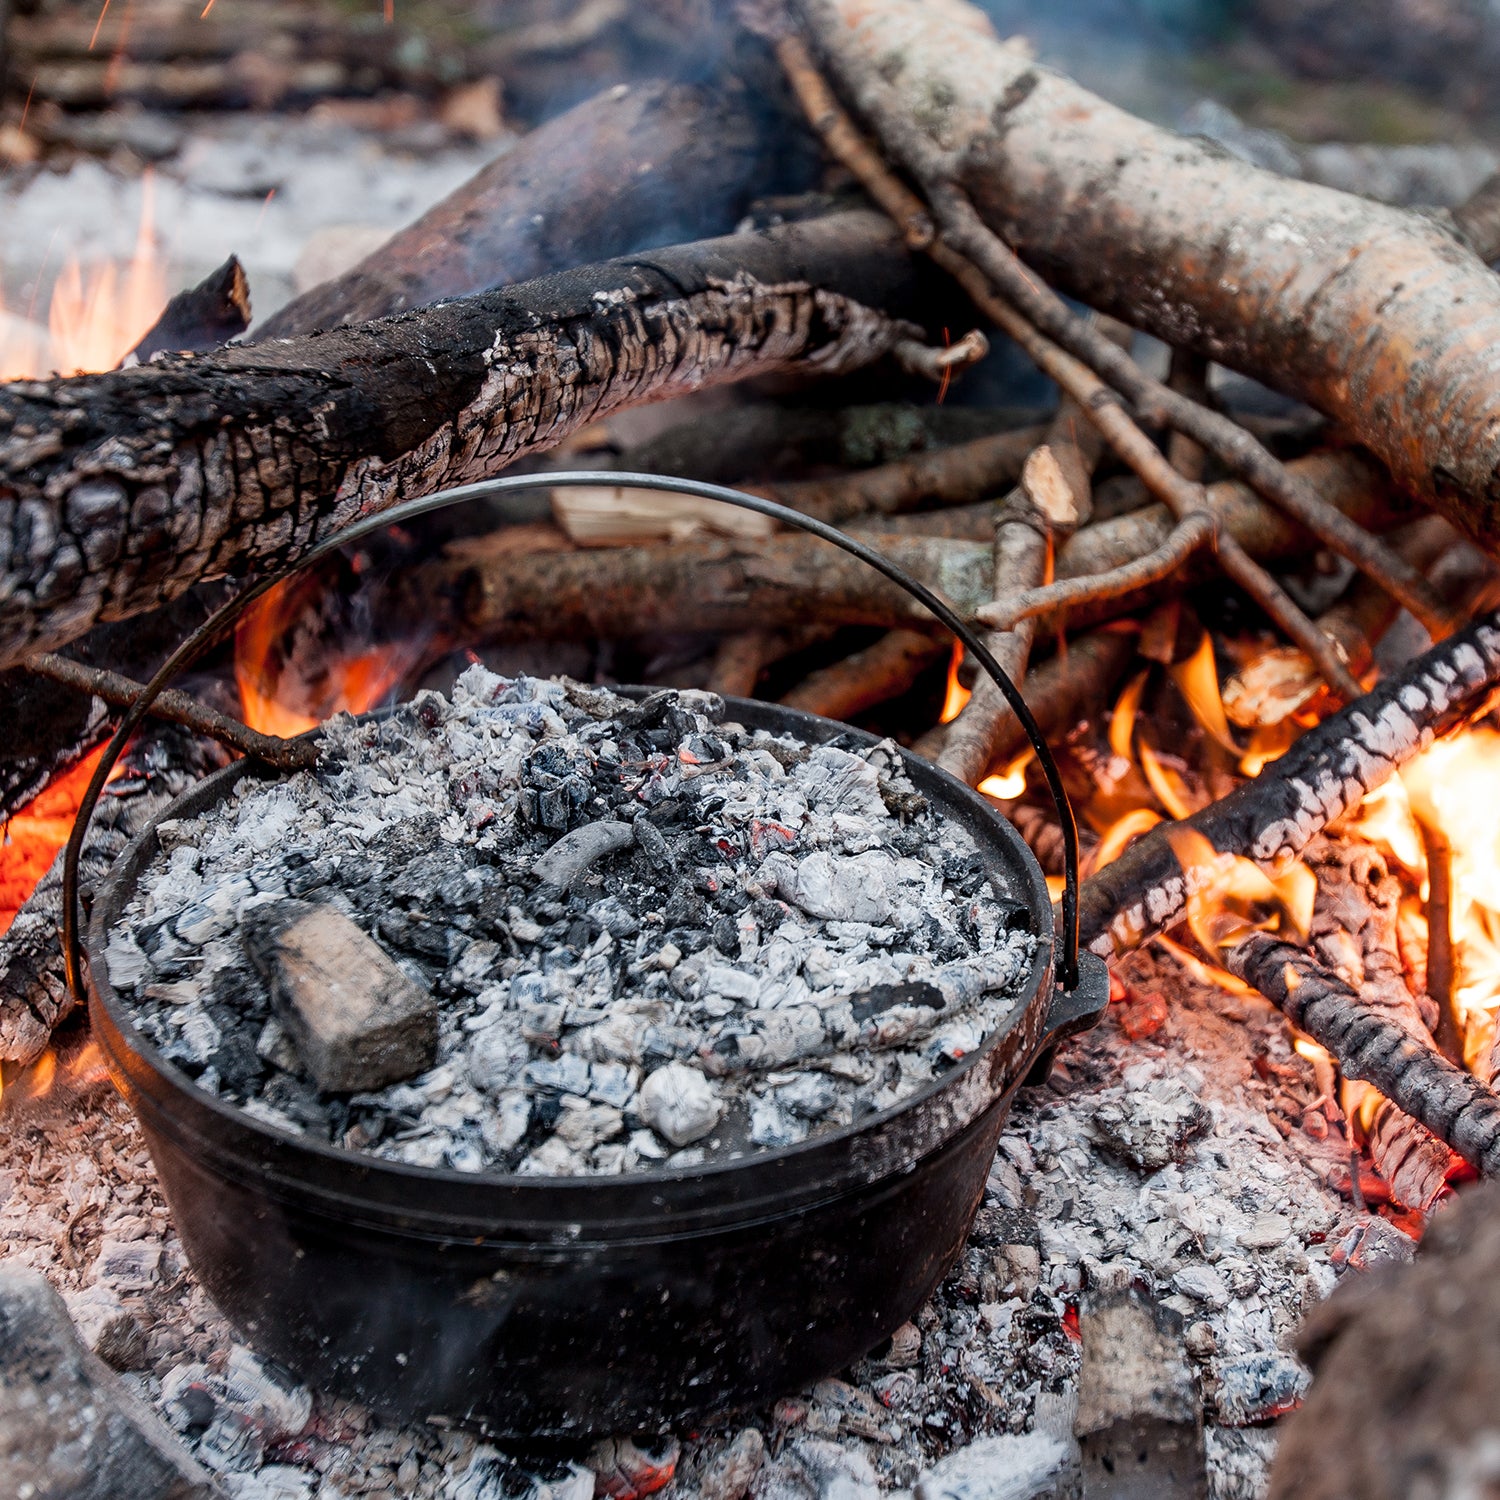
Cooking over a fire is a misnomer, since it’s not the flame so much as the coals you want. Rahravan says building a fire is usually her first step when she gets to a campsite. She’ll set up her tent while she waits for the fire to generate the glowing coals she’ll use for cooking. You know coals are hot enough when they glow red in the middle. “They should be kind of shimmery,” she explains. Or, if it’s daylight and it’s hard to see them glowing, Carter says they should have a greyish coating of ash on the outside.
If you want to sit around your fire and cook on it, you’ll need a two-sided fire. Keep feeding half the fire, while letting the other half burn down to hot coals. Besides keeping you warm, a two-sided fire generates extra coals that will keep your Dutch oven toasty all night long.
Put Everything Together
If you need to sear or sautee, place your Dutch oven on a squat little pile of coals and let it heat up. This direct heat is too hot for low-and-slow braising, but it works well for browning meat or turning onions translucent. Once you’re done with this step, though, you’ll want to chill things out a bit. To lower the temp, either place a wire rack over your pile of coals and elevate your Dutch oven, or place it on a few rocks.
For dishes that will cook for a long time, like stew, avoid messing with the food once you put the lid on the pot. Each time you do, you’ll be releasing valuable heat, says Rahravan. For the most evenly cooked product, top the lid with more hot coals, so that just like an oven, heat is coming from all sides. Carter will sometimes seal the sides of the Dutch oven before placing it on the fire, wrapping foil around the lid and the lip just to be extra sure no ash gets in. Rahravan says it’s probably OK to skip this step. “I find the kind of person who is going to making shakshuka or a pork roast fireside is not that worried about a little extra carbon in their food,” she laughs.
Be Patient
When adapting an indoors Dutch oven cooking recipe for outdoors, you’ll need to adjust expectations for how long it takes. Rahravan says things generally take longer over the fire—up to 20 percent more time, she estimates.
When you get to about the time the dish would take to cook indoors, crack open the lid and take a peek. “Cooking over a fire definitely makes you a better chef because you start to learn the visual cues for when things are done,” she says. As a general rule, meat should be brown, stews should be bubbly, and veggies should be soft. If things seem are moving especially slowly, grab more coals (this is why you build a two-sided fire), and slide them underneath your pot.
Dish Up and Enjoy
By the time you’re done, you’ll have that woody smoke smell in your hair and a bowl full of hot, nourishing food. Bonus: you’ll know that even if society breaks down completely, you can, at the very least, cook a damn good meal.
A fresh corn chowder is one of Rahravan’s go-to dishes for campfire Dutch oven cooking. She adapted the following recipe slightly for outdoor cooking from Cook It In Your Dutch Oven, an America’s Test Kitchen cookbook. For this dish, place your Dutch oven over a fire on a metal grate or rack, which will be hotter for sauteeing. If you don’t have a grate, let the fire burn down, and then bury the oven well into the coals so there’s plenty of heat.
The Best Dutch Oven Camping Recipe: Fresh Corn Chowder
- 10 ears corn, husks and silk removed
- 4 slices bacon, finely chopped (optional)
- 1 onion, finely chopped
- 2 garlic cloves, minced
- 1 teaspoon minced fresh thyme or 1/4 teaspoon dried
- 3 tablespoons all-purpose flour
- 3 cups chicken broth
- 2 cups whole milk
- 12 ounces red potatoes, unpeeled, cut into 1/4‑inch pieces
- 2 bay leaves
- 1 cup heavy cream
- 2 tablespoons minced fresh parsley
- Salt and pepper
- Working with one ear of corn at a time, stand each of four ears on end inside a large bowl and cut kernels from the cobs using a paring knife. Grate the remaining six ears over the large holes of a box grater into a separate bowl. Using the back of a butter knife, scrape the remaining pulp from all the cobs into the bowl with the grated corn.
- Cook bacon over medium heat until crisp, five to seven minutes. For a vegetarian version, swap in a tablespoon of vegetable oil instead—if you do, heat until oil shimmers. Stir in onion and cook until softened, about five minutes. If you don’t hear sizzling when you add onion, the pot isn’t hot enough and you need to move it closer to the heat or build up the fire.
- Stir in garlic and thyme and cook until fragrant, about 30 seconds.
- Stir in flour and cook for one minute.
- Slowly whisk in broth and milk, scraping up any browned bits and smoothing out lumps. Stir in potatoes, bay leaves, and grated corn and pulp mixture. Bring to simmer. If your soup is actively bubbling or boiling, move your Dutch oven away from the heat by raising your tripod or shifting it further away on the grate. Cook until potatoes are almost tender, about 15 minutes.
- Stir in remaining corn kernels and cream. Cook until corn kernels are tender yet still slightly crunchy, about five minutes. Discard bay leaves. Stir in parsley and season with salt and pepper to taste.