Cloudflare DNS Recorder =============
Contents
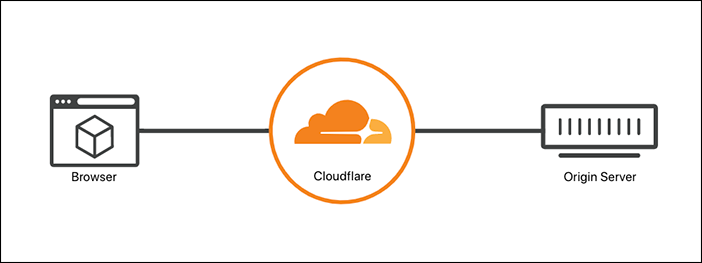
How Cloudflare DNS Recorder works =============
If you have a server/computer and want o access that server with your custom domain name like mydomain.com or test.mydomain.com, you should have a static IP address. However to get a static IP, you should pay extra to your internet provider. To avoid additional expenses, you can use my Python script to update your DNS record of domain on Cloudflare and you can use your Cloudflare nameserver as your domain nameserver.
Please follow each step to install our script
| Steps | Command |
|---|---|
| Install apt-get |
$ sudo apt-get update$ sudo apt-get upgrade
|
| Install python |
$ sudo apt-get install python3$ sudo python3 --version
|
| Install python pip |
$ curl https://bootstrap.pypa.io/get-pip.py --output get-pip.py$ sudo python3 get-pip.py$ pip3 --version
|
| Install python libraries |
$ pip3 install requests$ pip3 install PyYAML
|
| Install text editor |
$ sudo apt-get install nano$ sudo nano --version
|
|
$ mkdir myscript$ cd myscript
|
|
$ git clone https://github.com/ofsanlialp/CloudflareDNSrecorder.git |
| Enter repository folder |
$ cd CloudflareDNSrecorder
|
Configuration ============
When you download repository, you should edit config.yaml file to access your Cloudflare account. To do that please follow the steps:
$ nano config.yaml
==> Please fill following data, which is mentinod Uppercase, with your own data!!!
==> If you want to proxied your DNS, change proxied to True
If you don't know your DNS Record ID for specific domain leave it like recordID : "" When you run script, it will show your records and you can get your id from there
api: "API_KEY"
email: "CLOUDFLARE_EMAIL"
zoneID: "ZONE_ID"
recordID: "RECORD_ID"
type: "RECORD_TYPE"
name: "RECORD_NAME"
proxied: False
api: "5ed240111110606aae8e4111110de1c63f188"
email: "mymail@gmail.com"
zoneID: "1amgee9b8d23f1ards15g85dcdaf3422c"
recordID: ""

type: "A"
name: "home.mydomain.com"
proxied: False
Save config file and exit
Run $ python3 dnsRecorder.py Result will be like:
{
  "errors": [],
  "messages": [],
  "result": [
      {
          "content": "127.0.0.1",
          "created_on": "2020-07-29T21:26:46.888563Z",
          "id": "yu5ba2e817261d1bba038e32at2vce9d9",
          "locked": false,
          "meta": {
              "auto_added": false,
              "managed_by_apps": false,
              "managed_by_argo_tunnel": false,
              "source": "primary"
          },
          "modified_on": "2020-07-29T21:26:46.888563Z",
          "name": "home.mydomain.com",
          "proxiable": true,
          "proxied": false,
          "ttl": 1,
          "type": "A",
          "zone_id": "1amgee9b8d23f1ards15g85dcdaf3422c",
          "zone_name": "mydomain.com"
      }
  ],
  "result_info": {
      "count": 1,
      "page": 1,
      "per_page": 20,
      "total_count": 1,
      "total_pages": 1
  },
  "success": true
}
Please find the DNS record ID you would like to update and entry the value into the script
As you see on above example result id is "id": "yu5ba2e817261d1bba038e32at2vce9d9" for "name": "home.mydomain.com", You should type that id into config file like:
api: "5ed240111110606aae8e4111110de1c63f188"
email: "mymail@gmail.com"
zoneID: "1amgee9b8d23f1ards15g85dcdaf3422c"
recordID: "yu5ba2e817261d1bba038e32at2vce9d9"

type: "A"
name: "home.mydomain.com"
proxied: False
Save config file and exit
Then run script one more time: $ python3 dnsRecorder.py Now you should see an output like:
Updated DNS record of ===> home.mydomain.com to ===> 72.10.39.12
The purpose of this python script is to update your dynamic IP for public access to your home device/server. So you might want to run this script every 5 min to update your domain public IP on cloudflare. To do that, you should setup a cron job.
$ crontab -e
Than add the following commad. Please change USERNAME depends on your script location. Also you should make sure you are using correct python location with version to runs script.
*/5 * * * * cd /home/USERNAME/myscripts/CloudflareDNSrecorder && /usr/bin/python3 dnsRecorder.py
If you are not sure which version is your python, run following command:
$ whereis python3
You will get something like:
python3: /usr/bin/python3.8 /usr/bin/python3 /usr/bin/python3.8-config /usr/lib/python3.8 /usr/lib/python3 /etc/python3.8 /etc/python3 /usr/local/lib/python3.8 /usr/include/python3.8 /usr/share/python3 /usr/share/man/man1/python3.1.gz
You can use /usr/bin/python3.8
You can modify cronetab time depends on below information.
* * * * * * cd /home/USERNAME/myscripts/CloudflareDNSrecorder && /usr/bin/python3 dnsRecorder.py
| | | | |
| | | | +-- Year (range: 1900-3000)
| | | +---- Day of the Week (range: 1-7, 1 standing for Monday)
| | +------ Month of the Year (range: 1-12)
| +-------- Day of the Month (range: 1-31)
+---------- Hour (range: 0-23)+------------ Minute (range: 0-59)
After an asterisk () or a range of values, you can use character / to specify that values are repeated over and over with a certain interval between them. For example, you can write "0-23/2" in Hour field to specify that some action should be performed every two hours (it will have the same effect as "0,2,4,6,8,10,12,14,16,18,20,22"); value "/4" in Minute field means that the action should be performed every 4 minutes, "1-30/3" means the same as "1,4,7,10,13,16,19,22,25,28".
If you want to run your script after each reboot, also you should add following command into your cromtab file:
@reboot sleep 2m cd /home/USERNAME/myscripts/CloudflareDNSrecorder && /usr/bin/python3 dnsRecorder.py
Your script should run after your system rebooted and wait 2 minute
To check whether your cron job runs or not, you can use following command to check system log
$ grep CRON /var/log/syslog
Ouput
Jul 30 15:30:01 ubuntuking CRON[28233]: (USERNAME) CMD (cd /home/USERNAME/myscripts/CloudflareDNSrecorder && /usr/bin/python3 dnsRecorder.py )
Jul 30 15:30:03 ubuntuking CRON[28232]: (CRON) info (No MTA installed, discarding output)
Jul 30 15:40:01 ubuntuking CRON[28251]: (USERNAME) CMD (cd /home/USERNAME/myscripts/CloudflareDNSrecorder && /usr/bin/python3 dnsRecorder.py )
Jul 30 15:40:01 ubuntuking CRON[28250]: (CRON) info (No MTA installed, discarding output)
*/10 * * * * cd /home/USERNAME/myscripts/CloudflareDNSrecorder && /usr/bin/python3 dnsRecorder.py
@reboot sleep 1m cd /home/USERNAME/myscripts/CloudflareDNSrecorder && /usr/bin/python3 dnsRecorder.py