
How to Install your Own Cork Board Wall Area
Whether you want to add a giant cork board wall in the play room to display the kids' art, or you want a giant pin board for your office, this method will work for either.
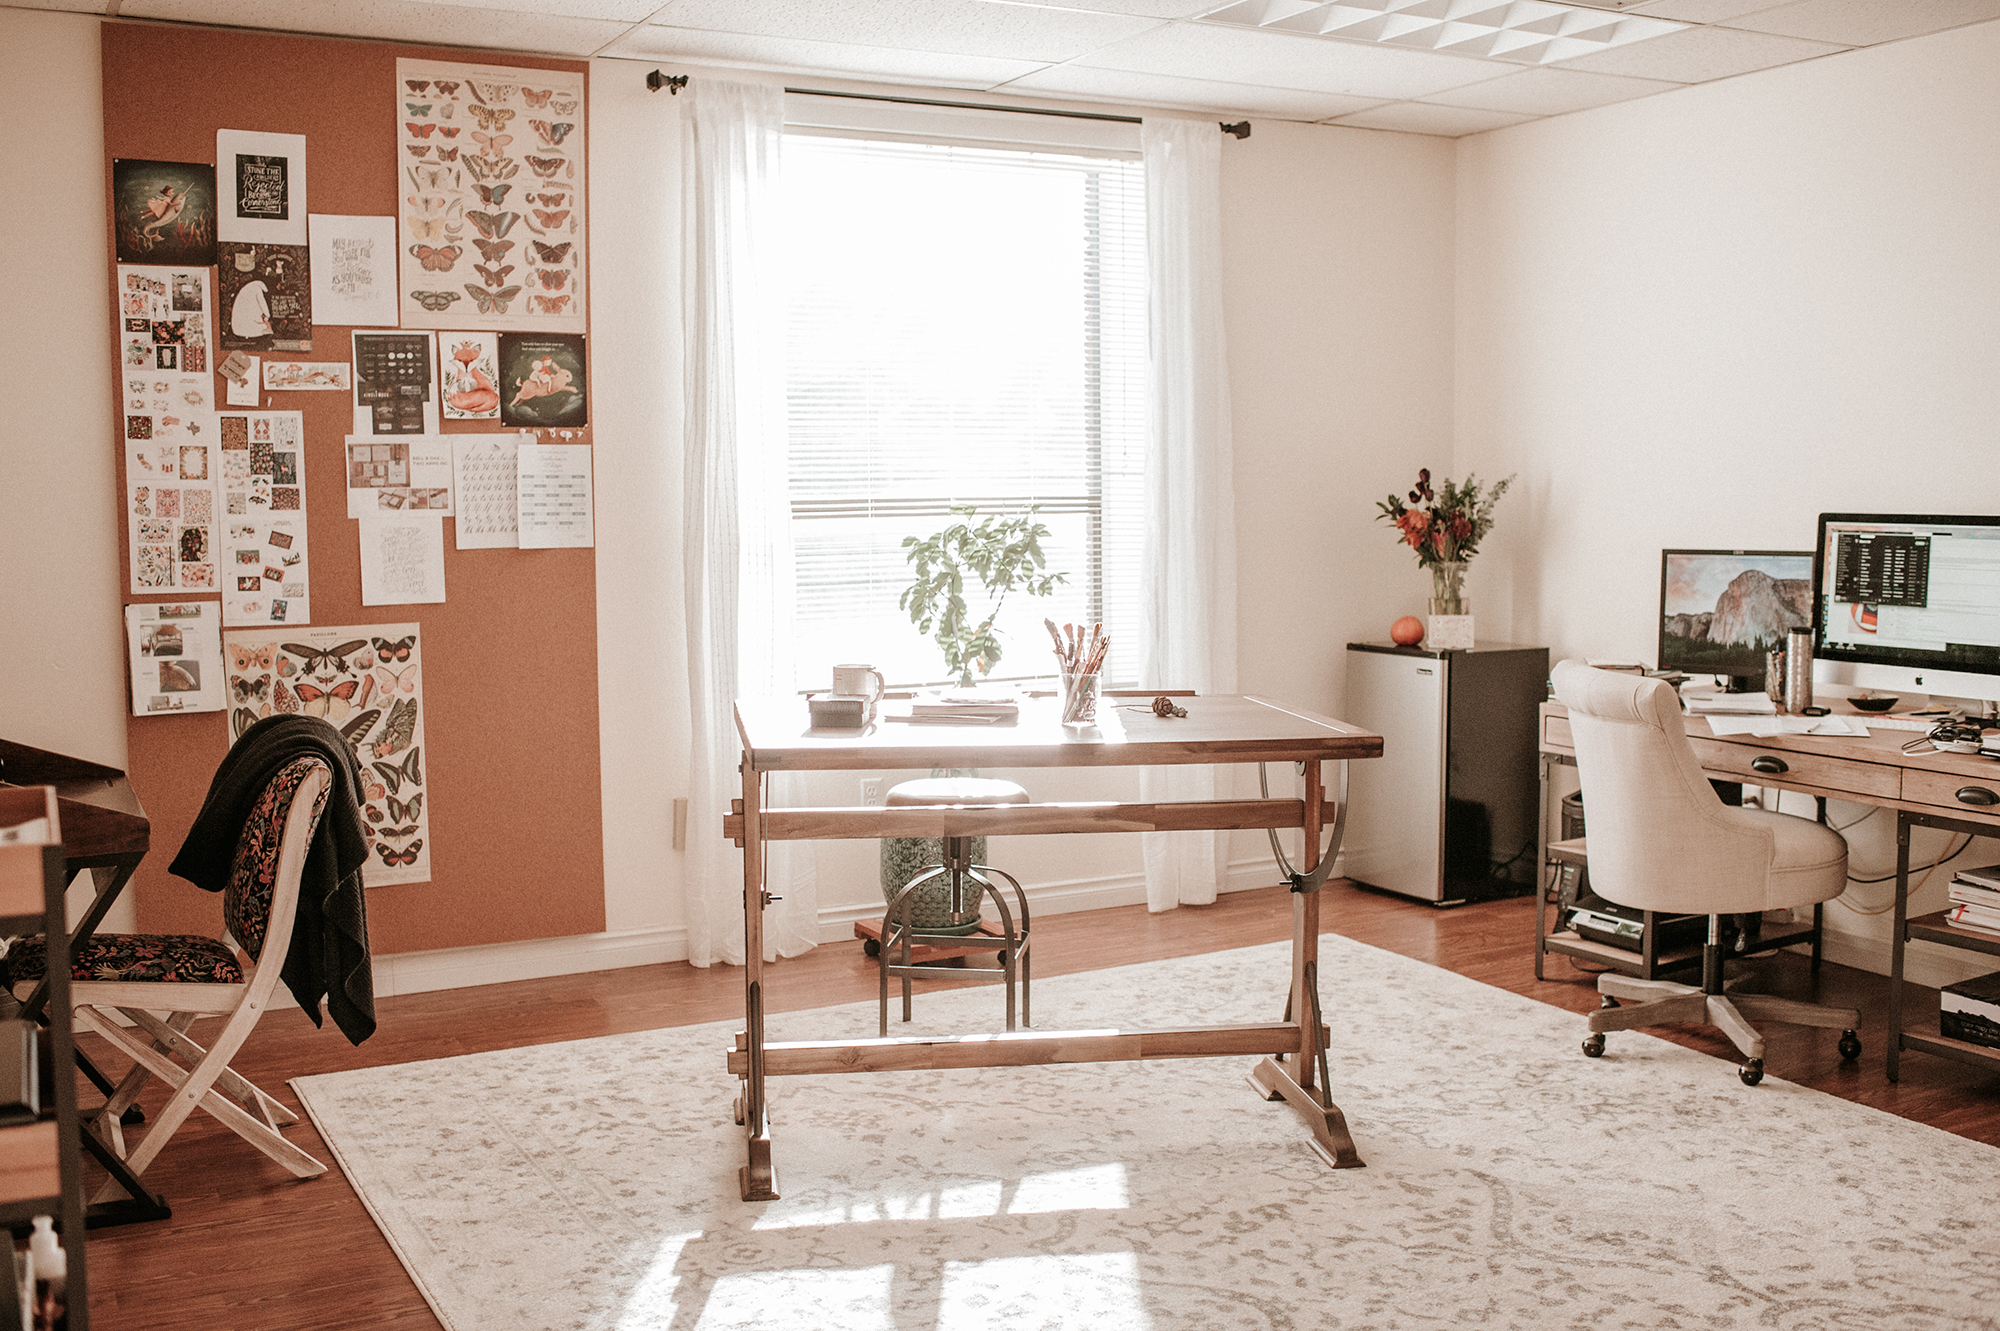
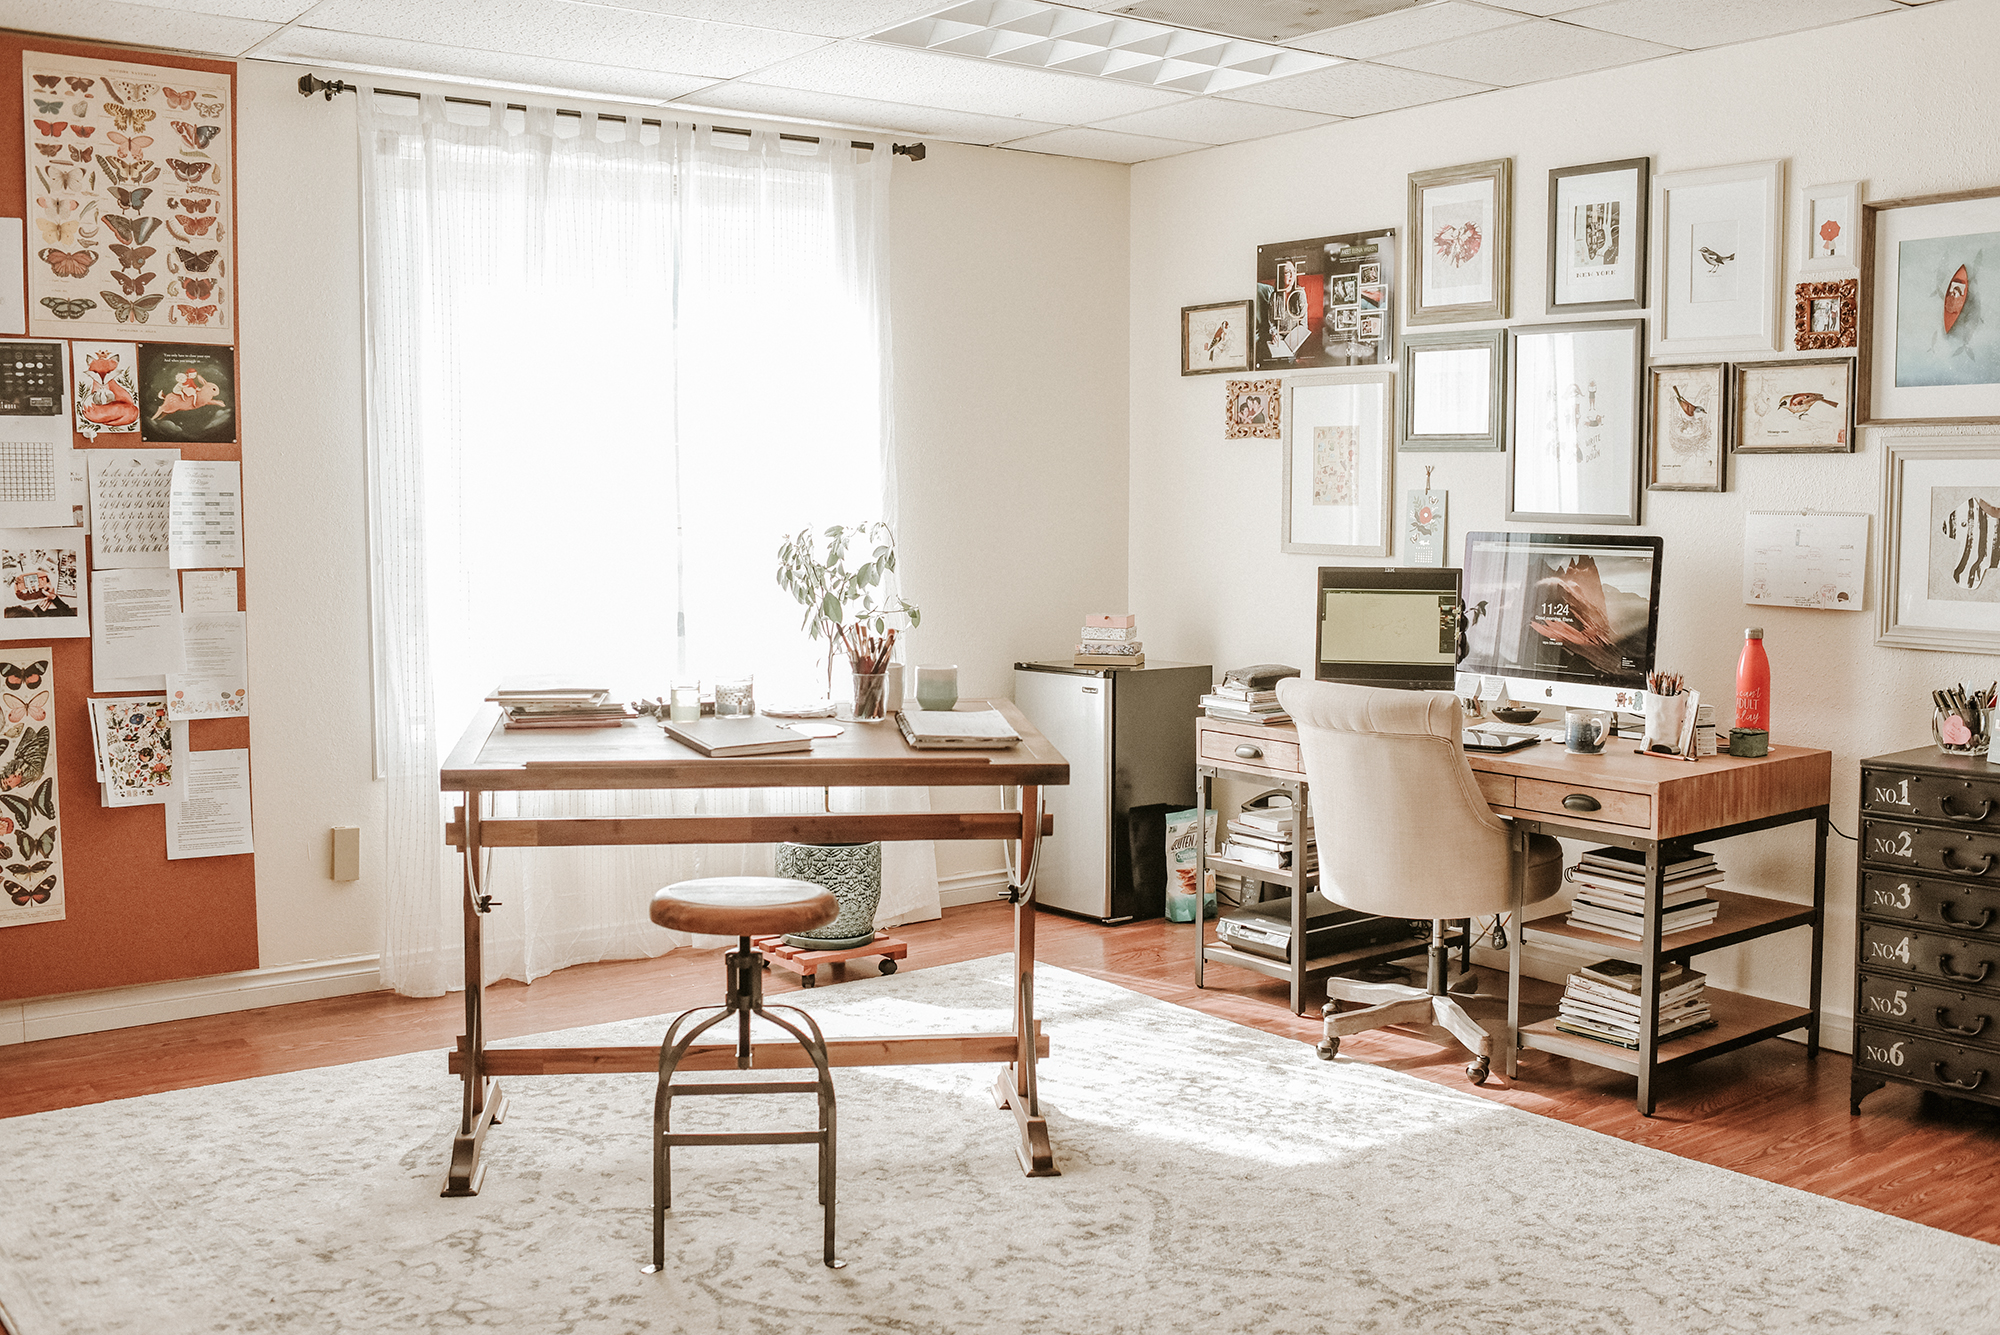
I think cork boards are awesome! We installed one in my home office, and it was the one thing I knew I wanted before anything else, in the new office space!
Let me introduce you to my husband Paul, who wrote the post and the instructions. I helped with the installation but he's the driving force behind this.

How to add a little class and utility to any given space…
~ a step-by-step guide to how we installed a cork board wall, and you could too
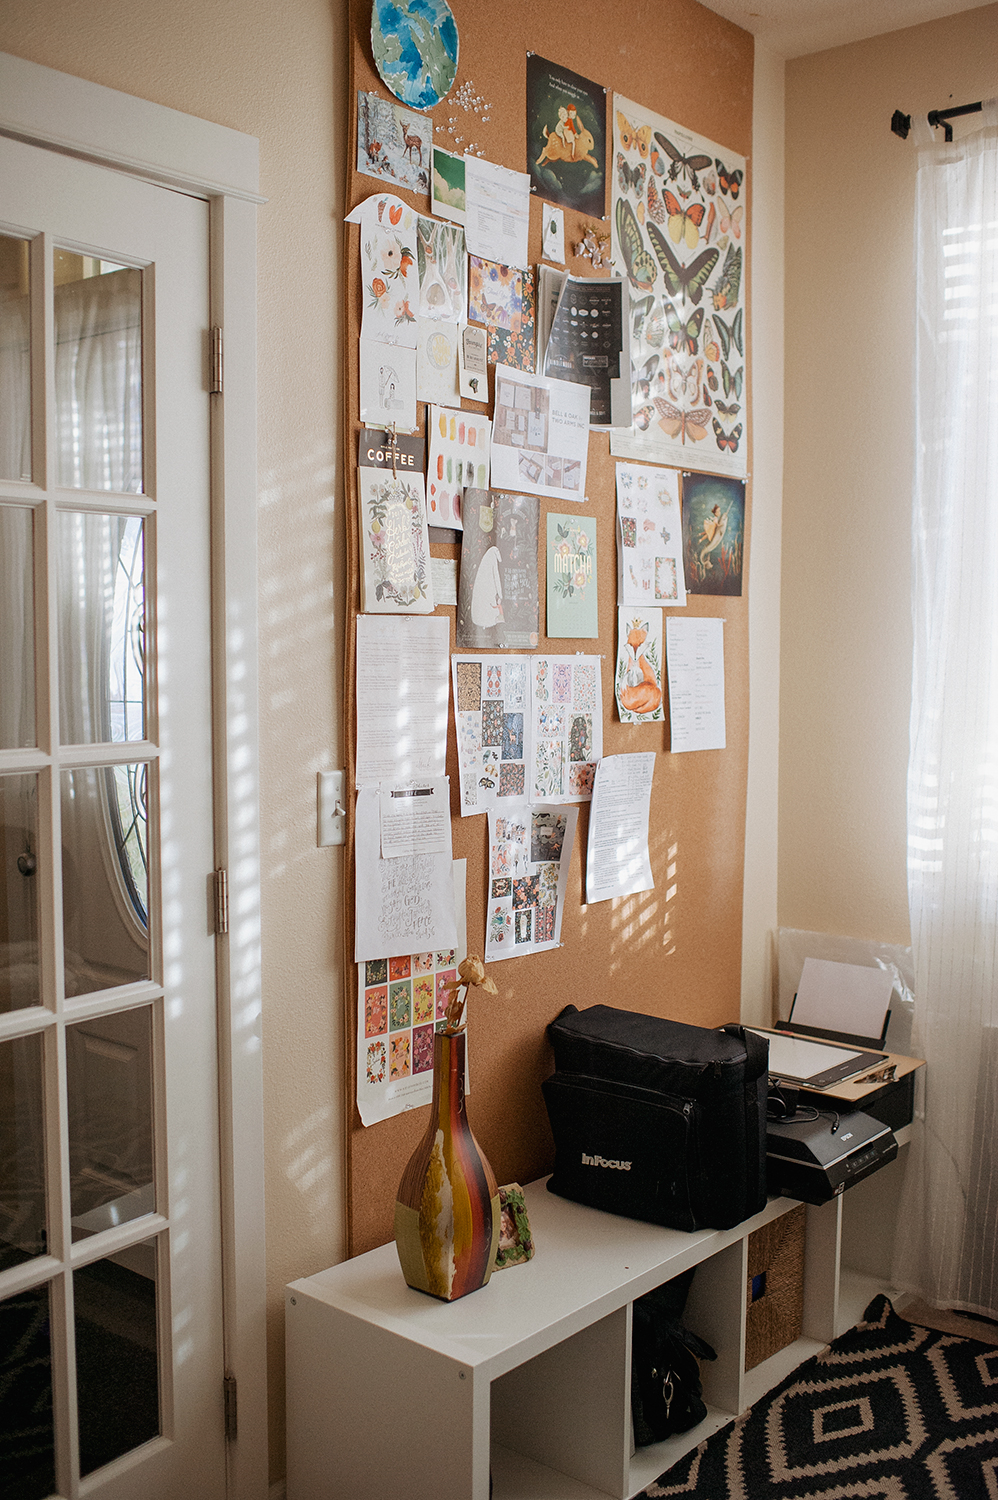
Inspiration needs a home! What better way to fuel the fires of creativity than displaying found gems/nuggets - and self created notes/pics?
Over the last couple of years we have installed two cork walls to do just that! Not to say that we are professional cork wall installers. Simply, after two installations we have some experience (and know what worked for us) so we thought we'd share that.
We looked up all kinds of tutorials on the best way to do this and decided to screw a plywood sheet to the wall first, then glue the cork sheet to it. The advantage was that there would only be a few screw holes to fill and paint over in the event of a move or change of decor.
Steps:
1. Decide on the size of your cork wall area.
2. Order the Cork sheet.
3. Get and mount the plywood board to the wall.
4. Apply the adhesive.
5. Roll cork onto board.
6. Trim if necessary.
7. Load it up with Inspiration!
MATERIALS/Tools needed:
• Plywood Sheet
• Screws (roughly 10) & a power drill
• Furring Strips - optional
• Cork roll or cork sheet - Manton cork
• Adhesive - Henry’s 356 Adhesive
• Paper towels (damp - to clean up any adhesive drips or spills)
• A cheap plastic kitchen spatula (to spread the adhesive), and a small plastic trowel for texturizing
• Hook blade/Utility knife
• Rolling pin


The nitty gritty and step-by-step details:
1. Measure and decide on the size needed - both for the plywood board and the cork to mount to it.
2. Order the cork. The cork we used was a pre cut 4x8 3/8” sheet of Manton cork
You could buy it directly through the company (note that the shipping fee is on the high side), or you could look it up and find the product on Amazon (which we did). Even with a 2 day shipping fee, the total came in a little lower. The shipping through Amazon might be free, with Prime (if you have the service). Worth checking it out.
“Tip: Don’t order the cork unless you are planning to install within a few days of delivery. The manufacturer states that shrinkage could occur if it dries out too long.
Tip : The day before installation, unroll the cork on the floor curled/convex side up and put books on all the edges to allow the cork to completely flatten before install.”

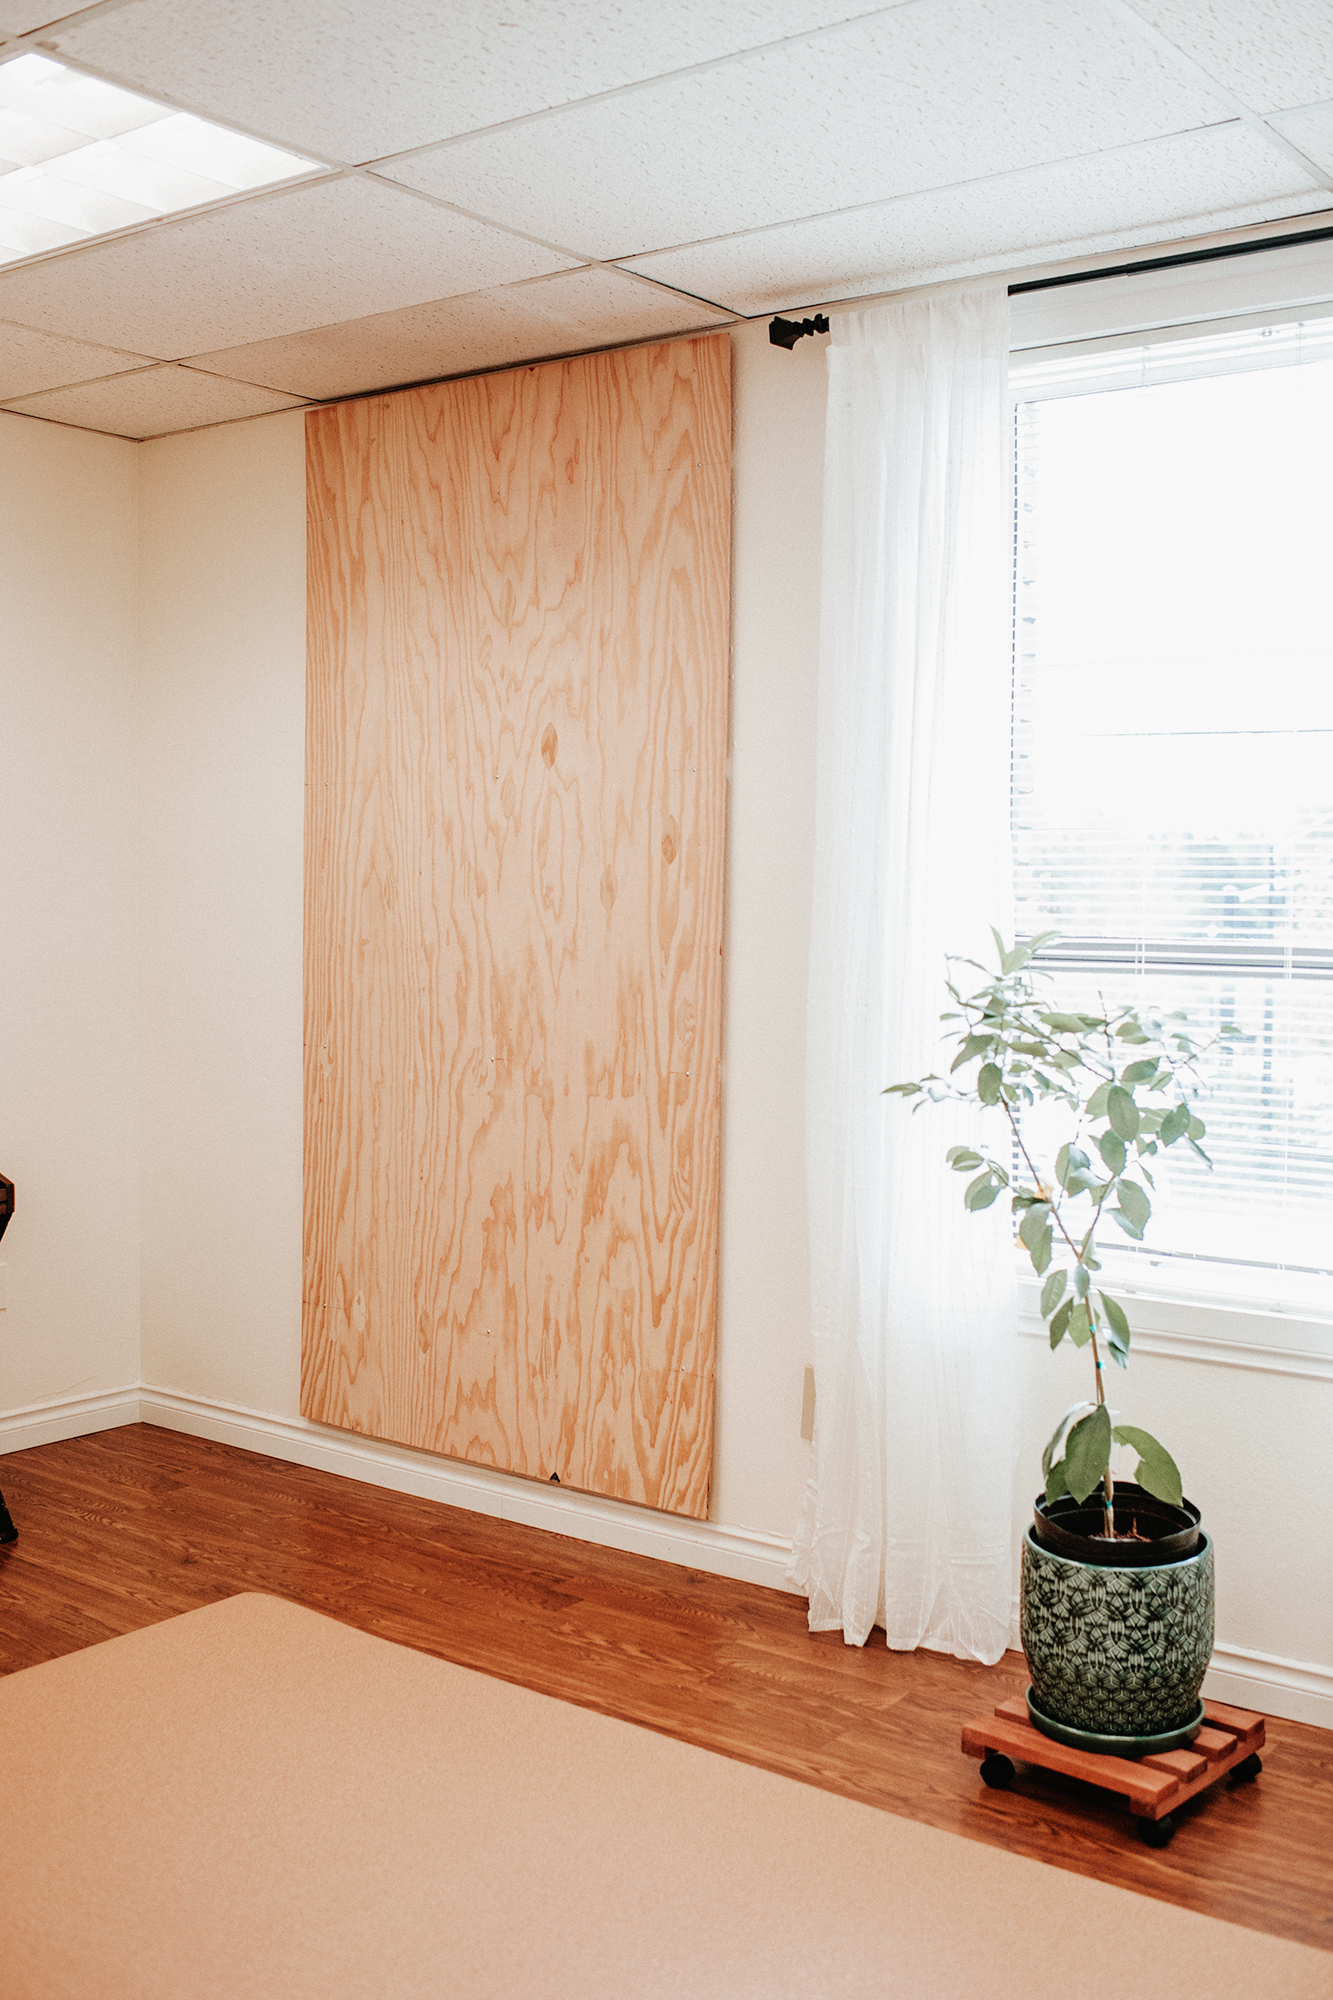
3. Based on our wall area you want covered, once you pick the size of your cork sheet, pick up a sheet of plywood as well. We picked up a 3/8,” 4x8 sheet of smooth surfaced plywood from Home Depot.
For the first cork board we mounted the plywood directly to the wall, with roughly 10 screws (we hit the studs where we were able).
As an alternative method, mount furring strips to the wall first and then mount the board to them. Both methods work. However, we preferred the more finished look of the furring strip method when mounting on a big open wall.
“Tip: Make sure the plywood is stiff enough to not warp.”

After the board is mounted securely in place, proceed to place your cork. We did it several days later actually, while the kids enjoyed a movie with the grandparents. So if you need to, you can split the process in these 2 steps: installing the plywood first, and then at a later time, installing the actual cork board.
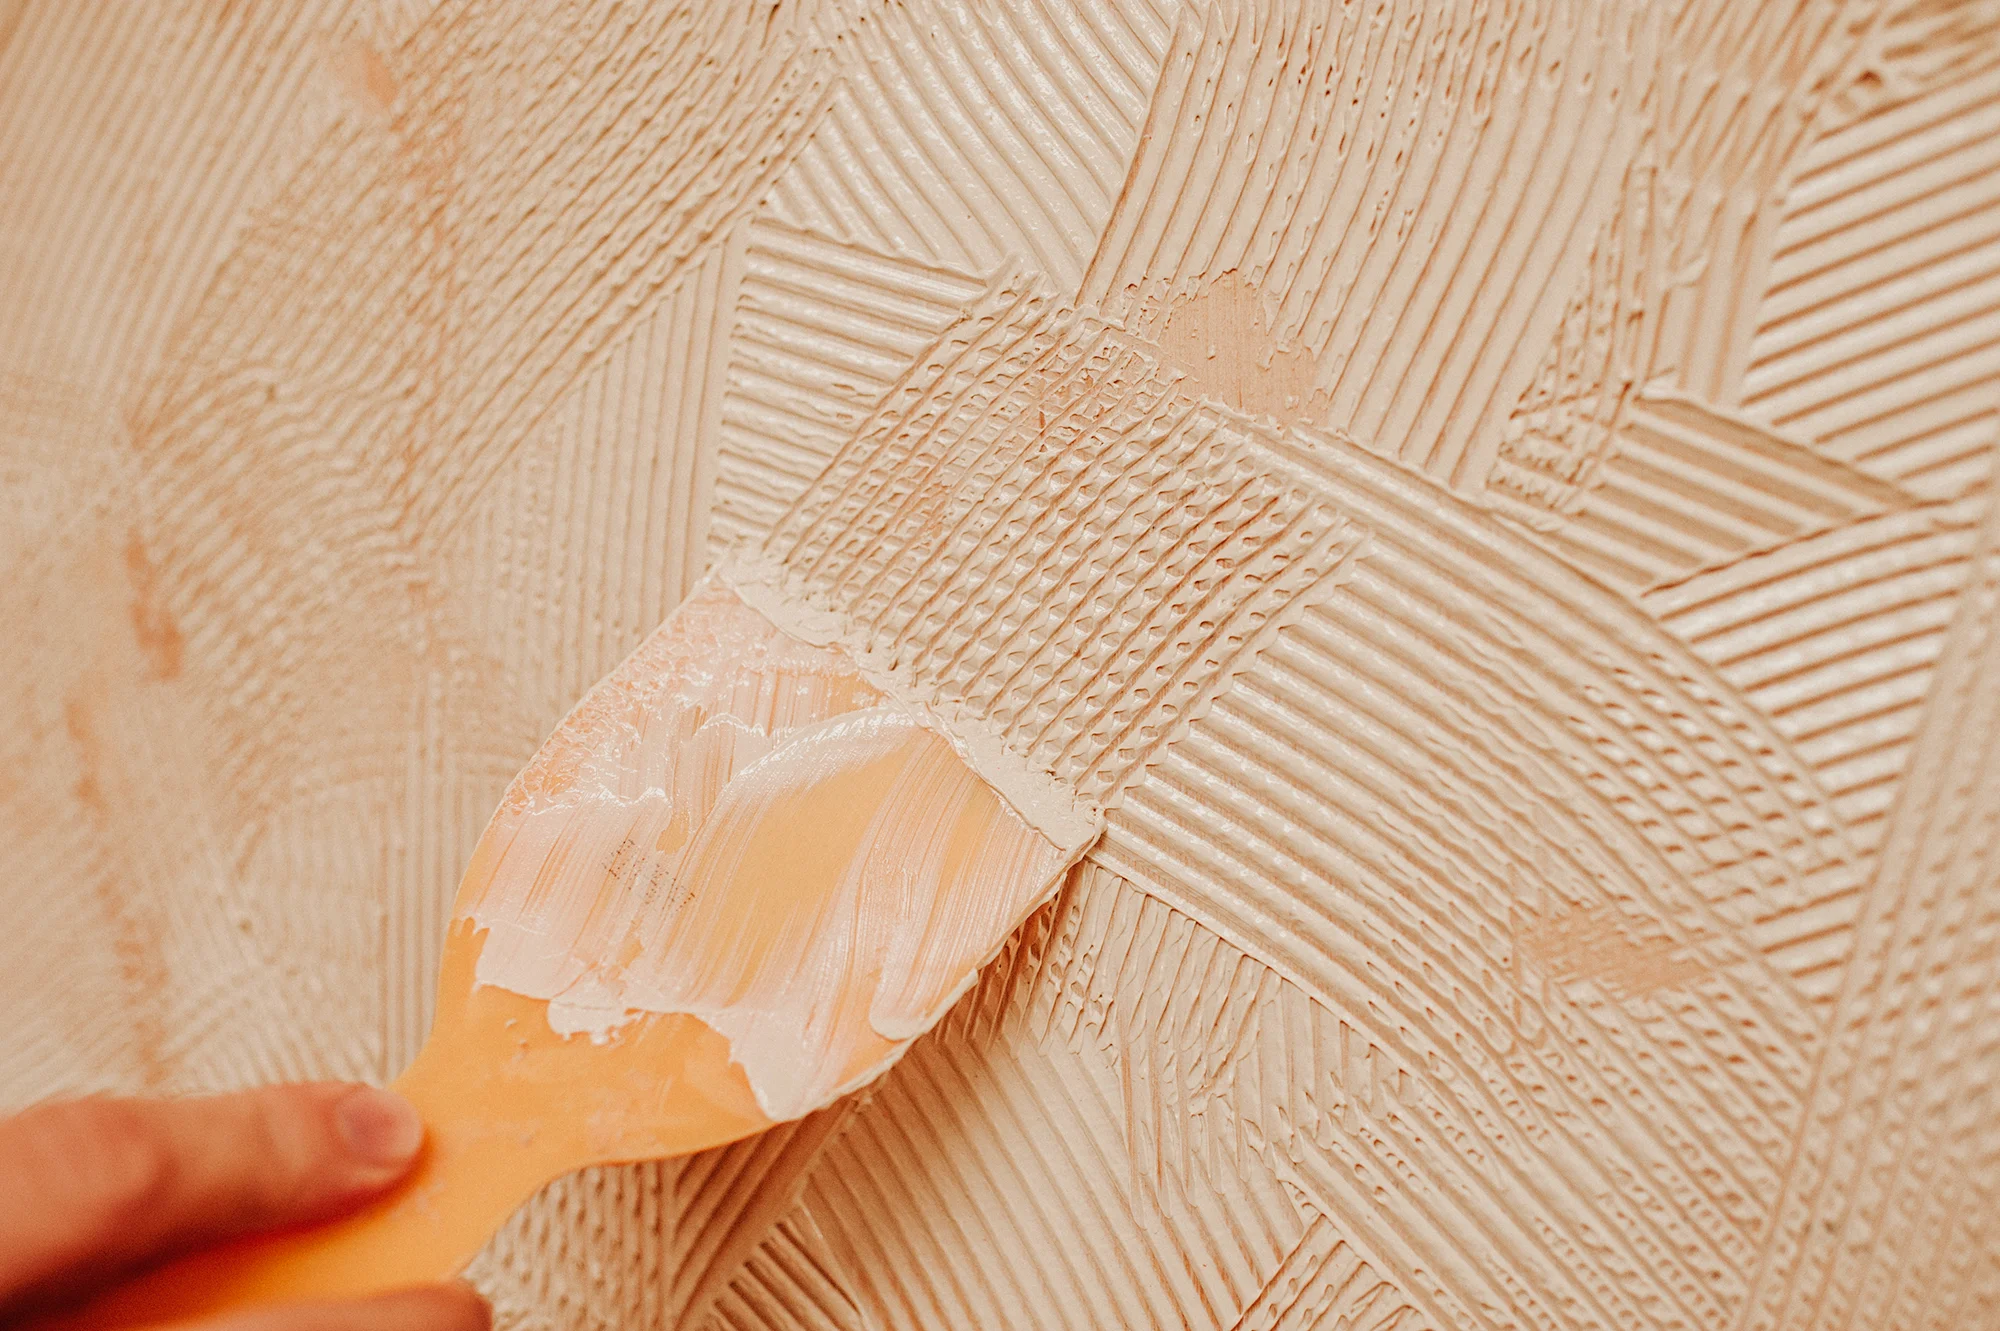
4. We used one -1 quart- container of Henry’s 356 Adhesive for the entire surface.
To spread the adhesive we used a 16” trowel, but it proved to go much faster spreading the glue with a cheap plastic kitchen spatula, and then used a small (plastic, not metal) trowel to texturize the layer of adhesive.
“Tip: It dries dark, so if you get any on the wall, where you might not want it, you could either wash it while still fresh - with damp paper towels, or paint over it later.”

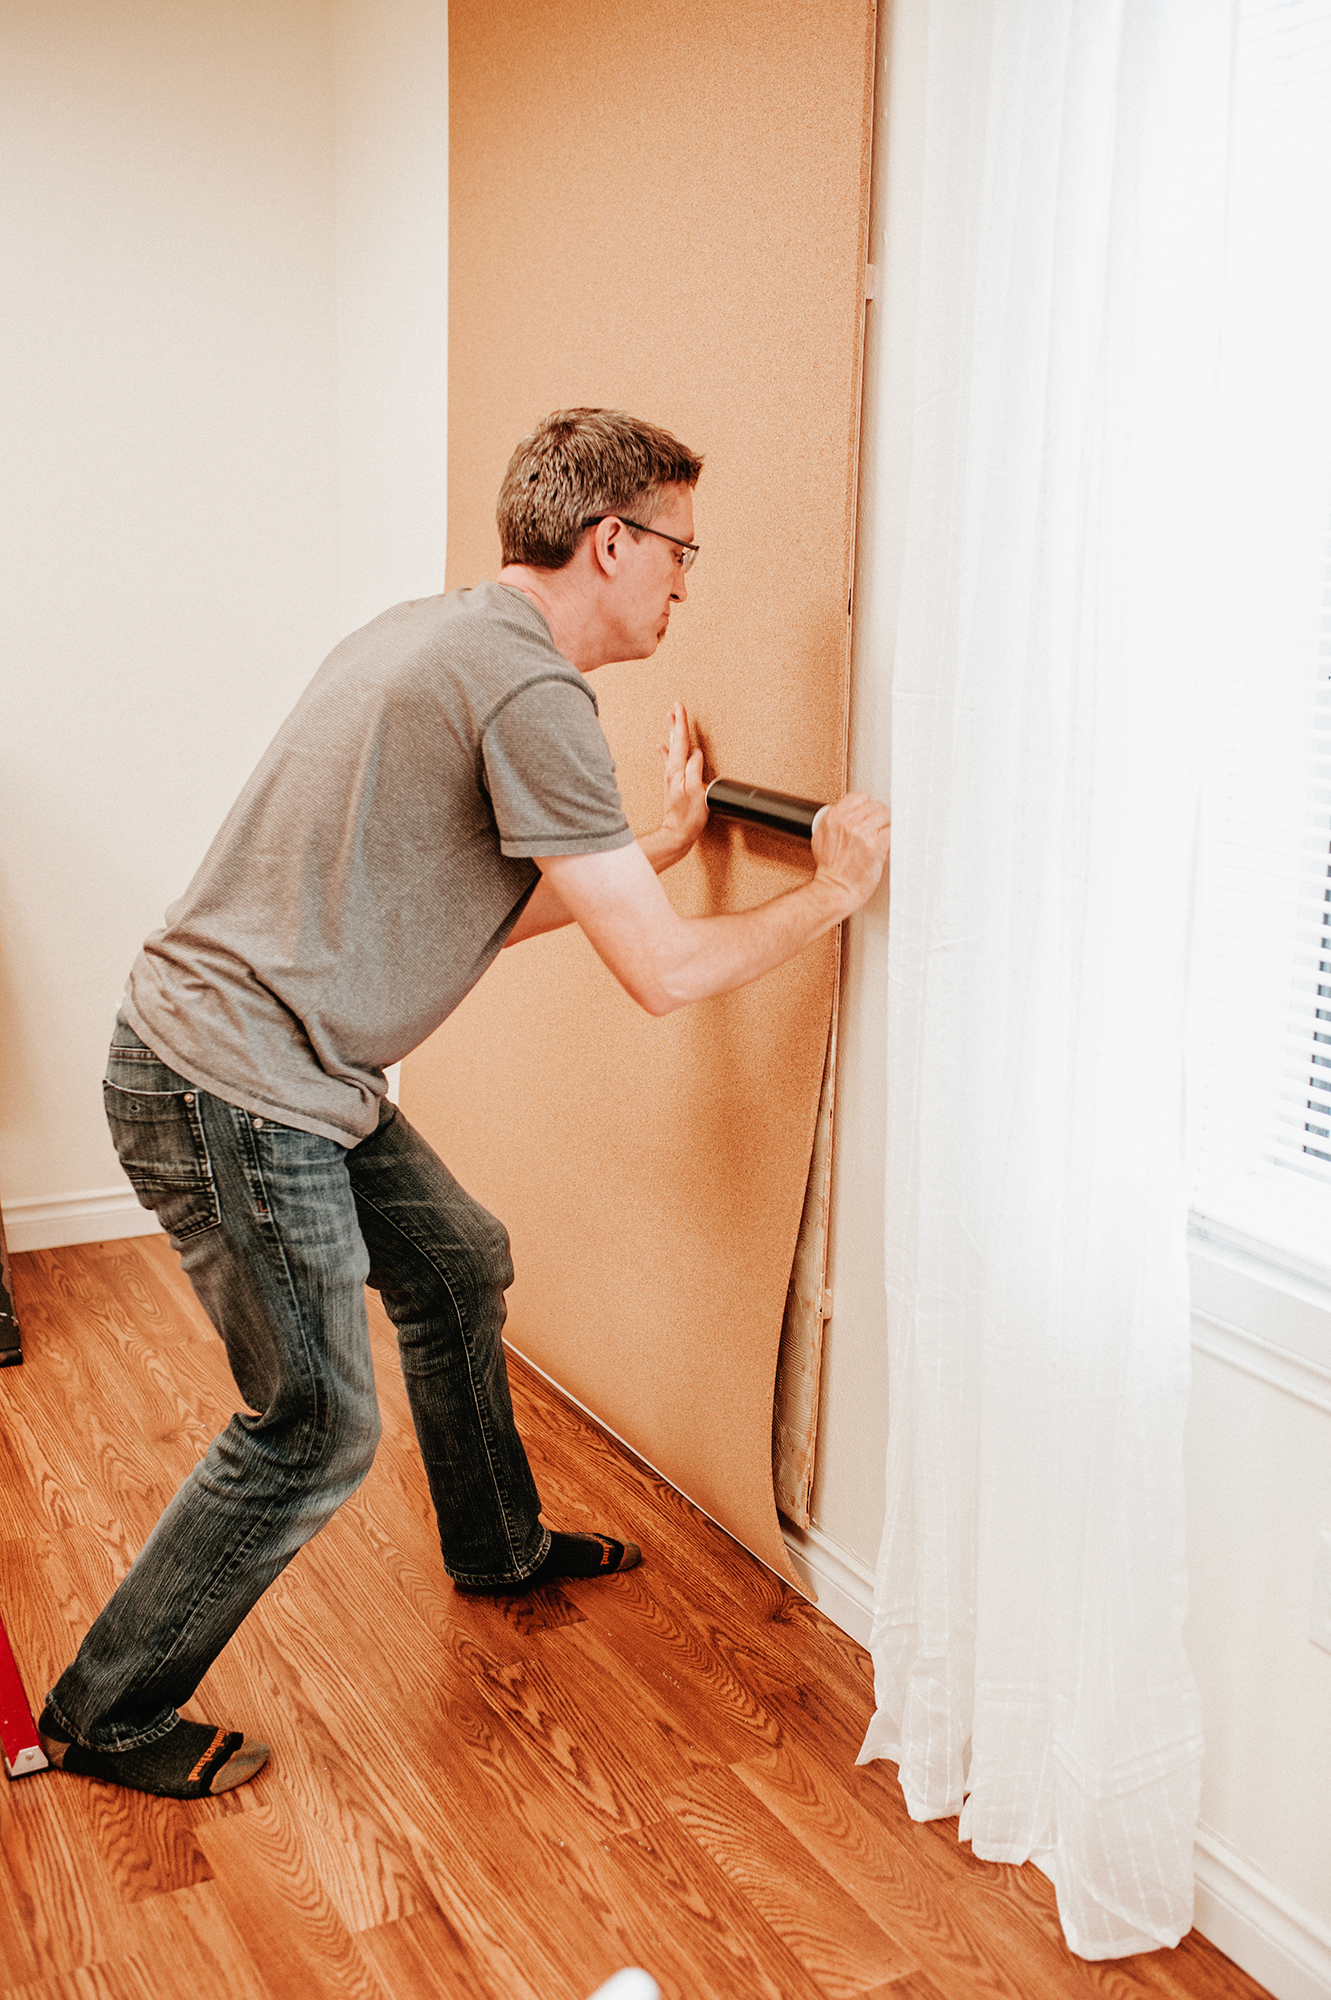
5. After the adhesive has been troweled onto the board we immediately started to apply the cork starting at the top. Getting the sheet up is pretty easy, as long as you have two people doing it... no special tool used to roll it, either. We just used a rolling pin from the kitchen.
“Tip: Initially, the cork seemed to not want to stay down on the board. However, simply keep rolling over and over even after it appears to be completely affixed.”


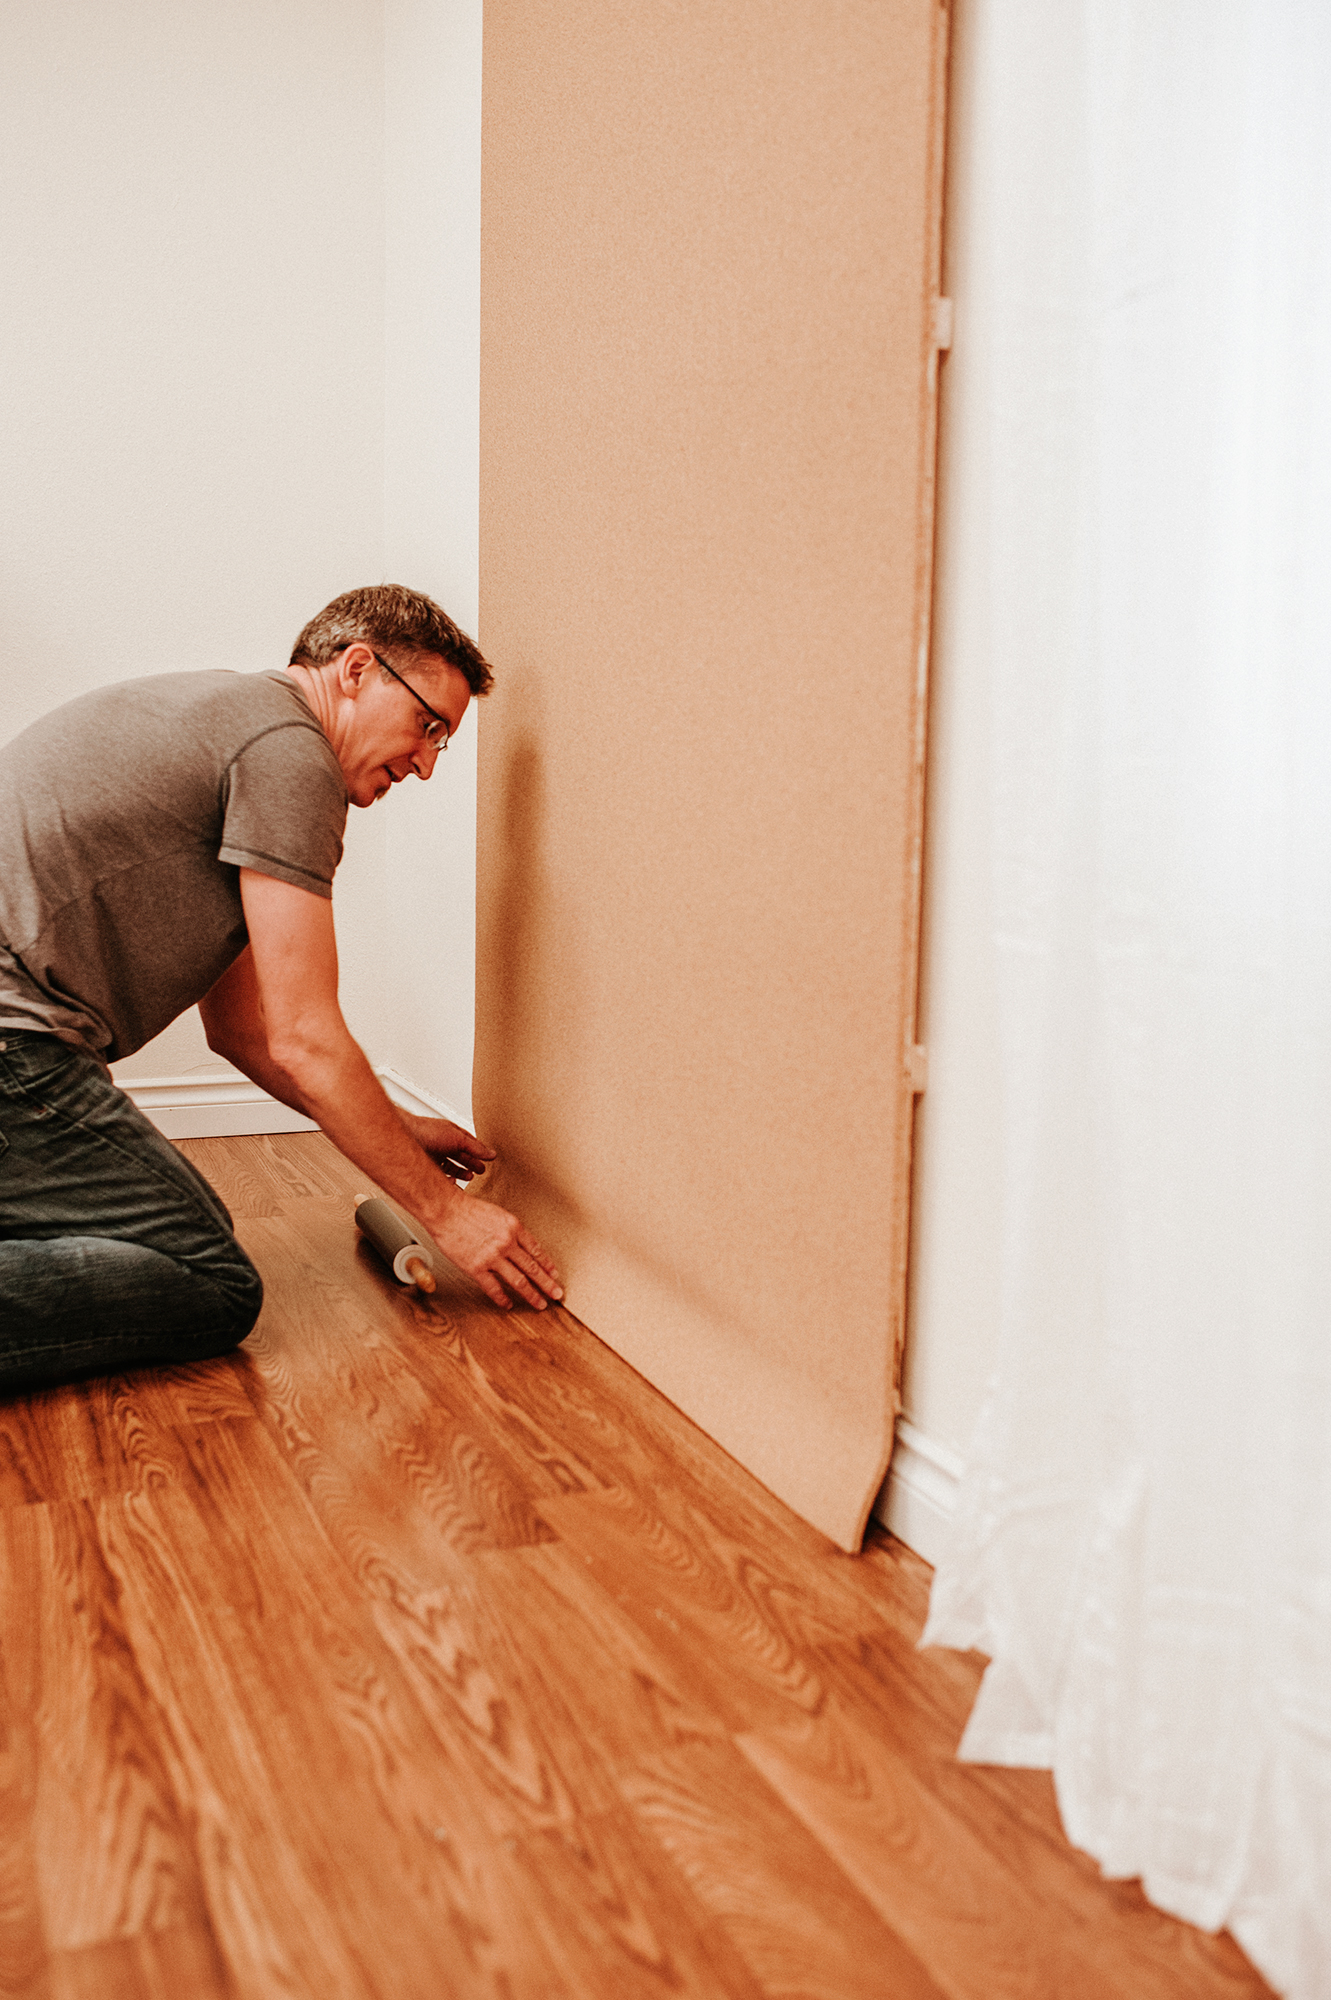
6. If the cork was cut to the same size as the board, there should be no need to trim. However, if there is need for trimming, make sure you have a new, sharp blade!
“Tip: Wait 24 hours before trimming to make sure no shifting occurs.”


7. Finally, fill up that board with your inspirations and aspirations!
Thankful to Paul for getting the info together and writing out the steps. And even more so, for getting the boards installed ;)
If you guys have any further questions on the process, feel free to leave a comment or email, and between Paul and myself we'll give you our best answer, based on our experience with this process.
A few parting thoughts...
As long as you think through and plan your steps ahead of time the process is very simple, and a piece of cake. The satisfaction and benefits of having the board up, waaaay out weigh the time and work it takes to install the board.
Measure - and double check the measurements of the wall area - and get your plywood and cork sheet cut at the proper size. Have all your tools ready - and most importantly have someone ready to lend you a helping hand throughout the process, when necessary! Have fun, and let us know how it went, if you do it! :)
Thank you for stopping by!
For this first cork board we installed the plywood board directly to the wall, before mounting the cork board to it. It still works great. Because the plywood wasn't of the highest quality, you can notice some warping in the board though. In the long run, it is absolutely worth it getting a good piece of plywood.
Over the last month or so, we also hung my picture wall. That was a fun experience that might be worth sharing sometime as well :)