Coffee, Old-School: An Intro to Roasting Your Own
Non-stick pan? Stovetop? You probably have everything you need to start experimenting with green (coffee) beans.

Admittedly, I get hung up on semantics, but I think toasting works better than roasting to describe coffee's transformation from green, farm-raised innocent to bronzed, sophisticated bean of the world we know and love. Roasting basically means to cook in an oven, while toasting expressly means to brown—like how coffee beans turn brown under increased temperature—whether in an oven, with proximity to fire, or through some other kind of radiant heating.
Indeed, caffe tostato is the Italian term for roasted coffee. Okay, it's out of my system. The toasted campaign ends here.
Today's topic is home roasting, with an "R"—a kind of precursor companion to the home blending discussion last time. Like blending, exploring roasting can inspire you to take your coffee craftsmanship further, and create deeper understanding of coffee's fundamentals. "Try this at home," with benefits.
[Corby's note: And with caveats! In my Joy of Coffee, I was and remain leery of home roasting, for reasons I'll put in a note below. But Giorgio's notes are explicit, helpful, and might even convince me to change my mind.]
At first glance, the idea and process of roasting coffee seems simple: apply a certain amount of heat to raw beans for a set amount of time. That's how, over an open fire, westward-pushing pioneers got their coffee ready to brew throughout the 19th century, as did many coffee-consuming American households into the early 20th century. Home roasting as a necessity effectively ended with the advent of high-volume roasters like Hills Brothers and Boyds in the early 1900s. The enterprising Arbuckle Brothers of Pittsburgh had patented a coffee roasting process as early as 1865.
As with so many processes, control and precision get in the way of ease in roasting coffee beans. Maintaining proper heat for the right amount of time is only step one. Cooling--the more nuanced, critical final phase—is where things can get tricky. Remember that food continues to cook when removed from heat. Just-roasted coffee beans are no different.
From a purely functional standpoint, roasting times can range from only a few minutes to many more. As intuition suggests, higher temperatures mean shorter roast times. For me, both ends of the spectrum produce subpar results: avoid slow and low, just as you would fast and hot.
Fast roasting, also called high-yield, rapidly cooks the outside of the bean, leaving the core almost raw. No matter how high the heat, the short roasting time cannot develop the beans' full range of aromatic components and evaporate the naturally occurring moisture. Residual moisture accelerates the staling process, prematurely exposing coffee's less pleasant aromas and flavors. What's more, fast roasting leaves too much chlorogenic acid in the bean, carrying unpleasant, astringent sour notes into the cup.

When it comes to roasting coffee, the middle road is the road best traveled. Professional roasters generally prefer a process involving a rotary drum, in which a gas burner creates radiant heat surrounding the coffee. Time and temperature pairings will vary by roasting company, but a benchmark combination of, say, 12 minutes of roast time and a final temperature of 420 degrees F should allow for full aromatic development and nearly complete water evaporation. A few seconds or degrees in either direction can make a huge difference, because the transformation occurring within the beans increases in force and speed toward the end of the process.
Budding home roasters will be hard pressed to get the consistent results produced by sophisticated, industrial (and expensive) drum-based systems, but there's good news. All the necessary equipment for effective coffee roasting resides in even the most Spartan of kitchens. Non-stick pan? Stovetop? Get ready to roast.
Set the pan on a medium flame and add just enough unroasted beans to cover the bottom. Cover fully with a lid—ideally a clear one, so you can see color changes without removing the cover and lowering temperature at a crucial moment. Vigilance is critical: don't just set it and forget it. To ensure even roasting, keep the coffee moving by gently, continuously shaking the pan.
When you start to hear crackling, open the lid and let the coffee's outer silvery skin escape [Corby's note—here's where the chaff blowback starts]; blow on the coffee to help it along. First, be sure to raise the flame to high to maintain temperature. Replace the lid and return the flame to medium once the skin dissipates.
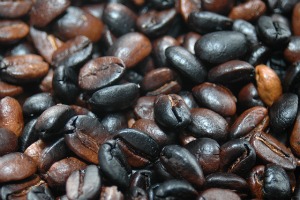
Maintain a close watch on your beans' changing color, tilting the clear lid occasionally to let smoke escape. Keep the heat on until an almond-like hue paints the bean for light roast, milk chocolate for medium roast, and dark chocolate for dark roast.
Finally, the critical last step: cooling. Forget this step, and your medium roast can go dark in just minutes. The moment beans turn the color you want, turn off the flame and immediately transfer them to an uncovered metal container, or one that is covered but not airtight, so gas can escape. If it's not summertime, place the container outside or in front of an open window to properly cool. In warmer conditions, place in the fridge for a few minutes and then let stand at room temperature. Wait a couple of days (I'll explain why in just a moment), grind and enjoy.
I've never tried it myself, but people tell me about using their hot air popcorn poppers as impromptu coffee roasters. As with the pan method, keep a close eye on color, be sure to remove the skins and cool promptly. Side benefit: your next batch of popcorn might just carry notes from your favorite morning cup. (Hold the butter.) [Corby's note: I DID use a popcorn popper, on many occasions, and finally gave up, because the flaky dried chaff, something of the texture of dried bonito flakes, blows and settles everywhere, and you tend to find it months later in crevices you didn't know existed. But at least they don't go rancid, and they can remind you of the home roasting technique you worked to get right.]
If your pan-based experiments produce encouraging results, and if you have the room and a few dollars to spare, you might think seriously about investing in a home roasting machine. You'll appreciate the consistent results and greater control. Machine types and costs vary widely, but generally speaking, quality machines can be had starting at a couple of hundred dollars.
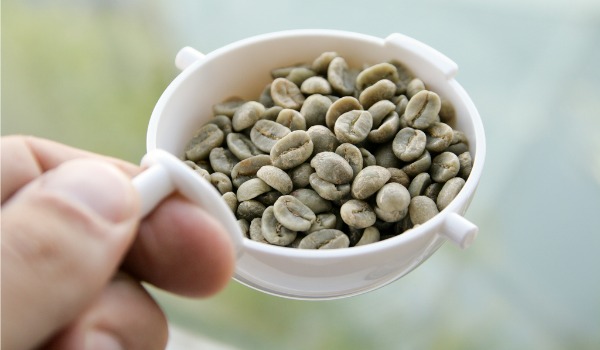
You can find quality unroasted (commonly called "green") coffee online, but I like to see and smell before buying. Avoid beans with a woody aroma—they're too old—or ones with fruity aromas, signaling the presence of fermented beans that will ruin what pours in your cup.
Look for batches of homogeneous color, on the spectrum from green to gray. Avoid yellowish beans at all costs; they could be up to a few years old. And stay away from batches containing even just a few black, white, or shiny green beans.
Whether at home or at an expert facility, roasting has its nuances, so don't be discouraged if your early results aren't right on the mark, or even in the ballpark. Keep at it and you'll be rewarded (or perhaps, gain a new appreciation for your favorite brand). Here are some things to keep in mind:
- Roasting coffee makes smoke—sometimes lots of it, especially with a dark roast—so do it in an open space, or with good ventilation or a fan to properly circulate air.
- Small beans roast faster then large beans, so if you are roasting multiple varieties to ultimately make a blend, be sure to roast only similarly sized beans in one pan.
- Natural (dry process) coffee calls for medium to dark roast and usually has more silverskin than washed (wet process), so pay more attention when removing the skins when roasting "natural" coffee. Washed coffees call for a light to medium roast.
- Wait at least two days after roasting before grinding and preparing your coffee to grind and brew it. This will allow ample time for carbon dioxide produced during roasting to escape from the beans, and for the aromatic components to become fully embeded in the coffee's oil. Jumping the gun will produce a very sour taste and underdeveloped coffee flavors in the cup.
- Grind only the amount of beans you plan to use, and keep the rest whole to preserve flavor.
- Use freshly roasted beans within two weeks.
And please remember, as technical as the talk can get, coffee is a simple pleasure. Whether starting from your artisanal home roast, or snug at your favorite café, warm cup in hand, and enjoy!
Images (top to bottom): asgw/flickr, INeedCoffee / CoffeeHero/flickr