By providing your information, you agree to our Terms of Use and our Privacy Policy. We use vendors that may also process your information to help provide our services. This site is protected by reCAPTCHA Enterprise and the Google Privacy Policy and Terms of Service apply.
Winged Eyeliner Tips For the Perfect Swoop Every Time


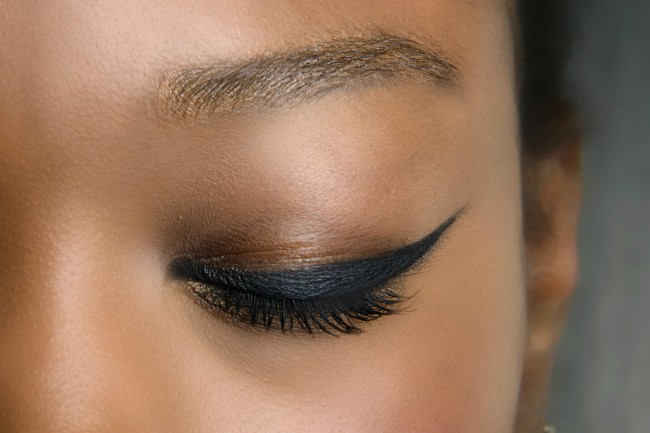
The struggle to create the perfected winged eyeliner is for some an everyday strife. As with all things, practice makes perfect, but if you keep repeating the same mistakes you’re likely never to improve. Since we’re betting your poor eyes are sore from all the do-overs, we’ve got a handful of helpful tips to make sure you can get it right every time you “wing it.”
MORE: Perfect Winged Eyeliner in 3 Steps
Find a straight-edge. Drawing a straight flick, no matter how short, is easier said than done. Never mind the fact that you have to do it twice and in opposite directions. Skip the grief and just use something like a business card or a small piece of scotch tape, with the straight edge following the angle you want your flick to be on the outer corner of your eyes. Trace along the edge with your liner of choice and voila—perfectly straight every time. You can even measure out how long you want it to be on the card so you know each side will be equal in length.
Find the right brush. While liquid liners seem like the easiest and most economical option to getting a bold precise line, they’re slightly more unwieldy than an angled eyeliner brush, since you have less of a brush to work with. If your liquid liner game is just a bit rockier than you’d prefer, try a gel liner with an angled eyeliner brush. Formulas for gel liners are just as beefy—that is to say waterproof and lots of pigment delivery— as liquid liners and you don’t have to get frustrated if your liner pen ever runs dry, midway through lining your eyes.
Anchor yourself. If you think of lining your eyes as calligraphy for the face, proper technique would call for “anchoring” your hand somehow, so you can steady your drawing. The easiest way to do this is to use your ring finger or pinky (depending on if you hold a pen/brush with your first three fingers or four) and rest the tip on your cheekbone—whichever you’re more comfortable with— while your other fingers wield the liner. This allows you to really get in there and draw a solid line without worrying about someone or something bumping your elbow and the whole thing becoming a big old mess.
Line first, edit later. Look, not everybody can ace a straight, cookie-cutter wing free-handed. No shame in that. Lucky for you, there’s a way to cheat this. Line your eyelid with a kohl pencil, extending just the tiniest bit past the outer corner. Don’t worry too much about this part. Now with either a pointed cotton swab or an angled liner brush, go over the pencil liner, essentially smudging it into shape. Pull it slightly past the outer corner of your eyes to get that winged shape. You can do this with your eyelid pulled taut or just looking down at a mirror.
Do it backwards. Seems complicated but can seriously make your life so much easier—just try it and you’ll see. Instead of making one frightening trek across your eyelid with a liner pen, draw the tail starting from the end, moving towards your eye’s outer corner. That way, you have a specific destination instead of the other way around, where you’re kind of just flicking your liner any which way. Once that mark is made, do the same thing for the connecting line—starting from the end of the wing line back towards your eyelid, aiming for the center of your eye, closest to the lash line.
Trace, then line. A foolproof method for getting the lines even and just the way you want them— using an eyeliner brush, use shadow to create your wing shape (it’s easy to erase and do-over this way without having to scrub too hard to remove makeup) and then use a gel/cream liner to go over it. Bonus is that the shadow will hold onto the liner, giving it a bolder look.
By providing your information, you agree to our Terms of Use and our Privacy Policy. We use vendors that may also process your information to help provide our services. This site is protected by reCAPTCHA Enterprise and the Google Privacy Policy and Terms of Service apply.


