A block of redstone is a mineral block equivalent to nine redstone dust. It acts as a permanently powered redstone power source that can be pushed by pistons.
Obtaining[]
Natural generation[]
In each ancient city, 2 blocks of redstone can be found integrated into circuitry within a secret room at the city center.
Breaking[]
A block of redstone can be mined using any pickaxe (unlike redstone ore, which requires an iron pickaxe or better).[1] If mined without a pickaxe, a block of redstone drops nothing.
| Block | Block of Redstone | |
|---|---|---|
| Hardness | 5 | |
| Tool | ||
| Breaking time[A] | ||
| Default | 25 | |
| Wooden | 3.75 | |
| Stone | 1.9 | |
| Iron | 1.25 | |
| Diamond | 0.95 | |
| Netherite | 0.85 | |
| Golden | 0.65 | |
- ↑ Times are for unenchanted tools as wielded by players with no status effects, measured in seconds. For more information, see Breaking § Speed.
Crafting[]
| Ingredients | Crafting recipe |
|---|---|
| Redstone Dust |
Usage[]
A block of redstone can be used as a redstone power source and can be crafted back into redstone dust. It can also be used as storage if the player's inventory is full of redstone dust from mining.
Crafting ingredient[]
Blocks of redstone can be crafted back into redstone dust, and thus provide compact storage for redstone, like other blocks of materials (block of iron, block of gold, etc.).
| Name | Ingredients | Crafting recipe |
|---|---|---|
| Redstone Dust | Block of Redstone |
Redstone component[]

A block of redstone powers dust and repeaters, deactivates attached torches, and activate mechanisms (left) – but does not power adjacent opaque blocks (right).
To place a block of redstone, use the Place Block control.
Blocks of redstone are always active and cannot be turned off. A block of redstone:
- powers any adjacent redstone dust, including above or below, to power level 15
- powers any adjacent redstone comparators or redstone repeaters facing away from the block of redstone to power level 15
- activates any adjacent mechanism components (doors, redstone lamps, etc.), including above or below, with the exception of pistons, which cannot be activated by any power source directly in front of them
Adjacent opaque blocks are not powered.
If a redstone torch is attached to a block of redstone, it deactivates after 1 redstone tick and does not reactivate (which is normal behavior for a redstone torch attached to a powered block).
A block of redstone can be moved by a piston. Water and lava flow around a block of redstone without affecting it.
Sounds[]
| Sound | Subtitles | Source | Description | Resource location | Translation key | Volume | Pitch | Attenuation distance |
|---|---|---|---|---|---|---|---|---|
| Block broken | Blocks | Once the block has broken | block |
subtitles |
1.0 | 1.2 | 16 | |
| Block placed | Blocks | When the block is placed | block |
subtitles |
1.0 | 1.2 | 16 | |
| Block breaking | Blocks | While the block is in the process of being broken | block |
subtitles |
0.25 | 0.75 | 16 | |
| None[sound 1] | Entity-Dependent | Falling on the block with fall damage | block |
None[sound 1] | 0.5 | 1.25 | 16 | |
| Footsteps | Entity-Dependent | Walking on the block | block |
subtitles |
0.15 | 1.5 | 16 |
| Sound | Source | Description | Resource location | Volume | Pitch |
|---|---|---|---|---|---|
| Blocks | Once the block has broken | dig |
1.0 | 1.1-1.2 | |
| Blocks | When the block is placed | use |
1.0 | 1.2-1.25 | |
| Blocks | While the block is in the process of being broken | hit |
0.3 | 0.75 | |
| Players | Falling on the block with fall damage | fall |
0.4 | 1.0 | |
| Players | Walking on the block | step |
0.35 | 1.0 | |
| Players | Jumping from the block | jump |
0.12 | 1.0 | |
| Players | Falling on the block without fall damage | land |
0.22 | 1.0 |
Data values[]
ID[]
| Name | Identifier | Form | Translation key |
|---|---|---|---|
| Block of Redstone | redstone_block |
Block & Item | block.minecraft.redstone_block |
| Name | Identifier | Numeric ID | Form | Item ID[i 1] | Translation key |
|---|---|---|---|---|---|
| Block of Redstone | redstone_block |
152 |
Block & Giveable Item[i 2] | Identical[i 3] | tile.redstone_block.name |
History[]
| Java Edition | |||||
|---|---|---|---|---|---|
1.5{{Extension DPL}}<ul><li>[[Chain|Chain]]<br/>{{about|the block|the enchantment in Minecraft Dungeons|MCD:Chains|the armor tier named chainmail|Armor|the armor material called chainmail|Armor materials}}
{{Block
|image=<gallery>
Chain Axis Y.png | Y-axis
Chain Axis X.png | X-axis
Chain Axis Z.png | Z-axis
</gallery>
| transparent = Yes
| light = No
| tool = Wooden pickaxe
| renewable = Yes
| stackable = Yes (64)
| flammable = No
| lavasusceptible = No
}}
'''Chains''' are metallic decoration [[block]]s.
== Obtaining ==
=== Breaking ===
Chains can be mined using any [[pickaxe]]. If mined without a pickaxe, it drops nothing.
{{breaking row|Chain|Pickaxe|Wood|horizontal=1}}
=== Natural generation ===
Chains generate in [[bastion remnant]]s and sometimes in [[ruined portal]]s that generate in the Nether. They always generate above [[magma cube]] spawners, also found in [[bastion]]s.
Chains can also generate in [[mineshafts]]. They generate on the sides of a wooden bridge (a mid-air corridor) when the distance between the bridge and the highest solid block below it is higher than the distance to the lowest solid block above it. Chains here generate vertically in a pillar between the bridge and the ceiling. The lowest block of the pillar, connecting the chain to the bridge, is always an [[oak fence]].
=== Chest loot ===
{{LootChestItem|chain}}
=== Crafting ===
{{Crafting
|B1=Iron Nugget
|B2=Iron Ingot
|B3=Iron Nugget
|Output=Chain
|type=Building block
}}
== Usage ==
Chains can be used to suspend [[bell]]s, [[hanging sign]]s, or both types of [[lantern]]s (normal lanterns and soul lanterns), as the chain texture connects to the chain of the lantern seamlessly as if it were part of it, and it connects the hanging sign chains together. Chains do not require a supporting block to be placed whether it is on the top, next to it or at the bottom. It can exist completely free-standing in mid air<ref>{{bug|MC-178791}}</ref> and it can be rotated. Chains connect horizontally or vertically, but not across different orientations (so a chain with N orientation does not connect to a chain with E orientation in the adjacent block).
Horizontal chains one block above a surface may be walked over. Horizontal chains two blocks above a surface prevent players from traveling past them. Vertical chains block travel if targeted directly, but may be skirted.
Precision is required, but chains can be walked on, allowing for inconspicuous, although somewhat costly, bridges.
Chains can be pushed by [[piston]]s without being broken.
=== Crafting ingredient ===
{{crafting usage}}
== Sounds ==
{{Sound table/Block/Chain}}
== Data values ==
=== ID ===
{{edition|java}}:
{{ID table
|edition=java
|showforms=y
|generatetranslationkeys=y
|displayname=Chain
|spritetype=block
|nameid=chain
|foot=1}}
{{edition|bedrock}}:
{{ID table
|edition=bedrock
|firstcolumnname=Chain
|shownumericids=y
|showforms=y
|generatetranslationkeys=y
|displayname=Block
|spritename=chain
|spritetype=block
|nameid=chain
|id=541
|form=block
|itemform=item.chain}}
{{ID table
|displayname=Item
|spritename=chain
|spritetype=item
|nameid=chain
|id=619
|form=item
|translationkey=tile.chain.name
|foot=1}}
=== Block states ===
{{see also|Block states}}
{{/BS}}
== History ==
{{History|java}}
{{History||1.16|snap=20w16a|[[File:Chain (item) JE1 BE1.png|32px]] [[File:Chain Axis Y JE1 BE1.png|32px]] Added chains.
|Chains generate in the newly added [[bastion remnant]]s, and can be found in their [[chest]]s.
|Chains currently use the generic metal [[block]] [[sound]]s.}}
{{History|||snap=20w17a|Unique [[sound]]s have been added for chains.}}
{{History|||snap=20w18a|Chains can now be [[waterlogged]].}}
{{History||1.16.2|snap=20w30a|The chance of finding chains in bastion remnant chests is decreased from 31.5% to 24.4%.}}
{{History|||snap=Pre-release 1|[[File:Chain Axis X JE1 BE1.png|32px]] [[File:Chain Axis Z JE1 BE1.png|32px]] Chains can now be placed in all orientations.}}
{{History||1.17|snap=21w07a|Chains can now generate in [[mineshaft]]s.}}
{{History|||snap=21w13a|[[File:Chain (UD) JE2.png|32px]] [[File:Chain (NS) JE2.png|32px]] [[File:Chain (EW) JE2.png|32px]] The model of chains has been changed so that the backside texture is mirrored.}}
{{History||1.20<br>(Experimental)|link=1.19.3|snap=22w42a|Chains are now used to craft [[hanging sign]]s.}}
{{History|bedrock}}
{{History||1.16.0|snap=beta 1.16.0.57|[[File:Chain_(item)_JE1_BE1.png|32px]] [[File:Chain Axis Y JE1 BE1.png|32px]] Added chains.}}
{{History|||snap=beta 1.16.0.63|Unique [[sound]]s have been added for chains.}}
{{History||1.16.100|snap=beta 1.16.100.54|[[File:Chain Axis X JE1 BE1.png|32px]] [[File:Chain Axis Z JE1 BE1.png|32px]] Chains can now be placed in all orientations.}}
{{History||1.20.0<br>(Experimental)|link=Bedrock Edition 1.19.50|snap=beta 1.19.50.21|Chains are now used to craft [[hanging sign]]s.}}
{{History|foot}}
== Issues ==
{{issue list}}
== Trivia ==
* A vertical chain, being a solid, but not a full [[block]], allows for many sizes of [[mob]]s and [[player]]s to pass alongside each piece horizontally.
* Despite its name, it cannot be [[crafted]] into [[chainmail armor]].<ref>{{bug|MC-178979}} - Invalid</ref>
* Chains do not stick together when moved by pistons, regardless of orientation.
== Gallery ==
<gallery>
Chained Stone Bricks.jpg|Chains and stone bricks.
Barbell.jpg|Chains and chiseled blackstone.
Barbell Evoker.jpg|An evoker lifting weights.
Chain with Lantern.png|A [[lantern]] hanging from a chain.
Chain with Spawner.png|A [[spawner]] hanging with a chain found in the bastion remnants.
</gallery>
== References ==
{{reflist}}
{{blocks|Building}}
{{Items}}
[[Category:Manufactured blocks]]
[[Category:Generated structure blocks]]
[[Category:Nether blocks]]
[[de:Kette]]
[[es:Cadena]]
[[fr:Chaîne]]
[[ja:鎖]]
[[ko:사슬]]
[[pl:Łańcuch]]
[[pt:Corrente]]
[[ru:Цепь]]
[[zh:锁链]]</li><li>[[Bone|Bone]]<br/>{{about|the item|the block|Bone Block|other uses|Bone (disambiguation)}}
{{Item
| image = Bone.png
| renewable = Yes
| stackable = Yes (64)
}}
A '''bone''' is an [[item]] primarily obtained from [[skeleton]]s and similar mobs. It can be crafted into [[Bone Meal|bone meal]] or used to tame wild [[Wolf|wolves]].
== Obtaining ==
=== Chest loot ===
{{LootChestItem|bone}}
=== Mob loot ===
Skeletons, [[wither skeleton]]s, [[skeleton horse]]s, and [[stray]]s may drop 0–2 bones upon death. The maximum drop is increased by 1 per level of Looting, for a maximum of 0-5 bones with Looting III.
{{IN|bedrock}}, [[salmon]], [[cod]], [[pufferfish]], and [[tropical fish]] have 25% chance to drop 1-2 bones upon death. The maximum drop is increased by 1 to 2 per level of Looting, for a maximum of 2-8 bones with Looting III.
Salmon (small and medium size) have 25% chance to drop 1 bone upon death, The maximum drop is increased by 1 to 2 per level of [[Looting]], for a maximum of 2-7 bones with Looting III. The chance of dropping bones increases by 1% per looting level, so with Looting III there is up to a 28% chance of bones dropping.
=== Fishing ===
Bones can also be obtained by [[fishing]] as part of the junk category. The best chance of catching a bone is achieved without the [[Luck of the Sea]] enchantment, yielding a 1.1% chance.
== Usage ==
=== Helmet ===
[[File:Steve wearing Bone.png|thumb|right|75px]]
[[File:Alex wearing Bone.png|thumb|right|75px]]
While a bone cannot be equipped in the head slot in Survival mode, equipping it using commands causes it to appear in the player's mouth.
=== Taming ===
Using a bone on a wild [[wolf]] has a {{frac|1|3}} chance of [[taming]] it. Bones cannot tame a hostile wolf or a wolf that has already been tamed. However, bones can be used to attract the attention of the tamed ones.
=== Crafting ingredient ===
A bone can be crafted into 3 bone meal.
{{crafting usage}}
== Achievements ==
{{load achievements|Leader of the pack}}
== Advancements ==
{{load advancements|Best Friends Forever}}
== Data values ==
=== ID ===
{{edition|java}}:
{{ID table
|edition=java
|showforms=y
|generatetranslationkeys=y
|displayname=Bone
|spritetype=item
|nameid=bone
|form=item
|foot=1}}
{{edition|bedrock}}:
{{ID table
|edition=bedrock
|shownumericids=y
|showforms=y
|notshowbeitemforms=y
|generatetranslationkeys=y
|displayname=Bone
|spritetype=item
|nameid=bone
|id=415
|form=item
|foot=1}}
== History ==
{{History|java beta}}
{{History||1.2|[[File:Bone JE1 BE1.png|32px]] Added bones.
|Bones can be [[crafting|crafted]] into [[bone meal]].}}
{{History||1.4|Bones can now be used to tame [[wolves]].}}
{{History|java}}
{{History||1.3.1|snap=12w21a|Bones can now be found within [[desert temple]]s, allowing bones to be obtainable on Peaceful difficulty.}}
{{History||1.4.2|snap=12w36a|Added [[wither skeleton]]s, which has a chance to [[drops|drop]] bones when killed.}}
{{History||1.6.1|snap=13w16a|Added [[skeleton horse]]s, which drop bones when killed.}}
{{History||1.7.2|snap=13w36a|Bones can now be more easily obtained in Peaceful difficulty by [[fishing]]. Although, they are considered a "junk" [[item]].}}
{{History||1.9|snap=15w44a|The average yield of bones in [[desert temple]]s has been slightly decreased.
|Bones can now be found in [[dungeon]] [[chest]]s.}}
{{History||1.10|snap=16w20a|Added [[stray]]s, which [[drops|drop]] bones when killed.}}
{{History||1.11|snap=16w39a|Bones can now found in the new [[woodland mansion]] chests.}}
{{History||1.13|snap=17w47a|Prior to [[1.13/Flattening|''The Flattening'']], this [[item]]'s numeral ID was 352.}}
{{History||1.14|snap=18w43a|[[File:Bone JE2.png|32px]] The texture of bones has now been changed.}}
{{History|||snap=18w44a|[[File:Bone JE3 BE2.png|32px]] The texture of bones has now been slightly changed.}}
{{History||1.19|snap=Deep Dark Experimental Snapshot 1|Bones now generate in [[ancient city]] chests.}}
{{History|pocket alpha}}
{{History||v0.2.0|[[File:Bone JE1 BE1.png|32px]] Added bones. They are currently unobtainable and serve no purpose.}}
{{History||v0.3.3|Added skeletons, which drop bones when they die.
|Bones can now be used to craft [[bone meal]].}}
{{History||v0.5.0|Bones can now be obtained after activating the [[nether reactor]].}}
{{History||v0.9.0|snap=build 1|Added bones to [[Creative]] mode.}}
{{History||v0.11.0|snap=build 1|Bones can now be more easily obtained in Peaceful difficulty by [[fishing]]. Although, they are considered a "junk" [[item]].}}
{{History||v0.12.1|snap=build 1|Added [[wither skeleton]]s, which have a chance to [[drops|drop]] bones when killed.
|Bones are no longer available from the [[nether reactor]].}}
{{History||v0.13.0|snap=build 1|Bones can now be found inside of the [[desert temple]] hidden [[chest]] room.}}
{{History||v0.15.0|snap=build 1|Added [[stray]]s and [[skeleton horse]]s, which drop bones when killed.
|Bones can now be found in [[jungle temple]] [[chest]]s.}}
{{History|pocket}}
{{History||1.1.0|snap=alpha 1.1.0.0|Bone can now be found inside [[woodland mansion]] chests.}}
{{History|bedrock}}
{{History||1.4.0|snap=beta 1.2.14.2|Bones now [[drops|drop]] from [[fish]] mobs.}}
{{History||1.10.0|snap=beta 1.10.0.3|[[File:Bone JE3 BE2.png|32px]] The texture of bones has now been changed.}}
{{History|console}}
{{History||xbox=TU1|xbone=CU1|ps=1.00|wiiu=Patch 1|[[File:Bone JE1 BE1.png|32px]] Added bones.}}
{{History||xbox=TU5|Bones can be found in the Miscellaneous tab in the [[Creative inventory]].}}
{{History||xbox=TU12|Moved bones to the Materials tab in the Creative inventory.}}
{{History||xbox=TU19|xbone=CU7|ps=1.12|wiiu=Patch 1|Added [[wither skeleton]]s, which have a chance to [[drops|drop]] bones when killed.}}
{{History||xbox=TU31|xbone=CU19|ps=1.22|wiiu=Patch 3|Bones can now be obtained from [[fishing]].}}
{{History||xbox=TU46|xbone=CU36|ps=1.38|wiiu=Patch 15|Added [[stray]]s and [[skeleton horse]]s, which drop bones when killed.}}
{{History||xbox=none|xbone=none|ps=1.90|wiiu=none|switch=none|[[File:Bone JE3 BE2.png|32px]] The texture of bones has now been changed.}}
{{History|new 3ds}}
{{History||0.1.0|[[File:Bone JE1 BE1.png|32px]] Added bones.}}
{{History|foot}}
== Issues ==
{{issue list}}
== See also ==
* [[Bone meal]]
* [[Wolf]]
* [[Dyeing]]
{{Items}}
[[Category:Renewable resources]]
[[de:Knochen]]
[[es:Hueso]]
[[fr:Os]]
[[hu:Csont]]
[[it:Osso]]
[[ja:骨]]
[[ko:뼈]]
[[nl:Bot]]
[[pl:Kość]]
[[pt:Osso]]
[[ru:Кость]]
[[th:กระดูก]]
[[tr:Kemik]]
[[uk:Кістка]]
[[zh:骨头]]</li></ul> |
13w01a | ||||
| The unused locked chest texture has been changed to have a block of redstone texture on the side, due to the redstone block taking up its texture space. | |||||
1.8{{Extension DPL}}<ul><li>[[Suspicious Stew|Suspicious Stew]]<br/>{{For|the block|Suspicious Sand}}
{{Item
| title = Suspicious Stew
| heals = {{hunger|6}}
| renewable = Yes
| stackable = No
|effects=See {{slink||Food}}
}}
'''Suspicious stew''' is a [[food]] item that can give the [[player]] a [[effect|status effect]] that depends on the [[flower]] used to craft it.
== Obtaining ==
{{IN|Bedrock}}, suspicious stew is the only food item in the game that can be obtained from the [[Creative]] inventory only by searching. However, it can be crafted and can also be found in [[shipwreck]] chests. Suspicious stew can be given with [[commands]] like {{cmd|give}}, but {{in|java}}, unless NBT data like that listed in the data values section is included, consuming it has no effect and still restores the same hunger points as a normal suspicious stew. In [[Bedrock Edition]], giving the player a suspicious stew through commands causes the stew to choose an allowable status effect at random.
=== Harvesting ===
Suspicious stew can be obtained by "milking" a brown [[mooshroom]] with a [[bowl]] after using a small flower on it. When a small flower is used on a brown mooshroom, the brown mooshrom produces a suspicious stew related to that small flower the next time it is milked with a bowl. Red mooshrooms do not produce suspicious stew. The brown mooshroom returns to producing [[mushroom stew]] until fed another small flower.
=== Crafting ===
{{Crafting
|Red Mushroom
|Brown Mushroom
|Bowl
|Any Flower
|Output=Suspicious Stew
|shapeless=true
|type=Foodstuff
}}
Suspicious stew is not listed in the recipe book. However, it can be quickly assembled by clicking the [[Mushroom Stew|mushroom stew]] recipe and adding one small flower to it.
=== Chest loot ===
{{LootChestItem|suspicious-stew}}
=== Mob loot ===
After being given a flower, a brown [[mooshroom]] can be "milked" for suspicious stew by {{control|using}} a [[bowl]] on it. The flower type determines the stew's effect using the same rule as a crafted stew. Milking a red mooshroom after feeding it a flower does not yield a suspicious stew specific to that flower.
=== Trading ===
{{IN|java}}, expert-level farmer [[villager]]s can offer either 1 or 2 suspicious stew trades, each stew for one [[emerald]].
{{IN|bedrock}}, expert-level farmer villager offers to sell suspicious stew for one emerald as well.
The [[trading]] interface does not indicate the type of suspicious stew being sold, but each trade entry consistently yields the same type of stew, so the player can remember or make a note of the types offered by a given villager, such as "this villager's first stew gives [[blindness]], and their second entry gives saturation".
== Usage ==
=== Food ===
{{see also|Tutorials/Hunger management}}
To eat suspicious stew, press and hold {{control|use}} while it is selected in the hotbar. Eating one restores {{hunger|6}} hunger and 7.2 hunger [[Hunger#Mechanics|saturation]] and gives a few seconds of a [[effect|status effect]] that varies depending on which flower was used to craft it. The effect is not displayed in the tooltip, texture, etc., meaning that the player cannot know in advance what the effect is without knowing which flower was used.
{{/Effects}}
The [[bowl]] is emptied and returned to the player after the suspicious stew has been eaten, and can be re-used to craft more stews. Unlike most foods, suspicious stew can be eaten even if the player's hunger bar is full.
The Saturation effect effectively makes those two stews a superfood: In those 6 or 7 ticks it can restore up to 6(7) hunger and 12(14) saturation points ''on top of'' their food value, for a total of at least {{hunger|12}} hunger, and effectively maximizing saturation. This is the largest amount of hunger and saturation the player can get from a single food item. Regeneration can restore up to {{Health|3}} health, and Poison or Wither can inflict up to {{Health|4}} damage.
Consuming suspicious stew is the only way to obtain the Saturation and Blindness effects in vanilla ''Minecraft'' without the use of commands.
== Sounds ==
=== Generic ===
{{Sound table/Entity/Food}}
=== Unique ===
{{edition|java}}:
{{Sound table
|sound=Mooshroom eat1.ogg
|sound2=Mooshroom eat2.ogg
|sound3=Mooshroom eat3.ogg
|sound4=Mooshroom eat4.ogg
|subtitle=Mooshroom eats
|source=neutral
|description=Plays when a brown mooshroom is fed a flower.
|id=entity.mooshroom.eat
|translationkey=subtitles.entity.mooshroom.eat
|volume=2.0
|pitch=''varies'' <ref group=sound>Can be 1.0, 0.95, or 1.05 for each sound</ref>
|distance=16}}
{{Sound table
|sound=Mooshroom milk1.ogg
|sound2=Mooshroom milk2.ogg
|sound3=Mooshroom milk3.ogg
|subtitle=Mooshroom gets milked suspiciously
|source=neutral
|description=Plays when a brown mooshroom is milked with a bowl after being fed a flower.
|id=entity.mooshroom.suspicious_milk
|translationkey=subtitles.entity.mooshroom.suspicious_milk
|volume=1.0
|pitch=''varies'' <ref group=sound>Can be 1.0, 0.9, or 1.1 for each sound</ref>
|distance=16
|foot=1}}
{{edition|bedrock}}:
{{Sound table
|type=bedrock
|sound=Mooshroom eat1.ogg
|sound2=Mooshroom eat2.ogg
|sound3=Mooshroom eat3.ogg
|sound4=Mooshroom eat4.ogg
|subtitle=Mooshroom eats
|source=Friendly Creatures
|description=When a brown mooshroom is fed a flower
|id=mob.mooshroom.eat
|volume=1.0/0.95/1.05
|pitch=0.8-1.2}}
{{Sound table
|sound=Mooshroom milk1.ogg
|sound2=Mooshroom milk2.ogg
|sound3=Mooshroom milk3.ogg
|subtitle=Mooshroom gets milked
|source=Friendly Creatures
|description=When a mooshroom is milked with a bowl
|id=mob.mooshroom.suspicious_milk
|volume=1.0/0.9/1.1
|pitch=1.0
|foot=1}}
== Data values ==
=== ID ===
{{edition|java}}:
{{ID table
|edition=java
|showforms=y
|generatetranslationkeys=y
|displayname=Suspicious Stew
|spritetype=item
|nameid=suspicious_stew
|form=item
|foot=1}}
{{edition|bedrock}}:
{{ID table
|edition=bedrock
|shownumericids=y
|showforms=y
|notshowbeitemforms=y
|generatetranslationkeys=y
|displayname=Suspicious Stew
|spritetype=item
|nameid=suspicious_stew
|id=590
|form=item
|foot=1}}
=== Item data ===
{{IN|je}}, suspicious stew uses the following NBT data:
<div class="treeview">
* {{nbt|compound|tag}}: The item's '''tag''' tag.
{{:Player.dat format/Suspicious Stew}}
</div>
=== Metadata ===
{{IN|be}}, suspicious stew uses the following data values:
{{dvt|spritetype=item|sprite=suspicious-stew|{{EffectLink|Night Vision}} from {{BlockLink|Poppy}}}}
{{dvt|sprite=suspicious-stew|{{EffectLink|Jump Boost}}}}
{{dvt|sprite=suspicious-stew|{{EffectLink|Weakness}}}}
{{dvt|sprite=suspicious-stew|{{EffectLink|Blindness}}}}
{{dvt|sprite=suspicious-stew|{{EffectLink|Poison}}}}
{{dvt|sprite=suspicious-stew|{{EffectLink|Saturation}} from {{BlockLink|Dandelion}}}}
{{dvt|sprite=suspicious-stew|{{EffectLink|Saturation}} from {{BlockLink|Blue Orchid}}}}
{{dvt|spritetype=item|sprite=suspicious-stew|{{EffectLink|Fire Resistance}}}}
{{dvt|sprite=suspicious-stew|{{EffectLink|Regeneration}}}}
{{dvt|sprite=suspicious-stew|{{EffectLink|Wither}}}}
{{dvt|sprite=suspicious-stew|{{EffectLink|Night Vision}} from {{BlockLink|Torchflower}}|foot=1}}
== Achievements ==
{{load achievements|Time for Stew}}
== Advancements ==
{{load advancements|A Furious Cocktail;How Did We Get Here;Husbandry;A Balanced Diet}}
== History ==
{{History|java}}
{{History||1.14|snap=18w43a|[[File:Suspicious Stew JE1 BE1.png|32px]] Added suspicious stew.
|Suspicious stew is not obtainable in the [[Creative inventory]].}}
{{History|||snap=19w08a|Suspicious stew can be obtained by milking brown [[mooshroom]]s.}}
{{History|||snap=19w11a|[[Trading]] has been changed, expert-level farmer villagers now sell suspicious stew for an [[emerald]].}}
{{History||1.14.4|snap=Pre-Release 1|Suspicious stew made from [[poppies]] now gives [[Night Vision]] to the [[player]] instead of [[Speed]].}}
{{History||1.16|snap=Pre-release 1|Mooshrooms can now be milked for suspicious stew in Creative mode.<ref>{{bug|MC-90969}}</ref>}}
{{History||1.17|snap=21w13a|Suspicious stew can now be eaten even if the player is at full [[hunger]].}}
{{History||1.19|snap=22w13a|Suspicious stew may now be found in [[ancient city]] [[chest]]s.}}
{{History||1.19.3|snap=22w45a|Suspicious stew is now available in the [[Creative]] [[inventory]].}}
{{History||1.20<br>(Experimental)|link=1.19.4|snap=23w07a|Suspicious stew now drops when brushing [[suspicious sand]] in [[desert well]]s.}}
{{History|||snap=1.19.4-pre1|[[Torchflower]]s can now be used to make suspicious stew.}}
{{History||1.20|snap=23w12a|The probability for the suspicious stew to generate in the [[suspicious sand]] in [[desert well]] has been changed from 1/7 to 1/8.}}
{{History|bedrock}}
{{History||1.13.0|snap=beta 1.13.0.9|[[File:Suspicious Stew JE1 BE1.png|32px]] Added suspicious stew.
|Suspicious stew is not obtainable in the Creative inventory.}}
{{History|||snap=beta 1.13.0.15|Master-level farmer [[villager]]s can now [[trading|sell]] suspicious stew.}}
{{History||1.16.0|snap=beta 1.16.0.57|[[Trading]] has been changed, expert-level farmer villagers now sell suspicious stew for an [[emerald]].}}
{{History||1.20.0<br>(Experimental)|link=Bedrock Edition 1.19.70|snap=beta 1.19.70.23|Suspicious stew now drops when brushing [[suspicious sand]] in [[desert well]]s.}}
{{History||1.20.10|Added one type of suspicious stew to the Items tab in the Creative inventory.}}
{{History||1.20.30|snap=beta 1.20.20.20|Suspicious stew can no longer be found in the Creative inventory.}}
{{History|foot}}
== Issues ==
{{Issue list}}
== Trivia ==
* Suspicious stew was introduced because developers wanted a way of communicating that [[wikipedia:Lily_of_the_valley|lilies of the valley]] are poisonous.<ref>{{ytl|YUM7XiEX1DI|Items: Ten Things You Probably Didn't Know About Minecraft @ 3:32|Minecraft|November 29, 2019|t=212s}}</ref>
== References ==
{{Reflist}}
<references group="loot"/>
{{Items}}
[[Category:Food]]
[[de:Seltsame Suppe]]
[[es:Estofado sospechoso]]
[[fr:Soupe suspecte]]
[[ja:怪しげなシチュー]]
[[ko:수상한 스튜]]
[[nl:Geheimzinnige stoofpot]]
[[pl:Podejrzana potrawka]]
[[pt:Ensopado suspeito]]
[[ru:Подозрительный суп]]
[[th:สตูว์พิศวง]]
[[zh:迷之炖菜]]
[[Category:Renewable resources]]</li><li>[[Banner|Banner]]<br/>{{for|the image|Banner (image)}}
{{Block
| image = <gallery>
White Banner.gif | Banner
White Wall Banner.png | Wall Banner
</gallery>
| rarity = Common
| transparent = Yes
| light = No
| tool = axe
| renewable = Yes
| stackable = Yes (16)
| flammable = No
| lavasusceptible = Yes
}}
'''Banners''' are tall decorative [[blocks]], featuring a field that is highly customizable using [[dye]]s and [[banner pattern]]s.
== Obtaining ==
=== Breaking ===
Banners can be broken with or without a [[tool]], but an [[axe]] is fastest.
{{breaking row|horizontal=1|Banners|Axe}}
A banner also breaks and drops itself as an [[Item (entity)|item]] if the block the banner is attached to is moved, removed, or destroyed.
=== Natural generation ===
{| class="wikitable collapsible"
! Name !! Location !! Appearance !! Design
|-
! Magenta Banner
| Outside of [[end cities]].
| style="text-align: center" | [[File:End City Banner.png|32px]]
| Magenta Banner
* Black Inverted Chevron
* Black Chevron
|-
! Gray Banner
| In banner room in [[woodland mansion]]s.
| style="text-align: center" | [[File:Gray Banner.png|32px]]
| Gray Banner
|-
! Light Gray Banner
| In master bedroom in [[woodland mansion]]s.
| style="text-align: center" | [[File:Master Bedroom Banner.png|32px]]
| Light Gray Banner
* White Flower Charge
|- id="Ominous Banner"
! Ominous Banner{{only|java|short=1}}
Illager Banner{{only|bedrock|education|short=1}}
| Carried by [[raid captain]]s.<br> Located in [[pillager outpost]]s.
{{IN|java}}, the ominous banner cannot be crafted or copied because the design uses 8 patterns.
{{IN|bedrock}}, the illager banner is a separate type that cannot be placed in a loom.
| style="text-align: center" | [[File:Ominous Banner.png|32px]]<br/>[[File:Ominous Banner BE.png|32px]]
| White Banner{{only|java|short=1}}
* Cyan Lozenge
* Light Gray Base
* Gray Pale
* Light Gray Bordure
* Black Fess
* Light Gray Per Fess
* Light Gray Roundel
* Black Bordure
Separate type entirely{{only|bedrock|short=1}}
|-
! Brown Banner
| Outside of some houses, meeting points, and pillar fountains in savanna [[village]]s.
| style="text-align: center" | [[File:Brown Banner.png|32px]]
| Brown Banner
|-
! Black Banner
| In altar room in [[woodland mansions]].
| style="text-align: center" | [[File:Black Banner.png|32px]]
| Black Banner
|}
=== Crafting ===
Banners can be crafted from six [[wool]] and a [[stick]] in a pattern resembling a [[sign]].
{{Crafting
|head=1
|showdescription=1
|A1=Matching Wool |B1=Matching Wool |C1=Matching Wool
|A2=Matching Wool |B2=Matching Wool |C2=Matching Wool
|B3=Stick
|Output=Matching Banner
|Olink=Banner
|type=Decoration block
|description=Once the banner is crafted, its base color cannot be changed.{{only|java}}
}}
{{Crafting
|showdescription=1
|Any Banner
|Bleach
|Output=White Banner
|type=Decoration block
|description=Bleach can be used to remove the color of a banner, resulting in a white banner. This includes removing patterns from a white banner.{{only|bedrock|education}}
|foot=1
}}
=== Trading ===
Expert-level cartographer [[villager]]s always offer to [[trading|sell]] 1 or 2 blank banners of a random color for 3 [[emeralds]]. Expert-level shepherd villagers have a {{frac|2|7}} chance of offering the same trade.{{only|java}}
{{IN|bedrock}}, expert-level cartographer and shepherd villagers both offer to sell one of 16 blank banners for 3 emeralds as part of their trades.
=== Mob loot ===
[[Illager]]s that spawn carrying an ominous banner{{only|java|short=1}} / illager banner{{only|bedrock|education|short=1}} always drop it upon death.
== Usage ==
[[File:Standing banner with block.png|thumb|upright|Overlapping block on a banner.]]
[[File:Wall banner with block.png|thumb|upright|Overlapping on a wall mounted banner.]]
There are 16 colored blank banners, and numerous patterns each available in each of the 16 colors. A banner can feature up to 6 different patterns. The top layer of a banner (or the last pattern added) can be washed off by {{control|using}} it on a [[cauldron]] containing water.
Banners, much like signs, can be placed both on the ground facing in any direction, or on a wall. They gently sway as if affected by a breeze, regardless of dimension or location.
Banners have no collision mask as they are completely non-solid, so [[entities]] can move through them.
Other blocks (including other banners) can be placed on any edge of a banner's hitbox, which is only one block high despite the banner appearing as two blocks tall. This makes it possible to overlap another solid block on the top half of a banner for floor banners, or the bottom half of wall banners.
When a banner is placed on the side of a block, its position is set by the top block, and it is possible to place it so it appears half buried.
Banners can also be placed in [[item frame]]s, where they simply appear as their item model.
[[Water]] and [[lava]] flow around banners. {{IN|bedrock}}, banners can be [[waterlogged]].
<gallery>
File:Wall banner with water below.png| Water can be placed below wall banners
File:Water flowing around banner.png| Water flows around a banner on the ground
</gallery>
Lava can create [[fire]] in air blocks next to banners as if the banners were flammable, but the banners do not burn (and cannot be burned by other methods). Banners also cannot be moved by [[piston]]s.
If a banner is renamed on an [[anvil]], it retains its name when a pattern is added, but not when a pattern is removed.
=== Helmet ===
{{exclusive|java|section=13}}
While a banner cannot be equipped in the [[Helmet|head slot]] in [[Survival]] mode, equipping it using commands causes it to appear on top of the player. This is how [[raid captain]]s wear banners{{only|java|short=1}}.
=== Chestplate ===
{{exclusive|bedrock|section=13}}
While a banner cannot be equipped in the [[chestplate]] slot in Survival mode, equipping it using NBT editors causes it to appear on top of the player. This is how [[raid captain]]s wear banners{{only|bedrock|education|short=1}}.
<gallery>
Steve wearing White Banner.png|
Alex wearing White Banner.png|
Pillager with Ominous Banner.png|
Vindicator with Ominous Banner.png|
Evoker with Ominous Banner.png|Illusioner with Ominous Banner.png|
</gallery>
=== Crafting ingredient ===
[[Shield]]s can have patterns applied to them using banners. The shield pattern has a smaller resolution than the banner pattern, causing them to look different or offset. Banners that have more than six patterns, such as Ominous Banners or banners obtained through inventory editors, will be reduced to six patterns on the shield.
{{Crafting
|showdescription=1
|Shield
|Matching Banner; Ominous Banner
|Output=Matching Shield; Ominous Shield
|B2link=Banner
|type=Combat
|description=Applies the banner pattern to the shield. The banner is consumed.<br>The shield must have no pre-existing patterns.<br>Does not change existing durability or enchantments on the shield.
}}
=== Copying ===
Banners can be copied with a blank banner to make multiple identical banners. Banners with more than 6 patterns applied using commands cannot be copied in this manner.
{{Crafting
|showdescription=1
|Matching Banner
|Matching Banner
|Output=Matching Banner
|A2link=Banner
|B2link=Banner
|Olink=Banner
|type=Decoration block
|ignoreusage=1
|description=Copies pattern; both banners must have the same base color, and the one having a pattern copied onto it must have no preexisting pattern.
}}
=== Map marker ===
[[File:Banner marked map.png|alt=All banners marked on a map, alongside a named banner.|thumb|right|How every banner appears {{IN|java}} on a map, including named banners.]]
{{exclusive|java|section=13}}
{{IN|java}}, {{control|using}} on a standing banner with a [[map]] selected places a marker of the banner's position on the selected map, and {{control|using}} on the banner again removes the marker. Note that wall banners cannot serve as map markers. The marker has the same color as the banner's base without decorations. The marker is removed if the banner is destroyed unless the map is locked using a [[cartography table]]. If the banner is renamed, the name appears below the marker.
=== Patterns ===
{{see also|Banner/Patterns|title1=List of patterned banners}}
[[File:Spawned-in Banner.png|thumb|100px|Example of a banner with more than 6 patterns, a result of using the {{cmd|give}} command.]]
A banner may have up to six layers of patterns, which are overlaid with the last-crafted on top. A banner can have up to 16 layers of patterns with the use of commands. The total number of unique banners is approximately 2.3x10^16 (or 23 quadrillion).
Any color banner can be used; the pattern overlays the color. {{IN|java}}, a [[loom]] is used to make patterns. However, {{in|bedrock}}, the patterns can be made in a [[loom]] or a [[crafting table]].
A banner can have more than six layers of patterns through the commands <code>/[[Commands/give|give]]</code>, <code>/[[Commands/setblock|setblock]]</code> or <code>/[[Commands/fill|fill]]</code>. This only works in ''Java Edition'', as Bedrock Edition doesn't have any NBT commands. Here is an example of a mining banner with seven different patterns. There is specific codes for the [[Banner#Item data:~:text=white-,Item,-In Java Edition|colors]] and [[Banner/Patterns|patterns]] that you have to input.
<code><nowiki>/give @p white_banner{display:{Name:"\"Mining Industries Banner\""},BlockEntityTag:{Patterns:[{Pattern:"cr",Color:15},{Pattern:"bs",Color:15},{Pattern:"sc",Color:12},{Pattern:"ms",Color:0},{Pattern:"hh",Color:15},{Pattern:"bo",Color:15},{Pattern:"tts",Color:8}]}} 1</code>
{{LoadPage|Template:Banner pattern loom recipes|Loom recipes|h4}}
{{LoadPage|Banner/Banner pattern crafting recipes|Crafting recipes|h4|transcluded=1}}
=== Renaming ===
{{IN|java}}, a banner can be given a custom name that remains as the banner is placed and retrieved. The player can use an [[anvil]] to rename the banner item, or may change the <code>CustomName</code> tag using the {{cmd|data}} command on the banner block.
=== Fuel ===
Banners can be used as a fuel in [[furnace]]s, smelting 1.5 items per banner.
=== Note Blocks ===
Banners can be placed under [[note block]]s to produce "bass" sounds.
== Sounds ==
=== Generic ===
{{Sound table/Block/Wood}}
=== Unique ===
{{edition|java}}: ''None''
{{edition|bedrock}}:
{{Sound table
|type=bedrock
|sound=Water Splash Old.ogg
|source=block
|description=When all patterns are removed from a banner using a cauldron
|id=cauldron.cleanbanner
|volume=0.1
|pitch=1.0
|foot=1}}
== Data values ==
=== ID ===
{{edition|java}}:
{{ID table
|edition=java
|showblocktags=y
|showitemtags=y
|showforms=y
|generatetranslationkeys=y
|displayname=White Banner
|spritetype=block
|nameid=white_banner
|blocktags=banners, wall_post_override
|itemtags=banners
|translationkey=block.minecraft.white_banner,block.minecraft.ominous_banner
}}
{{ID table
|displayname=Orange Banner
|spritetype=block
|nameid=orange_banner
|blocktags=banners, wall_post_override
|itemtags=banners}}
{{ID table
|displayname=Magenta Banner
|spritetype=block
|nameid=magenta_banner
|blocktags=banners, wall_post_override
|itemtags=banners}}
{{ID table
|displayname=Light Blue Banner
|spritetype=block
|nameid=light_blue_banner
|blocktags=banners, wall_post_override
|itemtags=banners}}
{{ID table
|displayname=Yellow Banner
|spritetype=block
|nameid=yellow_banner
|blocktags=banners, wall_post_override
|itemtags=banners}}
{{ID table
|displayname=Lime Banner
|spritetype=block
|nameid=lime_banner
|blocktags=banners, wall_post_override
|itemtags=banners}}
{{ID table
|displayname=Pink Banner
|spritetype=block
|nameid=pink_banner
|blocktags=banners, wall_post_override
|itemtags=banners}}
{{ID table
|displayname=Gray Banner
|spritetype=block
|nameid=gray_banner
|blocktags=banners, wall_post_override
|itemtags=banners}}
{{ID table
|displayname=Light Gray Banner
|spritetype=block
|nameid=light_gray_banner
|blocktags=banners, wall_post_override
|itemtags=banners}}
{{ID table
|displayname=Cyan Banner
|spritetype=block
|nameid=cyan_banner
|blocktags=banners, wall_post_override
|itemtags=banners}}
{{ID table
|displayname=Purple Banner
|spritetype=block
|nameid=purple_banner
|blocktags=banners, wall_post_override
|itemtags=banners}}
{{ID table
|displayname=Blue Banner
|spritetype=block
|nameid=blue_banner
|blocktags=banners, wall_post_override
|itemtags=banners}}
{{ID table
|displayname=Brown Banner
|spritetype=block
|nameid=brown_banner
|blocktags=banners, wall_post_override
|itemtags=banners}}
{{ID table
|displayname=Green Banner
|spritetype=block
|nameid=green_banner
|blocktags=banners, wall_post_override
|itemtags=banners}}
{{ID table
|displayname=Red Banner
|spritetype=block
|nameid=red_banner
|blocktags=banners, wall_post_override
|itemtags=banners}}
{{ID table
|displayname=Black Banner
|spritetype=block
|nameid=black_banner
|blocktags=banners, wall_post_override
|itemtags=banners}}
{{ID table
|displayname=White Wall Banner
|spritetype=block
|nameid=white_wall_banner
|blocktags=banners, wall_post_override
|form=block
|translationkey=block.minecraft.white_banner,block.minecraft.ominous_banner}}
{{ID table
|displayname=Orange Wall Banner
|spritetype=block
|nameid=orange_wall_banner
|blocktags=banners, wall_post_override
|form=block
|translationkey=block.minecraft.orange_banner}}
{{ID table
|displayname=Magenta Wall Banner
|spritetype=block
|nameid=magenta_wall_banner
|blocktags=banners, wall_post_override
|form=block
|translationkey=block.minecraft.magenta_banner}}
{{ID table
|displayname=Light Blue Wall Banner
|spritetype=block
|nameid=light_blue_wall_banner
|blocktags=banners, wall_post_override
|form=block
|translationkey=block.minecraft.light_blue_banner}}
{{ID table
|displayname=Yellow Wall Banner
|spritetype=block
|nameid=yellow_wall_banner
|blocktags=banners, wall_post_override
|form=block
|translationkey=block.minecraft.yellow_banner}}
{{ID table
|displayname=Lime Wall Banner
|spritetype=block
|nameid=lime_wall_banner
|blocktags=banners, wall_post_override
|form=block
|translationkey=block.minecraft.lime_banner}}
{{ID table
|displayname=Pink Wall Banner
|spritetype=block
|nameid=pink_wall_banner
|blocktags=banners, wall_post_override
|form=block
|translationkey=block.minecraft.pink_banner}}
{{ID table
|displayname=Gray Wall Banner
|spritetype=block
|nameid=gray_wall_banner
|blocktags=banners, wall_post_override
|form=block
|translationkey=block.minecraft.gray_banner}}
{{ID table
|displayname=Light Gray Wall Banner
|spritetype=block
|nameid=light_gray_wall_banner
|blocktags=banners, wall_post_override
|form=block
|translationkey=block.minecraft.light_gray_banner}}
{{ID table
|displayname=Cyan Wall Banner
|spritetype=block
|nameid=cyan_wall_banner
|blocktags=banners, wall_post_override
|form=block
|translationkey=block.minecraft.cyan_banner}}
{{ID table
|displayname=Purple Wall Banner
|spritetype=block
|nameid=purple_wall_banner
|blocktags=banners, wall_post_override
|form=block
|translationkey=block.minecraft.purple_banner}}
{{ID table
|displayname=Blue Wall Banner
|spritetype=block
|nameid=blue_wall_banner
|blocktags=banners, wall_post_override
|form=block
|translationkey=block.minecraft.blue_banner}}
{{ID table
|displayname=Brown Wall Banner
|spritetype=block
|nameid=brown_wall_banner
|blocktags=banners, wall_post_override
|form=block
|translationkey=block.minecraft.brown_banner}}
{{ID table
|displayname=Green Wall Banner
|spritetype=block
|nameid=green_wall_banner
|blocktags=banners, wall_post_override
|form=block
|translationkey=block.minecraft.green_banner}}
{{ID table
|displayname=Red Wall Banner
|spritetype=block
|nameid=red_wall_banner
|blocktags=banners, wall_post_override
|form=block
|translationkey=block.minecraft.red_banner}}
{{ID table
|displayname=Black Wall Banner
|spritetype=block
|nameid=black_wall_banner
|blocktags=banners, wall_post_override
|form=block
|translationkey=block.minecraft.black_banner
|foot=1}}
{{ID table
|displayname=Block entity
|spritename=Banners
|spritetype=block
|nameid=banner
|foot=1}}
{{edition|bedrock}}:
{{ID table
|edition=bedrock
|firstcolumnname=Banner
|shownumericids=y
|showforms=y
|generatetranslationkeys=y
|displayname=Standing
|spritename=Banners
|spritetype=block
|nameid=standing_banner
|translationkey=tile.standing_banner.black.name, tile.standing_banner.red.name, tile.standing_banner.green.name, tile.standing_banner.brown.name, tile.standing_banner.blue.name, tile.standing_banner.purple.name, tile.standing_banner.cyan.name, tile.standing_banner.silver.name, tile.standing_banner.gray.name, tile.standing_banner.pink.name, tile.standing_banner.lime.name, tile.standing_banner.yellow.name, tile.standing_banner.lightBlue.name, tile.standing_banner.magenta.name, tile.standing_banner.orange.name, tile.standing_banner.white.name
|id=176
|form=block}}
{{ID table
|displayname=Wall
|spritename=Banners
|spritetype=block
|nameid=wall_banner
|id=177
|form=block
|translationkey=-}}
{{ID table
|displayname=Item
|spritename=Banners
|spritetype=item
|nameid=banner
|translationkey=item.banner.black.name, item.banner.red.name, item.banner.green.name, item.banner.brown.name, item.banner.blue.name, item.banner.purple.name, item.banner.cyan.name, item.banner.silver.name, item.banner.gray.name, item.banner.pink.name, item.banner.lime.name, item.banner.yellow.name, item.banner.lightBlue.name, item.banner.magenta.name, item.banner.orange.name, item.banner.white.name
|id=567
|form=item
|foot=1}}
{{ID table
|notnamespaced=y
|displayname=Block entity
|spritename=Banners
|spritetype=block
|nameid=Banner
|foot=1}}
=== Metadata ===
==== Item ====
{{IN|Bedrock}}, banner items use the following data values:
{| class="wikitable"
! DV !! Banner color
|-
|| 0 || black
|-
|| 1 || red
|-
|| 2 || green
|-
|| 3 || brown
|-
|| 4 || blue
|-
|| 5 || purple
|-
|| 6 || cyan
|-
|| 7 || light gray
|-
|| 8 || gray
|-
|| 9 || pink
|-
|| 10 || lime
|-
|| 11 || yellow
|-
|| 12 || light blue
|-
|| 13 || magenta
|-
|| 14 || orange
|-
|| 15 || white
|}
=== Item ===
{{IN|Java}}, banner items use the following data values:
{| class="wikitable"
! DV !! Banner color
|-
|| 15 || black
|-
|| 14 || red
|-
|| 13 || green
|-
|| 12 || brown
|-
|| 11 || blue
|-
|| 10 || purple
|-
|| 9 || cyan
|-
|| 8 || light gray
|-
|| 7 || gray
|-
|| 6 || pink
|-
|| 5 || lime
|-
|| 4 || yellow
|-
|| 3 || light blue
|-
|| 2 || magenta
|-
|| 1 || orange
|-
|| 0 || white
|}
=== Block states ===
{{see also|Block states}}
{{/BS}}
=== Block data ===
A banner has a block entity associated with it that holds additional data about the block.
{{el|bedrock}}:
: See [[Bedrock Edition level format/Block entity format]].
{{el|java}}:
{{see also|Block entity format}}
{{/BE}}
=== Item data ===
{{el|java}}:
{{main|Player.dat format}}
Banners, as items, use an NBT tag <code>BlockEntityTag</code> to indicate the patterns and details when it is placed.
<div class="treeview" style="margin-top: 0;">
* {{nbt|compound|Item}}: The item
** {{nbt|compound|tag}}: Additional information about the item. This tag is optional for most items.
*** {{nbt|compound|BlockEntityTag}}: The details of the shulker box.
**** All block data, except tags common to all block entities.
</div>
{{el|bedrock}}:
: See [[Bedrock Edition level format/Item format]].
== Achievements ==
{{load achievements|Fruit on the Loom}}
== Advancements ==
{{load advancements|Voluntary Exile}}
== History ==
{{info needed section|The Nether Update}}
{{History|java}}
{{History||1.8|snap=July 21, 2014|slink=https://twitter.com/jeb_/status/491238882789572608|[[Jeb]] posted a picture of banners, and stated that he is working on them.}}
{{History|||snap=14w30a|[[File:White Banner Revision 1.png|22px]][[File:Light Gray Banner Revision 1.png|22px]][[File:Gray Banner Revision 1.png|22px]][[File:Black Banner Revision 1.png|22px]][[File:Brown Banner Revision 1.png|22px]][[File:Red Banner Revision 1.png|22px]][[File:Orange Banner Revision 1.png|22px]][[File:Yellow Banner Revision 1.png|22px]][[File:Lime Banner Revision 1.png|22px]][[File:Green Banner Revision 1.png|22px]][[File:Cyan Banner Revision 1.png|22px]][[File:Light Blue Banner Revision 1.png|22px]][[File:Blue Banner Revision 1.png|22px]][[File:Purple Banner Revision 1.png|22px]][[File:Magenta Banner Revision 1.png|22px]][[File:Pink Banner Revision 1.png|22px]] Added banners.}}
{{History|||snap=14w30c|Added four additional patterns: Cross (+), Border, Curly Border and Thing (Mojang logo).}}
{{History|||snap=14w31a|Added two additional patterns: Inverted Halves and Base Gradient.
|The banner pattern terminology has been changed based on vexillology advice [[Jeb]] received from [http://www.reddit.com/r/Minecraft/comments/2bkxej/i_made_a_huge_mistake_banners/ his Reddit post].
|Banners can now be used as a [[fuel]] in [[furnace]]s.}}
{{History||1.8.8|snap=pre|The number of layers attainable by using [[commands]] is now limited to 16 per banner.}}
{{History||1.9|snap=15w31a|[[File:End City Banner.png|17px]] Magenta banners with a black chevron and inverted chevron are now naturally generated on the outside walls of [[end city|end cities]].}}
{{History|||snap=15w33c|Banners can be used to apply patterns to [[shield]]s.}}
{{History||1.11|snap=16w33a|Banners now require a [[dye]] when applying a pattern that uses a non-dye [[item]], such as a [[mob head|creeper head]] or [[golden apple|enchanted golden apple]]. Previously, the lack of a dye would have applied the black variant of the pattern.}}
{{History|||snap=16w39a|Black and gray banners, and light gray banners with a white flower charge are now naturally generated in rooms of [[woodland mansion]]s.}}
{{History||1.12|snap=January 24, 2017|slink={{tweet|jeb_|823817090511601664}}|[[Jeb]] tweets a screenshot of the changes to the banner color palette.}}
{{History|||snap=17w06a|[[File:White Banner.png|17px]] [[File:Light Gray Banner.png|17px]] [[File:Gray Banner.png|17px]] [[File:Black Banner.png|17px]] [[File:Brown Banner.png|17px]] [[File:Red Banner.png|17px]] [[File:Orange Banner.png|17px]] [[File:Yellow Banner.png|17px]] [[File:Lime Banner.png|17px]] [[File:Green Banner.png|17px]] [[File:Cyan Banner.png|17px]] [[File:Light Blue Banner.png|17px]] [[File:Blue Banner.png|17px]] [[File:Purple Banner.png|17px]] [[File:Magenta Banner.png|17px]] [[File:Pink Banner.png|17px]] Changed banners' [[tint]]s.}}
{{History|||snap=pre6|"Chief fess" and "base fess" banners are now just "chief" and "base" banners.}}
{{History||1.13|snap=17w47a|The colors for the <code>banner</code>, <code>wall_banner</code> and <code>standing_banner</code> ID have been split up into their own IDs.
|Prior to [[1.13/Flattening|''The Flattening'']], these [[block]]s' numeral IDs were 176 and 177, and the [[item]]'s 425.}}
{{History|||snap=18w10a|{{control|Using}} a [[map]] on a banner now mark the spot of the banner on the map.}}
{{History||1.14|snap=18w43a|[[Loom]]s have been added to help the [[player]] edit banners more easily.
|All recipes for banner patterns have been removed.}}
{{History|||snap=18w45a|[[File:Ominous Banner Revision 1.png|17px]] Added [[illager patrol]]s, where the leader of an illager patrol carries an [[illager]] banner.}}
{{History|||snap=18w46a|[[File:Ominous Banner.png|17px]] The pattern of [[illager]] banner now has a black border.}}
{{History|||snap=19w11a|Cartographer and shepherd [[villager]]s now [[trading|sell]] banners.}}
{{History|||snap=Pre-Release 2|"Illager Banners" have been renamed to "Ominous Banners".}}
{{History||1.17|snap=20w46a|The unused "base" pattern has been renamed to the "field" pattern and given proper translation strings (its ID is still "base").}}
{{History||1.19.3|snap=22w43a|The ominous banner is now available in the Creative inventory.}}
{{History|bedrock}}
{{History||1.2.0|snap=beta 1.2.0.2|[[File:White Banner.png|17px]] [[File:Light Gray Banner.png|17px]] [[File:Gray Banner.png|17px]] [[File:Black Banner.png|17px]] [[File:Brown Banner.png|17px]] [[File:Red Banner.png|17px]] [[File:Orange Banner.png|17px]] [[File:Yellow Banner.png|17px]] [[File:Lime Banner.png|17px]] [[File:Green Banner.png|17px]] [[File:Cyan Banner.png|17px]] [[File:Light Blue Banner.png|17px]] [[File:Blue Banner.png|17px]] [[File:Purple Banner.png|17px]] [[File:Magenta Banner.png|17px]] [[File:Pink Banner.png|17px]] Added banners.
|[[File:End City Banner.png|17px]] Magenta banners with a black chevron and inverted chevron are now naturally generated on the outside walls of [[end city|end cities]].
|Black and gray banners, and light gray banners with a white flower charge are now naturally generated in rooms of [[woodland mansion]]s.}}
{{History||1.4.0|snap=beta 1.2.20.1|The white banner can now be crafted from a colored banner and [[bleach]], which also removes all patterns, if used on a white banner.}}
{{History||1.10.0|snap=beta 1.10.0.3|[[Loom]]s have been added to help the [[player]] edit banners more easily.
|Brown banners now generate in new [[savanna]] [[village]]s.
|Black banners now generate in [[pillager outpost]] watchtowers.}}
{{History||1.11.0|snap=beta 1.11.0.1|Gray banners now generate in pillager outpost watchtowers, instead of black banners.
|[[File:Ominous Banner BE.png|17px]] Added [[illager captain]]s, which drop an [[illager]] banner upon [[death]].}}
{{History|||snap=beta 1.11.0.3|Illager banners now generate in [[pillager outpost]] watchtowers, instead of gray banners.}}
{{History|||snap=beta 1.11.0.4|Banners can now be [[trading|bought]] from cartographer and shepherd [[villager]]s.}}
{{History||1.20.0|snap=beta 1.20.0.20|Banners can now be used to customise [[shield]]s.}}
{{History|console}}
{{History||xbox=TU43|xbone=CU33|ps=1.36|wiiu=Patch 13|switch=1.0.1|[[File:White Banner Revision 1.png|22px]][[File:Light Gray Banner Revision 1.png|22px]][[File:Gray Banner Revision 1.png|22px]][[File:Black Banner Revision 1.png|22px]][[File:Brown Banner Revision 1.png|22px]][[File:Red Banner Revision 1.png|22px]][[File:Orange Banner Revision 1.png|22px]][[File:Yellow Banner Revision 1.png|22px]][[File:Lime Banner Revision 1.png|22px]][[File:Green Banner Revision 1.png|22px]][[File:Cyan Banner Revision 1.png|22px]][[File:Light Blue Banner Revision 1.png|22px]][[File:Blue Banner Revision 1.png|22px]][[File:Purple Banner Revision 1.png|22px]][[File:Magenta Banner Revision 1.png|22px]][[File:Pink Banner Revision 1.png|22px]] Added banners.}}
{{History||xbox=TU46|xbone=CU36|ps=1.38|wiiu=Patch 15|switch=1.0.1|[[File:End City Banner.png|17px]] Magenta banners with a black chevron and inverted chevron are now naturally generated on the outside walls of [[end city|end cities]].}}
{{History||xbox=TU53|xbone=CU43|ps=1.49|wiiu=Patch 23|switch=1.0.3|[[File:White Banner.png|17px]] [[File:Light Gray Banner.png|17px]] [[File:Gray Banner.png|17px]] [[File:Black Banner.png|17px]] [[File:Brown Banner.png|17px]] [[File:Red Banner.png|17px]] [[File:Orange Banner.png|17px]] [[File:Yellow Banner.png|17px]] [[File:Lime Banner.png|17px]] [[File:Green Banner.png|17px]] [[File:Cyan Banner.png|17px]] [[File:Light Blue Banner.png|17px]] [[File:Blue Banner.png|17px]] [[File:Purple Banner.png|17px]] [[File:Magenta Banner.png|17px]] [[File:Pink Banner.png|17px]] Changed banners' [[tint]]s.}}
{{History||xbox=none|xbone=none|ps=1.90|wiiu=none|switch=none|[[Loom]]s have been added to help the [[player]] edit banners more easily.}}
{{History||ps=1.91|[[File:Ominous Banner BE.png|17px]] Added [[illager]] banners, which generate with [[pillager outpost]]s and are [[drops|dropped]] by [[illager captain]]s upon [[death]].}}
{{History|foot}}
== Issues ==
{{issue list}}
== Trivia ==
* With 16 blank banners, 38 patterns of 16 colors each (608 uniquely-colored patterns), and 0 to 6 patterns per banner, the number of uniquely crafted banners is 16 × (608<sup>0</sup> + 608<sup>1</sup> + 608<sup>2</sup> + 608<sup>3</sup> + 608<sup>4</sup> + 608<sup>5</sup> + 608<sup>6</sup>) ≈ 809 quadrillion - 809 with 15 zeros (809,573,616,779,945,488). The number of visually distinct banners is smaller, because one or more patterns may completely cover other patterns, or the entire banner, or be duplicated due to the symmetric set of patterns (e.g. field or (yellow) + per pale azure (blue) = field azure + per pale or inverted).
** Not 38 patterns are available on BE, but 40 patterns of 16 colors each (640 uniquely-colored patterns), so the number is even greater. 16 × (640<sup>0</sup> + 640<sup>1</sup> + 640<sup>2</sup> + 640<sup>3</sup> + 640<sup>4</sup> + 640<sup>5</sup> + 640<sup>6</sup>) ≈ 1 quintillion - 1 with 18 zeros (1,101,232,303,249,827,856). This increases the number by almost 1.4 times, or almost 292 quadrillion, despite the addition of only 2 patterns.
* If a banner has over 6 patterns, only the six bottom-most patterns are displayed when hovered over in the [[inventory]].
* The Mojang logo is called "Thing" in-game, which could be considered an alternate translation for [[wiktionary:mojäng|mojäng]]. If [[wikipedia:Google Translate|Google Translate]] is used, it translates to "thingys" or "contraption".
** In the Swedish translation of the game, this pattern is, in fact, called ''mojäng''.
* [[List of block textures#Banner Textures|Banner textures]] are located in \assets\minecraft\textures\entity\banner.
** There are 40 monochrome textures, each containing all 6 sides of the banner.
** The texture of the back side is the mirrored texture of the front side.
** Compared to the texture files, textures' colors are inverted in-game due to them acting as masks for the re-colored base texture, base.png. That means white is visible, while black is transparent.
* Banners that have the purple NBT+ line in the bottom (obtained by holding Ctrl and middle-clicking the banner, which also copies the NBT [[tag]] of anything that the player points their crosshair to) actually have no difference with the base banner obtained by middle click.
*The Illager Banner in Bedrock Edition is available as a separate item but is just a second variant of the white banner.
**Standard variant of white banner is set to type 0.
**Illager variant is set to type 1.
== Gallery ==
<gallery>
Banners Jeb.png|The first image of banners, as tweeted by Jens Bergensten.
Iceland and Norway Flags.png|Another banner image from Jeb.
Searge Banners.png|Several banners made by Searge.
The Bountiful Update.png|Banners in the official 1.8 poster.
BannersBeforeAndAfter.png|An image, tweeted by Jeb, showcasing the changes he made to the banner color palette in the 1.12 update.
Gradients Overlay.png|The result of using gradient different numbers of times, each time increasing the level of gradient by 1.
All positions and rotations of a banner.png|All positions and rotations of a banner
Item Frame with Banner.png|A banner with the [[Mojang]] logo in an [[item frame]].
EndCityBanners.png|Banners floating outside of an [[End city]] tower.
Woodland mansion 1x2 d1.png|Banners hanging above the doorway of a [[woodland mansion]] master bedroom.
Replaceitembanner.png|Banner put in the helmet slot by using the command {{cmd|replaceitem}}{{Only|BE}} or {{cmd|item replace}}{{Only|JE}}.
Better Together Banners.jpg|Banners in ''Bedrock Edition''.
Better Together Banner Crafting 1.jpg|A banner in the hand.
Better Together Banner Crafting 2.jpg|A banner in the inventory.
Better Together Banner Crafting 3.jpg|A banner in the crafting grid.
Better Together Banner Crafting 4.jpg|A banner being given a pattern.
</gallery>
=== Renders ===
<gallery>
Ominous Banner.gif
White Banner.gif
Light Gray Banner.gif
Gray Banner.gif
Black Banner.gif
Brown Banner.gif
Red Banner.gif
Orange Banner.gif
Yellow Banner.gif
Lime Banner.gif
Green Banner.gif
Cyan Banner.gif
Light Blue Banner.gif
Blue Banner.gif
Purple Banner.gif
Magenta Banner.gif
Pink Banner.gif
Ominous Wall Banner.png|
White Wall Banner.png|
Light Gray Wall Banner.png|
Gray Wall Banner.png|
Black Wall Banner.png|
Brown Wall Banner.png|
Red Wall Banner.png|
Orange Wall Banner.png|
Yellow Wall Banner.png|
Lime Wall Banner.png|
Green Wall Banner.png|
Cyan Wall Banner.png|
Light Blue Wall Banner.png|
Blue Wall Banner.png|
Purple Wall Banner.png|
Magenta Wall Banner.png|
Pink Wall Banner.png
</gallery>
<gallery>
File:Ominous Banner.gif|Ominous banner pattern in Java Edition.
File:Ominous Banner BE.gif|Illager banner pattern in Bedrock Edition.
File:Ominous Banner Revision 1.gif|Old Ominous banner pattern.
File:Ominous Banner washing.gif|Washing with cauldron shows how to apply the ominous banner pattern.
</gallery>
=== [[Lego Minecraft]] Banners ===
<gallery>
File:Lego Red Creeper Banner Collage.jpg|Lego banners from 21127 and 21131
File:Lego Melon Banner.png|Lego banner from 21138
File:Lego Fish Banner.png|Lego banner from 21142
File:Lego Beetroot Banner.png|Lego banner from 21144
File:Lego Wheat Banner.png|Another lego banner from 21144
File:Lego Carrot Banner.png|A third lego banner from 21144
File:Lego Crossbones Banner.png|Lego banner from 21152
File:Lego Green Creeper Banner Collage.jpg|Lego banners from 21155
File:Lego Ominous Banner.png|Lego ominous banner from 21160
</gallery>
== References ==
{{reflist}}
{{Blocks|Utility}}
{{Items}}
[[Category:Generated structure blocks]]
[[Category:Manufactured blocks]]
[[Category:Block entities]]
[[Category:Non-solid blocks]]
[[cs:Prapor]]
[[de:Banner]]
[[es:Estandarte]]
[[fr:Bannière]]
[[ja:旗]]
[[ko:현수막]]
[[nl:Banier]]
[[pl:Sztandar]]
[[pt:Estandarte]]
[[ru:Флаг]]
[[uk:Стяг]]
[[zh:旗帜]]</li></ul></nowiki> |
14w02a | Mobs now suffocate inside of the redstone block. | |||
1.13{{Extension DPL}}<ul><li>[[Sweet Berries|Sweet Berries]]<br/>{{Block
| title = Sweet Berries
| image = <gallery>
Sweet Berry Bush Age 0.png| Age 0
Sweet Berry Bush Age 1.png| Age 1
Sweet Berry Bush Age 2.png| Age 2
Sweet Berry Bush Age 3.png| Age 3
</gallery>
| image2 = Sweet Berries JE1 BE1.png
| transparent = Yes
| light = No
| tool = Any
| renewable = Yes
| stackable = Yes (64)
| heals = {{hunger|2}}
| flammable = Yes (60 java, 30 bedrock)
| lavasusceptible = No
}}
'''Sweet berries''' are a [[food]] [[item]] obtained from sweet berry bushes and are used to plant them.
'''Sweet berry bushes''' are quick-growing, [[Bone Meal|bonemealable]] [[Plant|plants]] that grow sweet berries, and damage and slow [[Player|players]] and most [[Mob|mobs]] moving through them. They can be found naturally in [[taiga]] and [[Snowy Taiga|snowy taiga]] biomes.
== Obtaining ==
=== Breaking ===
{{See also|Fortune#Discrete random}}
Sweet berry bushes can be mined instantly with any tool or by hand. A mature sweet berry bush yields 2–3 sweet berries. On its third growth stage, it yields 1–2 sweet berries. Each level of [[Fortune]] can increase the amount of drops by 1.
{{IN|ps4}}, the sweet berries drop into the player's inventory. In other editions, they drop on the ground.
=== Natural generation ===
Berry bushes commonly generate in [[taiga]] and [[snowy taiga]] biomes. Each [[chunk]] has {{frac|1|12}} chance to generate sweet berry bushes in [[random patch]]es. They also generate in both [[old growth pine taiga]] and [[old growth spruce taiga]].
=== Chest loot ===
{{LootChestItem|sweet-berries}}
=== Post-generation ===
Sweet berries can be collected from a sweet berry bush by {{control|using}} or {{control|breaking}} it, which yield 1–2 sweet berries in its third growth stage, and 2–3 sweet berries in its final growth stage.
== Usage ==
=== Placement ===
Placing [[sweet berries]] on a [[grass block]], [[dirt]], [[podzol]], [[coarse dirt]], [[farmland]]{{Only|Java}}, or [[moss block]] creates a small sweet berry bush that eventually becomes a fully grown sweet berry bush.
=== Growth ===
A sweet berry bush grows through four stages after it is planted. Its first growth stage is a small bush without any berries. It becomes a grown plant in its second stage, and produces berries in its third and fourth growth stage. The bush needs to be in light level 9 or greater to grow. {{control|Using}} [[bone meal]] on it increases its growth stage by one, and at full maturity, ejects the sweet berry item. The bush can be placed on a 1 block high space, but it cannot grow with a full, non-transparent block immediately above it.
=== Food ===
To eat sweet berries, press and hold {{control|use}} while it is selected in the hotbar. Eating one restores {{hunger|2}} [[hunger]] and 0.4{{only|je|short=1}} / 1.2{{only|be|short=1}} hunger [[saturation]].
=== Composting ===
Placing sweet berries into a [[composter]] has a 30% chance of raising the compost level by 1.
=== Breeding ===
Sweet berries can be fed to [[fox]]es to [[breeding|breed]] them. Foxes are similar to cats when being fed as a wild animal; a sudden movement by the [[player]] may cause the fox to flee even if the player holds sweet berries. A baby fox bred by a [[player]] trusts the player and does not flee.
=== Trading ===
Master-level butcher [[villager]]s offer to [[trading|buy]] 10 sweet berries for an [[emerald]].
=== Entity movement ===
A sweet berry bush (at any stage) slows down all [[entity|entities]] (except [[Item (entity)|items]]) passing through it. At stage 1 and higher, it causes damage. [[Fox]]es are immune to both characteristics, however. Sweet berry bushes deal {{hp|1}} [[damage]] every 0.5 seconds, only if the entity is moving in the hitbox of the bush. Entities that move through sweet berry bushes slow down to about 34.05% of their normal speed, similar to how a [[cobweb]] slows down mobs to 15% of normal speed. This makes it impossible to jump a full [[block]] while inside the bush.
Mobs at standard block height in a [[minecart]] are not damaged when the minecart is pushed through sweet berries. Players in a sweet berry bush take no damage except from horizontal movement, but are unable to jump out of the bush, similar to a cobweb.
=== Bees ===
[[Bee]]s pollinate sweet berry bushes, and then increase the honey level in [[beehive]]s and bee nests by 1.{{only|java}}
== Sounds ==
=== Generic ===
==== Block ====
{{Sound table/Block/Sweet berry bush}}
==== Item ====
{{Sound table/Entity/Food}}
=== Unique ===
{{edition|java}}:
{{Sound table
|rowspan=2
|sound=Berries pick1.ogg
|sound2=Berries pick2.ogg
|subtitle=Berries pop
|source=block
|description=When sweet berries are picked by a player
|id=block.sweet_berry_bush.pick_berries
|translationkey=subtitles.item.berries.pick
|volume=1.0
|pitch=0.8-1.2
|distance=16}}
{{Sound table
|subtitle=Berries pop
|source=block
|description=When sweet berries are picked by a fox
|id=block.sweet_berry_bush.pick_berries
|translationkey=subtitles.item.berries.pick
|volume=1.0
|pitch=1.0
|distance=16}}
{{Sound table
|sound=Player hurt sweet berry bush1.ogg
|sound2=Player hurt sweet berry bush2.ogg
|subtitle=Player hurts
|source=player
|description=When a player is damaged by touching a sweet berry bush
|id=entity.player.hurt_sweet_berry_bush
|translationkey=subtitles.entity.player.hurt
|volume=1.0
|pitch=0.8-1.2
|distance=16
|foot=1}}
{{edition|bedrock}}:
{{Sound table
|type=bedrock
|sound=Berries pick1.ogg
|sound2=Berries pick2.ogg
|source=block
|description=When sweet berries are picked
|id=block.sweet_berry_bush.pick
|volume=1.0
|pitch=1.0}}
{{Sound table
|sound=Player hurt sweet berry bush1.ogg
|sound2=Player hurt sweet berry bush2.ogg
|source=block
|description=When a player is damaged by touching a sweet berry bush
|id=block.sweet_berry_bush.hurt
|volume=1.0
|pitch=1.0
|foot=1}}
== Data values ==
=== ID ===
{{edition|java}}:
{{ID table
|edition=java
|showblocktags=y
|showitemtags=y
|showforms=y
|generatetranslationkeys=y
|displayname=Sweet Berry Bush
|spritetype=block
|nameid=sweet_berry_bush
|blocktags=azalea_log_replaceable, bee_growables
|form=block}}
{{ID table
|displayname=Sweet Berries
|spritetype=item
|nameid=sweet_berries
|itemtags=fox_food
|form=item
|foot=1}}
{{edition|bedrock}}:
{{ID table
|edition=bedrock
|shownumericids=y
|showforms=y
|generatetranslationkeys=y
|displayname=Sweet Berry Bush
|spritetype=block
|nameid=sweet_berry_bush
|id=462
|form=block}}
{{ID table
|displayname=Sweet Berries
|spritetype=item
|nameid=sweet_berries
|id=287
|form=item
|foot=1}}
=== Block states ===
{{see also|Block states}}
{{/BS}}
==Advancements==
{{Load advancements|Husbandry;A Balanced Diet;The Parrots and the Bats;Two by Two}}
== History ==
{{History||September 26, 2018|link={{tweet|minecraft|1044587405779451906}}|Berries are announced to be part of the [[biome]] vote at [[MINECON Earth 2018]].}}
{{History||September 29, 2018|link={{tweet|minecraft|1046097775199498245}}|[[Taiga]] wins the [[biome]] vote, meaning berries are to be added to the game first.}}
{{History|java}}
{{History||December 3, 2018|link={{tweet|cojomax99|1069586461173919745}}|[[Cojomax99]] tweets an image of some berries.}}
{{History||1.14|snap=18w49a|[[File:Sweet Berry Bush Age 0 JE1 BE1.png|32px]] [[File:Sweet Berry Bush Age 1 JE1 BE1.png|32px]] [[File:Sweet Berry Bush Age 2 JE1 BE1.png|32px]] [[File:Sweet Berry Bush Age 3 JE1 BE1.png|32px]] Added sweet berry bushes.|
[[File:Sweet Berries JE1 BE1.png|32px]] Added sweet berries.}}
{{History|||snap=18w50a|Sweet berries can now be found within [[taiga]] [[village]] loot [[chest]]s.}}
{{History|||snap=19w03a|Placing a sweet berry into the new [[composter]] has a 10% chance of raising the compost level by 1.
|Added [[sound]]s for sweet berry bushes.}}
{{History|||snap=19w05a|Sweet berries now have a 30% chance of increasing the compost level in a composter by 1.
|The [[sound]] for planting sweet berries has been changed.}}
{{History|||snap=19w07a|Sweet berries can now be fed to [[fox]]es to [[breeding|breed]] them.}}
{{History|||snap=19w11a|Butcher [[villager]]s now [[trading|buy]] sweet berries.}}
{{History||1.15|snap=19w34a|[[Bee]]s can now pollinate sweet berry bushes.}}
{{History|||snap=Pre-Release 2|Sweet berries now generate in [[giant tree taiga]] biomes.}}
{{History||1.16|snap=Pre-release 1|Sweet berry bushes no longer prevent mob spawning inside them.}}
{{History||1.17|snap=21w20a|The sound event for picking berries has been changed as to align better with that of glow berries.<ref>{{bug|MC-220063}}</ref>}}
{{History||1.18|snap=1.18-pre5|Sweet berry bushes in taigas are about 4 times more common than in previous snapshots.}}
{{History|bedrock}}
{{History||1.10.0|snap=beta 1.10.0.3|[[File:Sweet Berries JE1 BE1.png|32px]] Added sweet berries, which are available only through Experimental Gameplay.|[[File:Sweet Berry Bush Age 0 JE1 BE1.png|32px]] [[File:Sweet Berry Bush Age 1 JE1 BE1.png|32px]] [[File:Sweet Berry Bush Age 2 JE1 BE1.png|32px]] [[File:Sweet Berry Bush Age 3 JE1 BE1.png|32px]] Added sweet berry bushes, available only through Experimental Gameplay.}}
{{History||1.11.0|snap=beta 1.11.0.1|Sweet berries can now be used to fill [[composter]]s.}}
{{History|||snap=beta 1.11.0.3|Sweet berries and sweet berry bushes have been fully implemented and are now separate from Experimental Gameplay.}}
{{History|||snap=beta 1.11.0.4|Sweet berries can now be [[trading|sold]] to butcher [[villager]]s.}}
{{History||1.13.0|snap=beta 1.13.0.1|Sweet berries can now be fed to [[fox]]es to [[breeding|breed]] them.}}
{{History||1.14.0|snap=beta 1.14.0.1|[[Bee]]s can now pollinate sweet berry bushes.}}
{{History||1.16.100|snap=beta 1.16.100.54|Sweet berry bushes now properly damage entities.<ref>{{Bug|MCPE-56142}}</ref>}}
{{History||1.17.0|snap=beta 1.17.0.56|Bees no longer gather nectar from sweet berry bushes.}}
{{History|PS4}}
{{History||1.91|[[File:Sweet Berries JE1 BE1.png|32px]] Added sweet berries.|[[File:Sweet Berry Bush Age 0 JE1 BE1.png|32px]] [[File:Sweet Berry Bush Age 1 JE1 BE1.png|32px]] [[File:Sweet Berry Bush Age 2 JE1 BE1.png|32px]] [[File:Sweet Berry Bush Age 3 JE1 BE1.png|32px]] Added sweet berry bushes.}}
{{History|foot}}
=== Sweet berry bush "item" ===
{{:Technical blocks/Sweet Berry Bush}}
== Issues ==
{{issue list|berry|berries|sweet berry|sweet berries|berry bush|sweet berry bush}}
==Trivia==
* {{IN|java}}, sweet berry bushes absorb [[fall damage]] like [[water]].<ref>{{bug|MC-149990|||WAI}}</ref>
* Foxes harvest mature sweet berry bushes that have grown into their third or fourth stage. Unlike how carrots eaten by rabbits are destroyed and not dropped as items, sweet berry bushes harvested by foxes drop as items, although the fox may pick up one of the dropped berries. The bush remains intact, allowing for automatic sweet berry farms.
== Gallery ==
<gallery>
Berry Bush.png|A close-up look of a sweet berry bush.
Naturally generated berry bushes.png|A naturally generated sweet berry bush.
Multiplebushes.png|Multiple bushes of sweet berries in Taiga biome.
BerryBushCloseToRavine.png|A berry bush that is close to a ravine.
Cozy Cabin Berries.jpg|Berry bushes near a cozy cabin.
</gallery>
==References==
{{Reflist}}
{{Blocks|vegetation}}
{{Items}}
[[Category:Food]]
[[Category:Plants]]
[[Category:Non-solid blocks]]
[[Category:Natural blocks]]
[[Category:Flammable blocks]]
[[cs:Sladké bobule]]
[[es:Bayas dulces]]
[[de:Süßbeeren]]
[[fr:Baies sucrées]]
[[ja:スイートベリー]]
[[ko:달콤한 열매]]
[[pl:Słodkie jagody]]
[[pt:Bagas doces]]
[[ru:Сладкие ягоды]]
[[th:เบอร์รีหวาน]]
[[zh:甜浆果]]</li><li>[[Armadillo Scute|Armadillo Scute]]<br/>{{about|the item dropped by armadillos|the turtle scute|Turtle Scute}}
{{Item
| image = Armadillo Scute.png
| renewable = Yes
| stackable = Yes (64)
|title=Armadillo scute}}
'''Armadillo Scutes''' are [[item]]s that [[armadillo]]s drop when brushed. They can be used to craft [[wolf armor]] which can be put on [[wolves]].
== Obtaining ==
=== Mob loot ===
[[Armadillo]]s drop armadillo scutes when they are [[brush]]ed.
== Usage ==
=== Crafts ingredient ===
{{crafting usage}}
Armadillo scutes can be crafted into [[wolf armor]].
=== Repairing ===
Armadillo scutes can be used to repair [[wolf armor]].
==Issues==
{{issue list}}
{{Items}}
[[Category:Renewable resources]]</li></ul> |
17w47a | Prior to The Flattening, this block's numeral ID was 152. | |||
1.14{{Extension DPL}}<ul><li>[[Ink Sac|Ink Sac]]<br/>{{For|the variant dropped by Glow squids|Glow Ink Sac}}
{{Item
| image = Ink Sac.png
| renewable = Yes
| stackable = Yes (64)
}}
An '''ink sac''' is an [[item]] dropped by a [[squid]] upon death used to create [[black dye]], [[dark prismarine]]{{only|BE|short=1}}, and [[Book and Quill|books and quills]].
== Obtaining ==
=== Mob loot ===
==== Squid ====
{{see also|Tutorials/Squid farming|title1=Squid farming}}
A [[squid]] drops one to three ink sacs upon death. The maximum amount is increased by 1 per level of [[Looting]], for a maximum of 1 to 6 with Looting III.
=== Fishing ===
Ink sacs can be obtained as a "junk" item from [[fishing]]. The [[Luck of the Sea]] [[enchantment]] decreases the chance.
=== Trading ===
[[Wandering trader]]s sometimes sell 3 ink sacs for an [[emerald]] {{in|bedrock}}. Apprentice level [[Trading#Librarian|librarians]] also buy 5 ink sacs for one [[emerald]].
=== Natural generation ===
{{LootChestItem|ink-sac}}
== Usage ==
=== Crafting ingredient ===
{{crafting usage}}
{{IN|bedrock}}, ink sacs can be also used in banner patterns:
{{banner crafting usage}}
=== Loom ingredient ===
{{Banner loom usage|Ink Sac}}
=== Dye ===
{{Dye usage}}
* Each type of [[Prismarine#Dark Prismarine|dark prismarine]] can be crafted using varying amounts of 8 [[Prismarine Shard#prismarine shards|prismarine shards]].
=== Trading ===
Journeyman-level librarian [[villager]]s have a {{frac|2|3}} chance to buy five ink sacs for an [[emerald]]. They always offer the trade {{in|bedrock|lc=}}.
=== Signs ===
Ink sacs can be applied to [[sign]]s or [[hanging sign]]s to revert glowing text back to default.
== Sounds ==
{{edition|java}}:
{{Sound table
|sound=Ink sac1.ogg
|sound2=Ink sac2.ogg
|sound3=Ink sac3.ogg
|subtitle=Ink Sac splotches
|source=block
|description=When an ink sac is used on a sign
|id=item.ink_sac.use
|translationkey=subtitles.item.ink_sac.use
|volume=1.0
|pitch=''varies'' <ref group=sound>Each sound can be 0.85, 0.88, or 0.9</ref>
|distance=16
|foot=1}}
{{edition|bedrock}}:
{{Sound table
|type=bedrock
|sound=Ink sac1.ogg
|sound2=Ink sac2.ogg
|sound3=Ink sac3.ogg
|source=sound
|description=When an ink sac is used on a sign
|id=sign.ink_sac.use
|volume=1.0
|pitch=1.0
|foot=1}}
== Data values ==
=== ID ===
{{edition|java}}:
{{ID table
|edition=java
|showforms=y
|generatetranslationkeys=y
|displayname=Ink Sac
|spritetype=item
|nameid=ink_sac
|form=item
|foot=1}}
{{edition|bedrock}}:
{{ID table
|edition=bedrock
|showaliasids=y
|shownumericids=y
|showforms=y
|notshowbeitemforms=y
|generatetranslationkeys=y
|displayname=Ink Sac
|spritetype=item
|nameid=ink_sac
|aliasid=dye / 0
|id=413
|form=item
|translationkey=item.dye.black.name
|foot=1}}
== Video ==
{{video note|Ink sacs can no longer be used as a dye in Java Edition.}}
<div style="text-align:center">{{yt|ABYCZfawO60}}</div>
== History ==
{{History|java beta}}
{{History||1.2|[[File:Ink Sac JE1 BE1.png|32px]] Added ink sacks, together with all other dyes.}}
{{History||1.2_02|"Ink Sack" has been renamed to "Ink Sac".}}
{{History|java}}
{{History||1.3.1|snap=12w17a|Ink sacs are now used to craft [[book and quill]]s.}}
{{History||1.4.2|snap=12w34a|Added the ability to [[Armor#Dyeing|dye]] leather [[armor]] and [[wolf]] collars.}}
{{History||1.4.6|snap=12w49a|Ink sacs can now be crafted with [[gunpowder]] to create a [[firework star]].}}
{{History||1.6.1|snap=13w19a|[[Stained clay]] can now be [[crafting|crafted]].}}
{{History||1.7.2|snap=13w41a|[[Stained glass]] can now be crafted.}}
{{History||1.8|snap=14w25a|Ink sacs are now used to craft [[dark prismarine]].}}
{{History|||snap=14w30a|Added [[banner]]s, which can be [[dye]]d with ink sacs.}}
{{History||1.11|snap=16w39a|Ink sacs can now be used to dye [[shulker box]]es.}}
{{History||1.12|snap=17w06a|Ink sacs are now used to craft black [[concrete powder]].}}
{{History|||snap=17w15a|Ink sacs can now be used to dye [[bed]]s.}}
{{History||1.13|snap=17w47a|The different data values for the <code>dye</code> ID have been split up into their own IDs.
|Prior to [[1.13/Flattening|''The Flattening'']], this [[item]]'s numeral ID was 351.}}
{{History||1.14|snap=18w43a|Ink sacs can now be used to craft [[black dye]].
|Ink sacs can no longer be used as a [[dye]].
|All of the dye-related functions and crafting recipes of ink sac (except books and quills and dark prismarine) have been transferred to black dye.
|[[File:Ink Sac JE2 BE2.png|32px]] The texture of ink sacs has been changed.}}
{{History|||snap=19w11a|Librarian [[villager]]s now [[trading|buy]] ink sacs.}}
{{History||1.15|snap=Pre-release 1|Ink sacs are no longer used to craft [[dark prismarine]].}}
{{History||1.17|snap=21w03a|Ink sacs can now be used to remove the text's glowing effect of a [[sign]].}}
{{History||1.20<br>(Experimental)|link=1.19.3|snap=22w42a|Ink sacs can now be used to remove the text's glowing effect of a [[hanging sign]].}}
{{History|pocket alpha}}
{{History||v0.3.0|[[File:Ink Sac JE1 BE1.png|32px]] Added ink sacs. They are currently unobtainable and serve no purpose.}}
{{History||v0.8.0|snap=build 1|Ink sacs can now be used to craft [[cocoa beans]].}}
{{History|||snap=build 3|Ink sacs are now available in [[creative]].}}
{{History||v0.9.0|snap=build 1|Ink sacs now generate in [[village]] and [[stronghold]] [[chest]]s.}}
{{History||v0.11.0|snap=build 1|Ink sacs can now be obtained from [[squid]].
|Ink sacs can now be obtained as a junk [[item]] from [[fishing]].}}
{{History||v0.14.0|snap=build 1|Ink sacs now can now be used to dye water in [[cauldron]]s.}}
{{History||v0.16.0|snap=build 1|Ink sacs are no longer used to craft [[cocoa beans]].
|Ink sacs can now be used to craft [[dark prismarine]].}}
{{History|pocket}}
{{History||1.0.0|snap=alpha 0.17.0.1|Ink sacs can now be used to dye [[shulker]]s.}}
{{History||1.1.0|snap=alpha 1.1.0.0|Ink sacs are now used to re-dye [[bed]]s.
|Ink sacs can now be used to dye [[shulker box]]es.}}
{{History|bedrock}}
{{History||1.2.0|snap=beta 1.2.0.2|Ink sacs can now be used to craft [[book and quill]]s.
|Added [[banner]]s, which can be [[dye]]d with ink sacs.
|Ink sacs can now be crafted with [[gunpowder]] to create [[firework star]]s.
|Ink sacs can now be used to craft black [[concrete powder]].
|[[Stained glass]] can now be [[crafting|crafted]].}}
{{History||1.4.0|snap=beta 1.2.20.1|Ink sacs can now be crafted from iron, sulfur, and 4 oxygen in the [[compound creator]]s.
|Ink sacs can now be used to craft [[balloon]]s and [[glow stick]]s.}}
{{History||1.8.0|snap=beta 1.8.0.10|Ink sacs can now be used to craft [[black dye]].}}
{{History||1.10.0|snap=beta 1.10.0.3|Ink sacs can now be bought from [[wandering trader]]s.
|[[File:Ink Sac JE2 BE2.png|32px]] The texture of ink sacs has been changed.}}
{{History||1.11.0|snap=beta 1.11.0.4|Ink sacs can now be [[trading|sold]] to librarian [[villager]]s.}}
{{History||1.16.100|snap=beta 1.16.100.56|The ID of ink sacs has been changed from {{cd|dye/0}} to {{cd|ink_sac}}.}}
{{History||1.16.210|snap=beta 1.16.210.59|Ink sacs can now be used to revert glowing text on signs to normal.}}
{{History|console}}
{{History||xbox=TU1|xbone=CU1|ps=1.00|switch=1.0.1|wiiu=Patch 1|[[File:Ink Sac JE1 BE1.png|32px]] Added ink sacs.}}
{{History||xbox=none|xbone=none|ps=1.90|wiiu=none|switch=none|[[File:Ink Sac JE2 BE2.png|32px]] The texture of ink sacs has been changed.}}
{{History|New 3DS}}
{{History||0.1.0|[[File:Ink Sac JE1 BE1.png|32px]] Added ink sacs.}}
{{History|foot}}
== Issues ==
{{issue list}}
== References ==
{{reflist}}
{{Items}}
[[Category:Bedrock Edition specific information]]
[[Category:Items]]
[[Category:Dyes]]
[[Category:Renewable resources]]
[[cs:Váček inkoustu]]
[[de:Tintenbeutel]]
[[es:Saco de tinta]]
[[fr:Poche d'encre]]
[[hu:Tintazsák]]
[[ja:イカスミ]]
[[ko:먹물 주머니]]
[[nl:Inktzak]]
[[pl:Torbiel z atramentem]]
[[pt:Bolsa de tinta]]
[[ru:Чернильный мешок]]
[[uk:Чорнильний мішок]]
[[zh:墨囊]]</li><li>[[Minecart with Hopper|Minecart with Hopper]]<br/>{{ItemEntity
|image=Minecart with Hopper.png
|renewable=Yes
|stackable=No
|size=Height: 0.7 Blocks<br>Width: 0.98 Blocks
|networkid='''[[JE]]''': 10
|drops=1 {{ItemLink|Minecart with Hopper}}<br>plus contents
|health={{hp|6}}
}}
A '''minecart with hopper''' is a [[minecart]] with a [[hopper]] inside. Unlike a normal hopper, it pulls items from containers much more quickly, cannot push items into containers, can collect [[Item (entity)|item entities]] through a single layer of [[solid block]]s and is locked and unlocked via [[Activator Rail|activator rails]].
== Obtaining ==
=== Crafting ===
{{Crafting
|Output= Minecart with Hopper
|type= Transportation
|Hopper|Minecart}}
Minecarts with hoppers can be retrieved by attacking them. By doing so it drop as an [[item (entity)|item]] and any other contents of the hopper are dropped as well.
== Usage ==
[[File:Minecart with Hopper GUI.png|thumb|176px|The GUI of a minecart with hopper.]]
Minecarts with hoppers are placed similarly to other [[minecart]]s.
A minecart with hopper pulls in items lying nearby (within a range slightly larger than the cart itself), or inside a container directly above the minecart, at a rate of 1 item every [[game tick]] (20 items per second), eight times as fast as a normal hopper. It also picks up items that are lying on a block directly above the track. It does not push items into containers, but a hopper underneath the track can remove items from a minecart with hopper on the track. Ordinary hoppers can also drop items into a minecart with hopper like other containers, at the normal speed of 2.5 items per second. In Bedrock Edition, a minecart with hopper on curved rail pulls in items in a hopper lying in front of its moving direction and 1 block above if hopper's output funnel is pointed downward and no block is below that hopper.<ref>{{bug|MCPE-94293}}</ref>
The hopper can be disabled by passing over a powered [[activator rail]], and can be reenabled by an inactive activator rail.
An empty minecart with hopper can travel more than 85 blocks without stopping (as opposed to a normal cart going less than 12 blocks) from a dead stop using a 2 powered track starter even with another cart in front of them. However, the distance traveled by a minecart with hopper depends on the hopper's load. Using a 1 powered rail starter track, a minecart with an empty hopper travels 64 blocks until it stops (as opposed to an empty normal minecart going 8 blocks). The distance traveled diminishes non-linearly with increased hopper load; a minecart with a full hopper can travel only 16 blocks in this setup.
{{See also|Tutorials/Storage minecarts}}
== Sounds ==
{{Edition|Java}}:<br>
Minecarts with hoppers use the Friendly Creatures sound category for entity-dependent sound events.<ref group=sound name=rollsource>{{bug|MC-42132}}</ref>
{{Sound table
|sound=Minecart rolling.ogg
|subtitle=Minecart rolls
|source=Friendly Creatures <ref group=sound name=rollsource/>
|overridesource=1
|description=While a minecart with hopper is moving
|id=entity.minecart.riding
|translationkey=subtitles.entity.minecart.riding
|volume=0.0-0.35 <ref group=sound>Relates linearly with horizontal velocity (max 0.5)</ref>
|pitch=0.0-1.0 <ref group=sound>Will increase by 0.0025 per tick if the minecart's horizontal velocity is more than 0.01</ref>
|distance=16
|foot=1}}
{{Edition|Bedrock}}:
{{Sound table
|type=bedrock
|sound=Minecart rolling.ogg
|source=neutral
|description=While a minecart with hopper is moving
|id=minecart.base
|foot=1}}
== Data values ==
=== ID ===
{{edition|java}}:
{{ID table
|edition=java
|firstcolumnname=Item
|showforms=y
|generatetranslationkeys=y
|displayname=Minecart with Hopper
|spritetype=item
|nameid=hopper_minecart
|form=item
|foot=1}}
{{ID table
|edition=java
|firstcolumnname=Entity
|generatetranslationkeys=y
|displayname=Minecart with Hopper
|spritetype=entity
|nameid=hopper_minecart
|foot=1}}
{{edition|bedrock}}:
{{ID table
|edition=bedrock
|firstcolumnname=Item
|shownumericids=y
|showforms=y
|notshowbeitemforms=y
|generatetranslationkeys=y
|displayname=Minecart with Hopper
|spritetype=item
|nameid=hopper_minecart
|id=526
|form=item
|foot=1}}
{{ID table
|edition=bedrock
|firstcolumnname=Entity
|shownumericids=y
|generatetranslationkeys=y
|displayname=Minecart with Hopper
|spritetype=entity
|nameid=hopper_minecart
|id=96
|foot=1}}
=== Entity data ===
Minecarts with hoppers have entity data associated with them that contain various properties of the entity.
{{el|java}}:
{{main|Entity format}}
{{/ED}}
{{el|bedrock}}:
: See [[Bedrock Edition level format/Entity format]].
== Video ==
<div style="text-align:center">{{yt|I5etC7LeCac}}</div>
== History ==
{{History|java}}
{{History||1.5|snap=13w03a|[[File:Minecart with Hopper JE1 BE1.png|32px]] [[File:Minecart with Hopper (item) JE1 BE1.png|32px]] Added minecart with hopper.}}
{{History||1.9|snap=15w43a|Loot tables are added; minecarts with hopper now can use loot tables.}}
{{History||1.9.1|snap=pre2|The title of the [[inventory]] is changed from 'Hopper minecart' to 'Minecart with Hopper'.}}
{{History||1.11|snap=16w32a|The entity ID of the minecart with hopper has now been changed from <code>MinecartHopper</code> to <code>hopper_minecart</code>.}}
{{History||1.13|snap=17w47a|Prior to [[1.13/Flattening|''The Flattening'']], this [[item]]'s numeral ID was 408.}}
{{History||1.14|snap=18w43a|[[File:Minecart with Hopper JE2 BE2.png|32px]] [[File:Minecart with Hopper (item) JE2 BE2.png|32px]] The textures of the minecart with hopper have now been changed.}}
{{History||1.15|snap=19w38a|[[File:Minecart with Hopper 19w38a.png|32px]] The hopper now appears dark, same as suffocating mobs.}}
{{History|||snap=19w39a|The hopper now renders correctly.}}
{{History||1.16.2|snap=Pre-release 1|Opening or destroying a minecart with hopper now angers nearby [[piglin]]s.}}
{{History||1.19|snap=22w13a|The crafting recipe for a minecart with hopper is now shapeless.|Breaking a minecart with hopper will now drop the item instead of the minecart and hopper separately, though the contents of the hopper are still dropped.<ref>{{bug|MC-249493|||Fixed}}</ref>}}
{{History||1.19.4|snap=23w06a|Minecart with hopper now no longer aggravates [[piglin]]s when opened.}}
{{History|pocket alpha}}
{{History||v0.14.0|snap=build 1|[[File:Minecart with Hopper JE1 BE1.png|32px]] [[File:Minecart with Hopper (item) JE1 BE1.png|32px]] Added minecart with hopper.}}
{{History|pocket}}
{{History||1.1.0|snap=alpha 1.1.0.0|The entity ID of the minecart with hopper has now been changed from <code>minecarthopper</code> to <code>hopper_minecart</code>.}}
{{History|bedrock}}
{{History||1.10.0|snap=beta 1.10.0.3|[[File:Minecart with Hopper JE2 BE2.png|32px]] [[File:Minecart with Hopper (item) JE2 BE2.png|32px]] The textures of the minecart with hopper have now been changed.}}
{{History||1.19.0|snap=beta 1.19.0.30|Breaking a minecart with hopper will now drop the item instead of the minecart and hopper separately, though the contents of the hopper are still dropped.}}
{{History|console}}
{{History||xbox=TU19|xbone=CU7|ps=1.12|wiiu=Patch 1|switch=1.0.1|[[File:Minecart with Hopper JE1 BE1.png|32px]] [[File:Minecart with Hopper (item) JE1 BE1.png|32px]] Added minecart with hopper.}}
{{History||xbox=none|xbone=none|ps=1.90|wiiu=none|switch=none|[[File:Minecart with Hopper JE2 BE2.png|32px]] [[File:Minecart with Hopper (item) JE2 BE2.png|32px]] The textures of the minecart with hopper have now been changed.}}
{{History|new 3ds}}
{{History||0.1.0|[[File:Minecart with Hopper JE1 BE1.png|32px]] [[File:Minecart with Hopper (item) JE1 BE1.png|32px]] Added minecart with hopper.
|Minecarts with hopper emit smoke [[particles]] when destroyed.}}
{{History|foot}}
== Issues ==
{{issue list}}
== Gallery ==
<gallery>
File:First hopper Minecart Image.png|The first image of hopper carts released by Dinnerbone.<ref>{{Tweet|Dinnerbone|291215700213772289|Well you guys got that quick. The letters in the hotbar were for <nowiki>[imgur link]|January 15, 2013}}</ref>
File:13w03a Banner.png|The 13w03a banner showing a minecart with hopper and a [[dropper]].
</gallery>
== References ==
{{reflist}}
{{items}}
{{entities}}
[[Category:Mechanics]]
[[Category:Storage]]
[[cs:Vozík s násypkou]]
[[de:Trichterlore]]
[[es:Vagoneta con tolva]]
[[fr:Wagonnet à entonnoir]]
[[hu:Tölcsér csille]]
[[it:Carrello da miniera]]
[[ja:ホッパー付きのトロッコ]]
[[ko:호퍼가 실린 광산 수레]]
[[nl:Mijnkar met trechter]]
[[pl:Wagonik z lejem]]
[[pt:Carrinho de mina com funil]]
[[ru:Вагонетка с воронкой]]
[[uk:Вагонетка з лійкою]]
[[zh:漏斗矿车]]</li></ul></nowiki> |
18w43a | ||||
1.16{{Extension DPL}}<ul><li>[[Disc Fragment|Disc Fragment]]<br/>{{Item
| image = Disc Fragment.png
| renewable = No
| stackable = Yes (64)
}}
A '''disc fragment''' is a [[music disc]] fragment obtained from [[ancient city]] loot chests. Nine fragments can be combined in a [[Crafting Table|crafting table]] to make a music disc named "5".
== Obtaining ==
=== Chest loot ===
{{LootChestItem|disc-fragment-5}}
== Usage ==
=== Crafting ingredient ===
{{crafting usage|Disc Fragment 5}}
== Data values ==
=== ID ===
{{ID table
|edition=java<!--
|showitemtags=y-->
|showforms=y
|firstcolumnname=Track
|generatetranslationkeys=y
|displayname=Samuel Åberg - 5
|spritename=disc-fragment-5
|spritetype=item
|nameid=disc_fragment_5<!--
|itemtags=-->
|form=item
|foot=y}}
== History ==
{{History|java}}
{{History||1.19|snap=22w16a|[[File:Disc Fragment.png|32px]] Added disc fragments.}}
{{History|bedrock}}
{{History||1.19.0|snap=beta 1.19.0.28|[[File:Disc Fragment.png|32px]] Added disc fragments.}}
{{History|foot}}
== Issues ==
{{Issue list}}
==Gallery==
<gallery>
9 to 5.jpg|9 fragments of the 5 music disc.
</gallery>
==See also==
* {{EnvLink|Music}}
* {{ItemLink|Music Disc}}
{{Items}}
[[de:Plattenbruchstück]]
[[es:Fragmento de disco]]
[[fr:Fragment de disque]]
[[ja:レコードの破片]]
[[pl:Fragment płyty]]
[[pt:Fragmento de disco]]
[[ru:Фрагмент пластинки 5]]
[[uk:Фрагмент платівки]]
[[zh:唱片残片]]
[[Category:Non-renewable resources]]</li><li>[[Shield|Shield]]<br/>{{Item
| image = Shield.png
| image2 = White Shield.png
| extratext = View [[#Gallery|all renders]]
| durability = 336
| renewable = Yes
| stackable = No
}}
A '''shield''' is a tool used for protecting the [[player]] against attacks.
== Obtaining ==
=== Crafting ===
{{Crafting
|head=1
|showname=0
|A1=Any Planks <!-- the recipe changed in 15w37a, do not change it to the old recipe without reason -->
|B1=Iron Ingot
|C1=Any Planks
|A2=Any Planks
|B2=Any Planks
|C2=Any Planks
|B3=Any Planks
|Output=Shield
|type=Combat
}}
{{Crafting
|ignoreusage=1
|Shield
|Matching Banner
|A2=Shield
|B2=Banner
|Output=Matching Shield
|type=combat
|foot=1
}}
=== Repairing ===
{{Crafting
|ignoreusage=1
|showdescription=1
|Damaged Shield
|Damaged Shield
|Output=Shield
|description= The durability of the two shields is added together, plus an extra 5% durability. The repaired shield has no pattern.
|type= Combat
}}
Shields may also be repaired on an [[anvil]] by using [[planks]] or another shield. Shields repaired on anvils retain their pattern.
=== Trading ===
Journeyman-level armorer [[villager]]s have {{frac|1|3}}{{only|Bedrock|short=1}}/{{frac|2|5}}{{only|Java|short=1}} chance of selling a shield for 5 [[emerald]]s as their sixth trade.
== Usage ==
Despite using iron in its crafting recipe, it cannot be smelted into [[iron nugget]]s.<ref>{{bug|MC-111738}}</ref>
=== Defense ===
Shields are used for [[blocking]] incoming attacks. {{control|Using}}{{Only|Java|short=1}} or {{Control|sneaking}}{{Only|Bedrock|short=1}} causes a player to slow to a [[sneaking]] pace, and after {{convert|5|ticks|seconds}}<ref>{{bug|MC-100949||Shield blocking is delayed}}</ref>, attacks coming from in front of the player are blocked, dealing no damage. When the shield blocks an attack of {{hp|3}} or stronger, it takes durability damage equal to the strength of the attack rounded up.
Most blocked projectiles that carry status effects (such as [[Shulker#Shulker bullet|shulker bullets]]{{only|java|short=1}}, flaming [[arrow]]s, or tipped arrows) do not affect the blocker. [[Trident]]s & arrows can be deflected into other targets. Knockback from melee attacks and projectiles is prevented, while knockback from [[explosion]]s, [[hoglin]], and [[ravager]] attacks are significantly reduced.
The shield directionally blocks all attacks coming from within the FOV of the direction the wielder is facing, providing a full hemisphere of coverage to them. If the wielder faces straight up, they are likely to miss their blocks.<ref>{{bug|MC-109101||Shields do not block damage while the player faces straight up}}</ref><!--straight down fix: MC-92019-->
Mobs that deal continuous contact damage such as the slime, magma cube, and blaze rapidly drain the shield's durability for as long as the shielded player remains within the mob's hitbox.<ref>{{bug|MC-169167}}</ref><ref>{{bug|MCPE-119451}}</ref>
Blockable attacks include:
*Melee attacks, except by a warden, axe-wielding mobs or by a sprinting player wielding an axe, however even without sprinting an axe still greatly decreases the durability
** Status effects do not carry through to the blocker{{only|java|short=1}}.
*Normal, tipped, and spectral [[arrow]]s
** Arrows other than [[Piercing]] are totally deflected and can hit other targets.
** Status effects do not carry through to the blocker{{only|java|short=1}}.
***This can be used to damage the attacker or another mob down there.
*[[Flame|Flaming arrows]]
** Burning does not carry through to the blocker{{only|java|short=1}}.
*[[Trident]]s
*[[Snowball]]s and [[egg]]s
*Spines from [[pufferfish]]
*Bullets from [[shulker]]s
** The levitation effect does not carry through to the blocker{{only|java|short=1}}.
*Spit from [[llama]]s
*[[Fireball]]s, such as from [[blaze]]s and [[fire charge]]s
** Burning does not carry through to the blocker.
*Direct hits from [[ghast]] [[fireball]]s
** These still cause environmental damage.
*All explosions{{only|JE|short=1}}
*Explosion damage from [[creeper]]s
*[[TNT]] that another player lit
*[[Ravager]] headbutts
** These still knock the blocker back by about 3 blocks.
** Blocking these strikes can stun the ravager for a moment, and it roars afterward.
*Ravager roars are blocked but still knock back the blocker.
*[[Bee]] stings are blocked, but bees continuously attack until the player stops blocking and the player is stung.
*Beam attacks from [[guardian]]s or [[elder guardian]]s (only reduces damage by 50%).
*Damage reflected from [[Thorns]] enchantment / [[Guardian|guardians]].
They cannot block:
*Arrows from a [[crossbow]] enchanted with [[Piercing]]
** This does not reduce the shield's durability.
*[[Status effect]]s from tipped arrows or shulker bullets {{only|bedrock|short=1}} <ref>{{bug|MCPE-52904}}</ref>
** Direct projectile damage is blocked, but the effect still carries through.
*Status effects from splash/lingering [[potion]]s, [[evoker]]s' fangs, or breath from the [[ender dragon]]
*Beam attacks from [[guardian]]s or [[elder guardian]]s, or the [[warden]]'s sonic boom attack
*TNT that the blocking player lit themselves{{only|BE|short=1}}
*TNT that a [[Redstone (disambiguation)|redstone mechanism]] lit{{only|BE|short=1}}
*[[Fall damage]], including that from [[ender pearl]]s
** This also includes when the player rides an [[entity]] that died due to fall damage.
*Strikes from a warden or any [[axe]]-wielding mob (e.g., [[vindicator]]s, [[piglin brute]]s, [[zombie]]s after disabling players shield they attack another time immediately)
** Such strikes disable being able to use shields for 5 seconds.
=== Applying patterns ===
[[File:Cyan Shield Screenshot.png|250px|thumb|A custom shield.]]
Shields can be decorated by applying a [[banner]].
{{Crafting
|showdescription=1
|Shield
|Matching Banner
|Output=Matching Shield; Ominous Shield
|B2link=Banner
|Olink=Shield
|type=Combat
|description=Applies the banner pattern to the shield. The banner is consumed.<br>The shield must have no preexisting patterns.<br>Does not change existing durability or enchantments on the shield.
}}
Unlike with [[banner]]s, shields cannot be repainted or washed in a [[cauldron]]. Shields have only half the resolution of banners, making patterns look slightly different. In the game files, the pattern textures can be found in a separate directory called entity/shield.
{{IN|java}}, shields with patterns can also be obtained using the same commands as banners, except <code>banner</code> has to be replaced with <code>shield</code>.
=== Enchantments ===
A shield can receive the following [[enchantments]], but only through an [[anvil]]:
{| class="wikitable col-2-center"
|+
!Name
!Max Level
![[Enchanting|Method]]
|-
|[[Unbreaking]]
|III
|{{Inventory slot|Anvil}}
|-
|[[Mending]]
|I
|{{Inventory slot|Anvil}}
|-
|[[Curse of Vanishing]]
|I
|{{Inventory slot|Anvil}}
|-
|}
== Sounds ==
{{edition|java}}:
{{Sound table
|sound=Shield block1.ogg
|sound2=Shield block2.ogg
|sound3=Shield block3.ogg
|sound4=Shield block4.ogg
|sound5=Shield block5.ogg
|subtitle=Shield blocks
|source=player
|description=When an attack is blocked using a shield
|id=item.shield.block
|translationkey=subtitles.item.shield.block
|volume=1.0
|pitch=0.8-1.2
|distance=16}}
{{Sound table
|sound=Equip generic1.ogg
|sound2=Equip generic2.ogg
|sound3=Equip generic3.ogg
|sound4=Equip generic4.ogg
|sound5=Equip generic5.ogg
|sound6=Equip generic6.ogg
|subtitle=Gear equips
|source=player
|description=When a shield is placed in the offhand slot
|id=item.armor.equip_generic
|translationkey=subtitles.item.armor.equip
|volume=1.0
|pitch=1.0
|distance=16}}
{{Sound table
|sound=Random break.ogg
|subtitle=Item breaks
|source=player
|description=When a shield's durability is exhausted
|id=item.shield.break
|translationkey=subtitles.entity.item.break
|volume=0.8
|pitch=0.8-1.2
|distance=16
|foot=1}}
{{edition|bedrock}}:
{{Sound table
|type=bedrock
|sound=Shield block1.ogg
|sound2=Shield block2.ogg
|sound3=Shield block3.ogg
|sound4=Shield block4.ogg
|sound5=Shield block5.ogg
|source=player
|description=When an attack is blocked using a shield
|id=item.shield.block
|volume=0.7
|pitch=1.0}}
{{Sound table
|sound=Equip generic1.ogg
|sound2=Equip generic2.ogg
|sound3=Equip generic3.ogg
|sound4=Equip generic4.ogg
|sound5=Equip generic5.ogg
|sound6=Equip generic6.ogg
|source=player
|description=When a shield is placed in the offhand slot<wbr>{{Upcoming|BE 1.20.30}}<wbr><ref group=sound>{{Bug|MCPE-168039}}</ref>
|id=armor.equip_generic
|volume=1.0
|pitch=1.0}}
{{Sound table
|sound=Random break.ogg
|source=player
|description=When a shield's durability is exhausted
|id=random.break
|volume=1.0
|pitch=0.9
|foot=1}}
== Data values ==
=== ID ===
{{edition|java}}:
{{ID table
|edition=java
|showforms=y
|generatetranslationkeys=y
|displayname=Shield
|spritetype=item
|nameid=shield
|form=item
|translationkey=item.minecraft.shield, item.minecraft.shield.white, item.minecraft.shield.orange, item.minecraft.shield.magenta, item.minecraft.shield.light_blue, item.minecraft.shield.yellow, item.minecraft.shield.lime, item.minecraft.shield.pink, item.minecraft.shield.gray, item.minecraft.shield.light_gray, item.minecraft.shield.cyan, item.minecraft.shield.purple, item.minecraft.shield.blue, item.minecraft.shield.brown, item.minecraft.shield.green, item.minecraft.shield.red, item.minecraft.shield.black
|foot=1}}
{{edition|bedrock}}:
{{ID table
|edition=bedrock
|shownumericids=y
|showforms=y
|notshowbeitemforms=y
|generatetranslationkeys=y
|displayname=Shield
|spritetype=item
|nameid=shield
|id=355
|form=item
|translationkey=item.shield.name, item.shield.white.name, item.shield.orange.name, item.shield.magenta.name, item.shield.lightBlue.name, item.shield.yellow.name, item.shield.lime.name, item.shield.pink.name, item.shield.gray.name, item.shield.silver.name, item.shield.cyan.name, item.shield.purple.name, item.shield.blue.name, item.shield.brown.name, item.shield.green.name, item.shield.red.name, item.shield.black.name
|foot=1}}
== Advancements ==
{{load advancements|Not Today}}
== History ==
{{History||July 10, 2011|link=http://minetimes.wordpress.com/2011/07/10/interview-mit-jeb-ihr-konntet-die-fragen-stellen/|During an interview, [[Jeb]] says that "shields for the left arm" might be added.}}
{{History|java}}
{{History||1.9|snap=15w33c|[[File:White Shield.png|22px]] [[File:Light Gray Shield.png|22px]] [[File:Gray Shield.png|22px]] [[File:Black Shield.png|22px]] [[File:Brown Shield.png|22px]] [[File:Red Shield.png|22px]] [[File:Orange Shield.png|22px]] [[File:Yellow Shield.png|22px]] [[File:Lime Shield.png|22px]] [[File:Green Shield.png|22px]] [[File:Cyan Shield.png|22px]] [[File:Light Blue Shield.png|22px]] [[File:Blue Shield.png|22px]] [[File:Purple Shield.png|22px]] [[File:Magenta Shield.png|22px]] [[File:Pink Shield.png|22px]] Added shields.
|Shields replace the [[blocking]] functionality of [[sword]]s, although blocking more [[damage]].
|The current [[crafting]] recipe of shields includes [[wool]], producing 16 possible colored shields. There currently isn't a blank, uncolored shield.
{{{!}} class{{=}}"collapsible collapsed" data-description{{=}}"Recipe"
! Recipe
{{!}}-
{{!}}
{{Crafting
|A1=Matching Wool |B1=Any Planks
|A2=Matching Wool |B2=Any Planks |C2=Iron Ingot
|A3=Matching Wool |B3=Any Planks
|Output=Matching Shield
|ignoreusage=1
}}
{{!}}}
|Any of the colored base shields can be [[crafting|crafted]] with a [[banner]] of the same base color, to produce a patterned shield.
}}
{{History|||snap=15w34c|When an attack is blocked by a shield, the attacker now may be knocked back.
|Being attacked with an [[axe]] now may disable shield use for 5 seconds.}}
{{History|||snap=15w37a|The [[crafting]] recipe of shields has been changed to 6 [[planks]] and 1 [[iron ingot]].
{{{!}} class{{=}}"collapsible collapsed" data-description{{=}}"Recipe"
! Recipe
{{!}}-
{{!}}
{{Crafting
|A1=Any Planks |B1=Iron Ingot |C1=Any Planks
|A2=Any Planks |B2=Any Planks |C2=Any Planks
|B3=Any Planks
|Output=Shield
|ignoreusage=1
}}
{{!}}}
|[[File:Shield JE1.png|22px]] Crafting a shield now produces a base wooden shield that can be crafted together with any [[banner]].
|The cooldown of shields has been reduced from 0.5s to 0.25s.
|Blocking with shields now prevents some side effects.{{verify}}
|[[Arrow]]s now ricochet off shields.}}
{{History|||snap=15w44a|Shields can now be repaired by combining with other shields. This removes any [[banner]] that had been applied.}}
{{History|||snap=15w45a|Crafting a banner onto a shield now consumes the banner.}}
{{History|||snap=15w47b|Added shield blocking [[sound]]s.}}
{{History|||snap=16w07a|Added more variation of shield blocking sounds.}}
{{History|||snap=pre1|The [[durability]] of shields has been increased from 181 to 337.}}
{{History||1.10|snap=16w21a|Shields can now be equipped by [[dispenser]]s.}}
{{History||1.11|snap=16w33a|[[Crafting]] a shield with a banner no longer changes the durability, nor does it remove [[enchanting|enchantments]] from it.}}
{{History|||snap=16w35a|Shields now block 100% of [[damage]]/[[knockback]]/debuffs dealt in melee combat.}}
{{History||1.13|snap=17w47a|Prior to [[1.13/Flattening|''The Flattening'']], this [[item]]'s numeral ID was 442.}}
{{History||1.13.2|snap=release|Shields now properly block attacks when the player is facing down.<ref>{{bug|MC-92019|||Fixed}}</ref>}}
{{History||1.14|snap=18w43a|[[File:Shield JE2 BE1.png|22px]] The texture of shields has been changed.
|Shields no longer knockback attackers when they block due to a bug with rework of the blocking mechanic with the introduction of the ravager.<ref>{{bug|MC-147694}}</ref>}}
{{History|||snap=19w11a|Shields can now be [[trading|bought]] from armorer [[villager]]s.}}
{{History||1.14.3|snap=Pre-Release 3|Shields blocking flaming [[arrow]]s no longer put the [[player]] on [[fire]].}}
{{History||1.16|snap=20w06a|[[Crimson planks]] and [[warped planks]] can now be used to craft shields.}}
{{History||1.19|snap=22w11a|[[Mangrove planks]] can now be used to craft shields.}}
{{History||1.19.3|snap=22w43a|Shields can now properly block all explosions.}}
{{History||1.19.4|snap=23w06a|A sound is now played when a shield is placed into the offhand slot.}}
{{History|upcoming java}}
{{History||Combat Tests|snap=1.14.3 - Combat Test|Critical hits now bypass shields.
|The warm-up delay has been removed from shields.
|When in the off-hand, shields now activate when [[sneaking]].}}
{{History|||snap=Combat Test 2|Shields now protect against critical attacks again.
|Shields can only be activated when the weapon is charged to 200%.}}
{{History|||snap=Combat Test 3|A "Shield Indicator" option that displays when the shield is active, similar to the attack indicator, has been added.
|An option to hide shields when active has been added.
|The arc of available protection of shields has been decreased to 100 degrees instead of 180 degrees.}}
{{History|||snap=Combat Test 4|An option to disable shields being activated by pressing {{ctrl|crouch}} has been added.
|The option to hide the shield has been removed.}}
{{History|||snap=Combat Test 6|Shields now protect up to 5 [[damage]] for melee attacks (still 100% against projectiles).
|Shields activate instantly regardless if the weapon is charged, similar to Combat test 1.
|Shields now recover faster after an attack.}}
{{History|||snap=Combat Test 7c|Shields now add a 50% knockback resistance when active.
|Shields now protect against 100% [[explosions|explosion]] damage.}}
{{History|||snap=Combat Test 8c|The knockback calculations for shields have been fixed.{{Info needed}}
|Crouch-shielding while jumping has been disabled.
|Shields with [[banner]]s are now temporarily stronger than normal shields (10 absorption instead of 5, and better knockback resistance) to test different shield types.}}
{{History|bedrock}}
{{History||1.10.0|snap=beta 1.10.0.3|[[File:Shield JE2 BE1.png|22px]] Added shields.
|Shields cannot be customized with [[banner]]s.
|Shields are activated by [[sneaking|crouching]] or mounting [[mob]]s.}}
{{History||1.11.0|snap=beta 1.11.0.4|Shields can now be [[trading|bought]] from armorer [[villager]]s.}}
{{History||1.16.210|snap=beta 1.16.210.51|Now grants partial knockback protection from the [[goat]] ram attack.}}
{{History||1.16.220|snap=beta 1.16.220.50|[[Mob]]s that pick up shields now place them to their off-hand.}}
{{History||1.18.30|snap=beta 1.18.30.26|Being attacked with an [[axe]] now may disable shield use. This was not mentioned in the official changelog.<ref>{{tweet|kingbdogz|1504505321884196872|We missed a change in recent changelogs for the Bedrock beta that you may like - we have now made a parity fix that makes shields get disabled for 5 seconds when attacked by an Axe-wielding mob or player. We will make sure to list this properly in the next beta :)|March 17, 2022}}</ref>}}
{{History||1.20.0|snap=beta 1.20.0.20|[[File:White Shield.png|22px]] [[File:Light Gray Shield.png|22px]] [[File:Gray Shield.png|22px]] [[File:Black Shield.png|22px]] [[File:Brown Shield.png|22px]] [[File:Red Shield.png|22px]] [[File:Orange Shield.png|22px]] [[File:Yellow Shield.png|22px]] [[File:Lime Shield.png|22px]] [[File:Green Shield.png|22px]] [[File:Cyan Shield.png|22px]] [[File:Light Blue Shield.png|22px]] [[File:Blue Shield.png|22px]] [[File:Purple Shield.png|22px]] [[File:Magenta Shield.png|22px]] [[File:Pink Shield.png|22px]] Shields can now be customized using a banner.}}
{{History|PS4}}
{{History||1.90|[[File:Shield JE1.png|22px]] Added shields.
|Shields do not have [[banner]] application features.}}
{{History|foot}}
== Issues ==
{{issue list|-wither}}
== Gallery ==
<gallery>
Shield.png|Shield
White Shield.png|White Shield
Light Gray Shield.png|Light Gray Shield
Gray Shield.png|Gray Shield
Black Shield.png|Black Shield
Brown Shield.png|Brown Shield
Red Shield.png|Red Shield
Orange Shield.png|Orange Shield
Yellow Shield.png|Yellow Shield
Lime Shield.png|Lime Shield
Green Shield.png|Green Shield
Cyan Shield.png|Cyan Shield
Light Blue Shield.png|Light Blue Shield
Blue Shield.png|Blue Shield
Purple Shield.png|Purple Shield
Magenta Shield.png|Magenta Shield
Pink Shield.png|Pink Shield
</gallery>
=== Screenshots ===
<gallery>
JebShield.png|One of the first images of shields. [[Jeb]] wearing diamond armor while holding a creeper-emblazoned shield during [[MineCon]] 2015.
Jeb Crafting Shield.png|Jeb crafting a shield.
Player with Shield.png|Player holding the default shield.
Shield Block.png|A player blocking with a shield.
ShieldFirstPerson.png|Blocking with a shield as seen in first person.
Enchanted Shield (item).gif|An enchanted shield as seen in the [[inventory]].
-ominous- shield.png|A shield with the [[ominous banner]] on it as seen in the inventory.
Kai-Shield.jpg|An image of [[Kai]] wielding a banner with a shield, used to announce the feature on [[Bedrock Edition]].
Bedrock-Shields.jpg
</gallery>
== References ==
{{reflist}}
== External Links ==
* [https://www.minecraft.net/en-us/article/taking-inventory--shield Taking Inventory: Shield] – Minecraft.net on July 25, 2019
{{Items}}
[[Category:Combat]]
[[Category:Renewable resources]]
[[de:Schild (Kampf)]]
[[fr:Bouclier]]
[[it:Scudo]]
[[ja:盾]]
[[ko:방패]]
[[nl:Schild]]
[[pl:Tarcza]]
[[pt:Escudo]]
[[ru:Щит]]
[[th:โล่]]
[[zh:盾牌]]</li></ul> |
20w10a | Blocks of redstone can now support ladders and tripwire hooks.[2] | |||
1.19{{Extension DPL}}<ul><li>[[Prismarine Shard|Prismarine Shard]]<br/>{{Item
| renewable = Yes
| stackable = Yes (64)
| type =
}}
A '''prismarine shard''' is an item obtained by defeating [[guardian]]s or [[elder guardian]]s. It can be used to craft various [[prismarine]] blocks as well as [[sea lantern]]s.
== Obtaining ==
Prismarine shards are dropped upon the death of [[guardian]]s and [[elder guardian]]s. From these mobs, 0–2 shards are dropped each time. This can be increased to a maximum of 5 with the [[Looting]] enchantment.
== Usage ==
=== Crafting ingredient ===
{{crafting usage}}
== Data values ==
=== ID ===
{{edition|java}}:
{{ID table
|edition=java
|showforms=y
|generatetranslationkeys=y
|displayname=Prismarine Shard
|spritetype=item
|nameid=prismarine_shard
|form=item
|foot=1}}
{{edition|bedrock}}:
{{ID table
|edition=bedrock
|showaliasids=y
|shownumericids=y
|showforms=y
|notshowbeitemforms=y
|generatetranslationkeys=y
|displayname=Prismarine Shard
|spritetype=item
|nameid=prismarine_shard
|aliasid=prismarineshard
|id=565
|form=item
|foot=1}}
== History ==
{{History|java}}
{{history||1.8|snap=14w25a|[[File:Prismarine Shard JE1 BE1.png|32px]] Added prismarine shards.}}
{{History||1.13|snap=17w47a|Prior to [[1.13/Flattening|''The Flattening'']], this [[item]]'s numeral ID was 409.}}
{{History||1.14|snap=18w43a|[[File:Prismarine Shard JE2 BE2.png|32px]] The texture of prismarine shards has now been changed.}}
{{History|pocket alpha}}
{{History||v0.16.0|snap=build 1|[[File:Prismarine Shard JE1 BE1.png|32px]] Added prismarine shards.}}
{{History|bedrock}}
{{History||1.10.0|snap=beta 1.10.0.3|[[File:Prismarine Shard JE2 BE2.png|32px]] The texture of prismarine shards has now been changed.}}
{{History|console}}
{{History||xbox=TU31|xbone=CU19|ps=1.22|wiiu=Patch 3|[[File:Prismarine Shard JE1 BE1.png|32px]] Added prismarine shards.}}
{{History||xbox=none|xbone=none|ps=1.90|wiiu=none|switch=none|[[File:Prismarine Shard JE2 BE2.png|32px]] The texture of prismarine shards has now been changed.}}
{{History|New 3DS}}
{{History||1.3.12|[[File:Prismarine Shard JE1 BE1.png|32px]] Added prismarine shards.}}
{{History|foot}}
== Issues ==
{{issue list}}
{{items}}
[[de:Prismarinscherbe]]
[[es:Fragmento de prismarina]]
[[fr:Éclat de prismarine]]
[[ja:プリズマリンの欠片]]
[[ko:프리즈머린 조각]]
[[nl:Prismarienscherf]]
[[pl:Odłamek pryzmarynu]]
[[pt:Pedaço de prismarinho]]
[[ru:Призмариновый осколок]]
[[uk:Призмариновий уламок]]
[[zh:海晶碎片]]
[[Category:Renewable resources]]</li><li>[[Smithing Template|Smithing Template]]<br/>{{for|the block|Smithing Table}}
{{Item
| title = Smithing Template
| image = <gallery>
Netherite Upgrade Smithing Template.png | Netherite Upgrade
Sentry Armor Trim Smithing Template.png | Armor Trim
</gallery>
| rarity = Rare
| renewable = No<!--Smithing templates are not renewable because diamonds, their only other method of creation, are not renewable.-->
| stackable = Yes (64)
}}
'''Smithing templates''' are items used in [[Smithing Table|smithing tables]] to alter [[Tool|tools]] and [[armor]]. They are consumed when used, but can be [[Crafting|duplicated]] using an existing template, its material and [[Diamond|diamonds]].
The sixteen '''armor trim smithing templates''' are found in a variety of [[Generated structures|structures]], and are used to apply various decorative trims (dependent on the variant) to armor using certain minerals for different colors.
'''Netherite upgrade smithing templates''' are required to upgrade diamond equipment with a [[Netherite Ingot|netherite ingot]]. They are only found in [[Bastion Remnant|bastion remnants]], but are guaranteed only in [[:en:Bastion_Remnant#Treasure_room|treasure rooms]].
== Obtaining ==
Smithing templates can be found in various [[Generated structures|structures]] and can be duplicated by using seven diamonds and a block based on what the template is.
=== Crafting ===
{{Crafting
|A1=Diamond |B1=Matching Smithing Template |C1=Diamond
|A2=Diamond |B2=Netherrack;Cobblestone;Sandstone;End Stone;Terracotta;Terracotta;Netherrack;Cobblestone;Terracotta;Cobbled Deepslate;Blackstone;Purpur Block;Prismarine;Cobblestone;Cobbled Deepslate;Terracotta;Mossy Cobblestone |C2=Diamond
|A3=Diamond |B3=Diamond |C3=Diamond
|Output=Matching Smithing Template,2
}}
{| class="article-table"
|+ Duplication
! Item !! Material
|-
| {{ItemSprite|netherite-upgrade|text=Netherite Upgrade}} || {{BlockSprite|Netherrack|text=Netherrack}}
|-
| {{ItemSprite|sentry-armor-trim|text=Sentry Armor Trim}} || {{BlockSprite|Cobblestone|text=Cobblestone}}
|-
| {{ItemSprite|vex-armor-trim|text=Vex Armor Trim}} || {{BlockSprite|Cobblestone|text=Cobblestone}}
|-
| {{ItemSprite|wild-armor-trim|text=Wild Armor Trim}} || {{BlockSprite|Mossy Cobblestone|text=Mossy Cobblestone}}
|-
| {{ItemSprite|coast-armor-trim|text=Coast Armor Trim}} || {{BlockSprite|Cobblestone|text=Cobblestone}}
|-
| {{ItemSprite|dune-armor-trim|text=Dune Armor Trim}} || {{BlockSprite|Sandstone|text=Sandstone}}
|-
| {{ItemSprite|wayfinder-armor-trim|text=Wayfinder Armor Trim}} || {{BlockSprite|Terracotta|text=Terracotta}}
|-
| {{ItemSprite|raiser-armor-trim|text=Raiser Armor Trim}} || {{BlockSprite|Terracotta|text=Terracotta}}
|-
| {{ItemSprite|shaper-armor-trim|text=Shaper Armor Trim}} || {{BlockSprite|Terracotta|text=Terracotta}}
|-
| {{ItemSprite|host-armor-trim|text=Host Armor Trim}} || {{BlockSprite|Terracotta|text=Terracotta}}
|-
| {{ItemSprite|ward-armor-trim|text=Ward Armor Trim}} || {{BlockSprite|Cobbled Deepslate|text=Cobbled Deepslate}}
|-
| {{ItemSprite|silence-armor-trim|text=Silence Armor Trim}} || {{BlockSprite|Cobbled Deepslate|text=Cobbled Deepslate}}
|-
| {{ItemSprite|tide-armor-trim|text=Tide Armor Trim}} || {{BlockSprite|Prismarine|text=Prismarine}}
|-
| {{ItemSprite|snout-armor-trim|text=Snout Armor Trim}} || {{BlockSprite|Blackstone|text=Blackstone}}
|-
| {{ItemSprite|rib-armor-trim|text=Rib Armor Trim}} || {{BlockSprite|Netherrack|text=Netherrack}}
|-
| {{ItemSprite|eye-armor-trim|text=Eye Armor Trim}} || {{BlockSprite|End Stone|text=End Stone}}
|-
| {{ItemSprite|spire-armor-trim|text=Spire Armor Trim}} || {{BlockSprite|Purpur Block|text=Purpur Block}}
|}
{{IN|bedrock}}, spire, tide, and dune armor trims can be duplicated with more blocks than {{in|java}}. In addition to the normal blocks, Tide armor trims can be duplicated using Prismarine Bricks or Dark Prismarine, dune armor trims can be duplicated with smooth sandstone, cut sandstone, or chiseled sandstone, and spire armor trims can be duplicated with purpur pillars.<ref>{{bug|MCPE-172711||Tide, Spire, and Dune Armor Trims can be crafted from more blocks than in Java Edition}}</ref>
=== Mob loot ===
[[Elder guardian]]s have a 20% chance to drop 1 tide armor trim upon death. [[Looting]] doesn't affect this percentage, and the elder guardian doesn't need to be killed by a player in order for the trim to drop and can be duplicated with [[prismarine]].
=== Chest loot ===
{{#invoke:LootChest|base3|netherite-upgrade-smithing-template,sentry-armor-trim-smithing-template,vex-armor-trim-smithing-template,wild-armor-trim-smithing-template,coast-armor-trim-smithing-template,dune-armor-trim-smithing-template,ward-armor-trim-smithing-template,silence-armor-trim-smithing-template,snout-armor-trim-smithing-template,rib-armor-trim-smithing-template,eye-armor-trim-smithing-template,spire-armor-trim-smithing-template}}
Note: In Woodland Mansions, only chests with random loot have the chance to contain the Vex Smithing Template, chests in the "Allium room", "Sapling farm", "Tree-chopping room" and "Fake End portal room" always generate with the same, room specific, loot.
=== Suspicious block loot ===
Items can only be extracted from [[Suspicious Block|suspicious blocks]] using a [[brush]].{{#invoke:LootChest|base3|wayfinder-armor-trim-smithing-template,raiser-armor-trim-smithing-template,shaper-armor-trim-smithing-template,host-armor-trim-smithing-template}}
== Usage ==
=== Crafting ingredient ===
{{Crafting
|A1=Diamond |B1=Matching Smithing Template |C1=Diamond
|A2=Diamond |B2=Netherrack;Cobblestone;Sandstone;End Stone;Terracotta;Terracotta;Netherrack;Cobblestone;Terracotta;Cobbled Deepslate;Blackstone;Purpur Block;Prismarine;Cobblestone;Cobbled Deepslate;Terracotta;Mossy Cobblestone |C2=Diamond
|A3=Diamond |B3=Diamond |C3=Diamond
|Output=Matching Smithing Template,2
}}
=== Smithing ingredient ===
Smithing templates are used at a [[smithing table]]. Netherite upgrade smithing templates are used to upgrade diamond gear into netherite gear by using a netherite upgrade, a piece of diamond gear, and a [[netherite ingot]].
{{Smithing
|head=1
|ingredients=Netherite Upgrade +<br>Any Diamond Gear +<br>[[Netherite Ingot]]
|Netherite Upgrade
|Diamond Helmet; Diamond Chestplate; Diamond Leggings; Diamond Boots; Diamond Sword; Diamond Pickaxe; Diamond Axe; Diamond Shovel
|Netherite Ingot
|Netherite Helmet; Netherite Chestplate; Netherite Leggings; Netherite Boots; Netherite Sword; Netherite Pickaxe; Netherite Axe; Netherite Shovel
|tail=1
}}
{{FakeImage|{{Animate|Iron_Armor_with_Iron_Shaper_Trim.png; Golden_Armor_with_Golden_Shaper_Trim.png; Diamond_Armor_with_Diamond_Shaper_Trim.png; Netherite_Armor_with_Netherite_Shaper_Trim.png|180px}}|If the armor material and the trimming material are the same, the color palette used for the armor trim is darker.}}
Armor trim smithing templates are used to customize an armor piece's appearance by using a smithing template, an armor piece, and an ingot or crystal ([[emerald]], [[redstone dust]], [[lapis lazuli]], [[amethyst shard]], [[nether quartz]], [[netherite ingot]], [[diamond]], [[gold ingot]], [[iron ingot]], or [[copper ingot]]). Including all dyed leather armor colors and regular armor, there are ≈3.679x10<sup>9</sup> different possible armor pieces<!--5713438 leather colors, plus the 4 other armor materials = 5713442. 5713442 * 161 (the 160 trim combos (16 trims, 10 materials) + untrimmed) = 919864162. 919864162 * 4 (helmet, chestplate, leggings, boots) = 3679456648 ≈ 3.679x10^9-->, and 7.16x10<sup>35</sup> <!--919864162 + 1 (no armor in that slot) = 919864163. 919864163^4 = 715969952015045562662444917041515536 ≈ 7.16x10^35 total possible armor combinations-->total possible armor combinations excluding enchantments and the player not wearing armor.
Already trimmed armor can be trimmed again by applying another template on it; the old trim pattern is overwritten in the process.<ref>{{bug|MC-262538||When combining armor trims the new trim deletes the old one|WAI}}</ref> Therefore, one piece of armor cannot possess multiple trims at the same time.
Most armor trims cover a small portion of the armor piece's surface with the trim material, except for the silence armor trim, which allows the trim material to cover a majority of the armor piece's surface.
All of the trims are purely decorative, and don't impact gameplay or strength(without the use of mods or plugins) of the armor they are applied to in any way. [[Piglin]]s do not pick up any gold-trimmed armor pieces, and they are not pacified by players wearing even a full set of gold-trimmed armor (unless, of course, the armor pieces in question are themselves golden), and netherite-trimmed armor pieces can still be burned by [[fire]].
{{Smithing
|head=1
|ingredients=Any Armor Trim +<br>Any Armor Piece +<br>Any Ingot/Crystal
|Any Armor Trim Smithing Template
|Iron Helmet; Netherite Chestplate;Golden Leggings;Diamond Boots
|Amethyst Shard; Copper Ingot; Diamond; Emerald; Gold Ingot; Iron Ingot; Lapis Lazuli; Nether Quartz; Netherite Ingot; Redstone Dust; Diamond; Emerald
|Amethyst Trim Iron Helmet; Copper Trim Netherite Chestplate; Diamond Trim Golden Leggings; Emerald Trim Diamond Boots; Gold Trim Iron Helmet; Iron Trim Netherite Chestplate; Lapis Trim Golden Leggings; Quartz Trim Diamond Boots; Netherite Trim Iron Helmet; Redstone Trim Netherite Chestplate; Diamond Trim Golden Leggings; Emerald Trim Diamond Boots
|tail=1
}}
;List of color palettes for all materials
*{{ItemSprite|emerald }} - {{TrimPalette| emerald }}
*{{ItemSprite|redstone dust }} - {{TrimPalette| redstone dust }}
*{{ItemSprite|lapis lazuli }} - {{TrimPalette| lapis lazuli }}
*{{ItemSprite|amethyst shard }} - {{TrimPalette| amethyst shard }}
*{{ItemSprite|nether quartz }} - {{TrimPalette| nether quartz }}
*{{ItemSprite|netherite ingot }} - {{TrimPalette| netherite ingot }} (Darker: {{TrimPalette| netherite ingot |darker=1}})
*{{ItemSprite|diamond }} - {{TrimPalette| diamond }} (Darker: {{TrimPalette| diamond |darker=1}})
*{{ItemSprite|gold ingot }} - {{TrimPalette| gold ingot }} (Darker: {{TrimPalette| gold ingot |darker=1}})
*{{ItemSprite|iron ingot }} - {{TrimPalette| iron ingot }} (Darker: {{TrimPalette| iron ingot |darker=1}})
*{{ItemSprite|copper ingot }} - {{TrimPalette| copper ingot }}
== Data values ==
=== ID ===
{{edition|java}}:
{{ID table
|edition=java
|firstcolumnname=Smithing Template
|showforms=y
|generatetranslationkeys=y
|displayname=Netherite Upgrade
|spritename=netherite-upgrade-smithing-template
|spritetype=item
|nameid=netherite_upgrade_smithing_template
|form=item}}
{{ID table
|displayname=Sentry Armor Trim
|spritename=sentry-armor-trim-smithing-template
|spritetype=item
|nameid=sentry_armor_trim_smithing_template
|form=item}}
{{ID table
|displayname=Vex Armor Trim
|spritename=vex-armor-trim-smithing-template
|spritetype=item
|nameid=vex_armor_trim_smithing_template
|form=item}}
{{ID table
|displayname=Wild Armor Trim
|spritename=wild-armor-trim-smithing-template
|spritetype=item
|nameid=wild_armor_trim_smithing_template
|form=item}}
{{ID table
|displayname=Coast Armor Trim
|spritename=coast-armor-trim-smithing-template
|spritetype=item
|nameid=coast_armor_trim_smithing_template
|form=item}}
{{ID table
|displayname=Dune Armor Trim
|spritename=dune-armor-trim-smithing-template
|spritetype=item
|nameid=dune_armor_trim_smithing_template
|form=item}}
{{ID table
|displayname=Wayfinder Armor Trim
|spritename=wayfinder-armor-trim-smithing-template
|spritetype=item
|nameid=wayfinder_armor_trim_smithing_template
|form=item}}
{{ID table
|displayname=Raiser Armor Trim
|spritename=raiser-armor-trim-smithing-template
|spritetype=item
|nameid=raiser_armor_trim_smithing_template
|form=item}}
{{ID table
|displayname=Shaper Armor Trim
|spritename=shaper-armor-trim-smithing-template
|spritetype=item
|nameid=shaper_armor_trim_smithing_template
|form=item}}
{{ID table
|displayname=Host Armor Trim
|spritename=host-armor-trim-smithing-template
|spritetype=item
|nameid=host_armor_trim_smithing_template
|form=item}}
{{ID table
|displayname=Ward Armor Trim
|spritename=ward-armor-trim-smithing-template
|spritetype=item
|nameid=ward_armor_trim_smithing_template
|form=item}}
{{ID table
|displayname=Silence Armor Trim
|spritename=silence-armor-trim-smithing-template
|spritetype=item
|nameid=silence_armor_trim_smithing_template
|form=item}}
{{ID table
|displayname=Tide Armor Trim
|spritename=tide-armor-trim-smithing-template
|spritetype=item
|nameid=tide_armor_trim_smithing_template
|form=item}}
{{ID table
|displayname=Snout Armor Trim
|spritename=snout-armor-trim-smithing-template
|spritetype=item
|nameid=snout_armor_trim_smithing_template
|form=item}}
{{ID table
|displayname=Rib Armor Trim
|spritename=rib-armor-trim-smithing-template
|spritetype=item
|nameid=rib_armor_trim_smithing_template
|form=item}}
{{ID table
|displayname=Eye Armor Trim
|spritename=eye-armor-trim-smithing-template
|spritetype=item
|nameid=eye_armor_trim_smithing_template
|form=item}}
{{ID table
|displayname=Spire Armor Trim
|spritename=spire-armor-trim-smithing-template
|spritetype=item
|nameid=spire_armor_trim_smithing_template
|form=item
|foot=1}}
{{edition|bedrock}}:
{{ID table
|edition=bedrock
|firstcolumnname=Smithing Template
|shownumericids=y
|showforms=y
|notshowbeitemforms=y
|generatetranslationkeys=y
|displayname=Netherite Upgrade
|spritename=netherite-upgrade-smithing-template
|spritetype=item
|nameid=netherite_upgrade_smithing_template
|id=685
|form=item
|translationkey=item.smithing_template.name, upgrade.netherite_upgrade.name}}
{{ID table
|displayname=Sentry Armor Trim
|spritename=sentry-armor-trim-smithing-template
|spritetype=item
|nameid=sentry_armor_trim_smithing_template
|id=686
|form=item
|translationkey=item.smithing_template.name, trim_pattern.sentry.name}}
{{ID table
|displayname=Vex Armor Trim
|spritename=vex-armor-trim-smithing-template
|spritetype=item
|nameid=vex_armor_trim_smithing_template
|id=692
|form=item
|translationkey=item.smithing_template.name, trim_pattern.vex.name}}
{{ID table
|displayname=Wild Armor Trim
|spritename=wild-armor-trim-smithing-template
|spritetype=item
|nameid=wild_armor_trim_smithing_template
|id=689
|form=item
|translationkey=item.smithing_template.name, trim_pattern.wild.name}}
{{ID table
|displayname=Coast Armor Trim
|spritename=coast-armor-trim-smithing-template
|spritetype=item
|nameid=coast_armor_trim_smithing_template
|id=688
|form=item
|translationkey=item.smithing_template.name, trim_pattern.coast.name}}
{{ID table
|displayname=Dune Armor Trim
|spritename=dune-armor-trim-smithing-template
|spritetype=item
|nameid=dune_armor_trim_smithing_template
|id=687
|form=item
|translationkey=item.smithing_template.name, trim_pattern.dune.name}}
{{ID table
|displayname=Wayfinder Armor Trim
|spritename=wayfinder-armor-trim-smithing-template
|spritetype=item
|nameid=wayfinder_armor_trim_smithing_template
|id=698
|form=item
|translationkey=item.smithing_template.name, trim_pattern.wayfinder.name}}
{{ID table
|displayname=Raiser Armor Trim
|spritename=raiser-armor-trim-smithing-template
|spritetype=item
|nameid=raiser_armor_trim_smithing_template
|id=699
|form=item
|translationkey=item.smithing_template.name, trim_pattern.raiser.name}}
{{ID table
|displayname=Shaper Armor Trim
|spritename=shaper-armor-trim-smithing-template
|spritetype=item
|nameid=shaper_armor_trim_smithing_template
|id=700
|form=item
|translationkey=item.smithing_template.name, trim_pattern.shaper.name}}
{{ID table
|displayname=Host Armor Trim
|spritename=host-armor-trim-smithing-template
|spritetype=item
|nameid=host_armor_trim_smithing_template
|id=701
|form=item
|translationkey=item.smithing_template.name, trim_pattern.host.name}}
{{ID table
|displayname=Ward Armor Trim
|spritename=ward-armor-trim-smithing-template
|spritetype=item
|nameid=ward_armor_trim_smithing_template
|id=690
|form=item
|translationkey=item.smithing_template.name, trim_pattern.ward.name}}
{{ID table
|displayname=Silence Armor Trim
|spritename=silence-armor-trim-smithing-template
|spritetype=item
|nameid=silence_armor_trim_smithing_template
|id=697
|form=item
|translationkey=item.smithing_template.name, trim_pattern.silence.name}}
{{ID table
|displayname=Tide Armor Trim
|spritename=tide-armor-trim-smithing-template
|spritetype=item
|nameid=tide_armor_trim_smithing_template
|id=693
|form=item
|translationkey=item.smithing_template.name, trim_pattern.tide.name}}
{{ID table
|displayname=Snout Armor Trim
|spritename=snout-armor-trim-smithing-template
|spritetype=item
|nameid=snout_armor_trim_smithing_template
|id=694
|form=item
|translationkey=item.smithing_template.name, trim_pattern.snout.name}}
{{ID table
|displayname=Rib Armor Trim
|spritename=rib-armor-trim-smithing-template
|spritetype=item
|nameid=rib_armor_trim_smithing_template
|id=695
|form=item
|translationkey=item.smithing_template.name, trim_pattern.rib.name}}
{{ID table
|displayname=Eye Armor Trim
|spritename=eye-armor-trim-smithing-template
|spritetype=item
|nameid=eye_armor_trim_smithing_template
|id=691
|form=item
|translationkey=item.smithing_template.name, trim_pattern.eye.name}}
{{ID table
|displayname=Spire Armor Trim
|spritename=spire-armor-trim-smithing-template
|spritetype=item
|nameid=spire_armor_trim_smithing_template
|id=696
|form=item
|translationkey=item.smithing_template.name, trim_pattern.spire.name
|foot=1}}
== Achievements ==
{{load achievements|Smithing with style}}
== Advancements ==
{{load advancements|Crafting a New Look;Smithing with Style}}
== Video ==
{{yt|klP9SrJFDU8}}
== History ==
{{History|java}}
{{History||1.20<br>(Experimental)|link=1.19.4|snap=23w04a|[[File:Netherite Upgrade Smithing Template JE1 BE1.png|32px]] [[File:Sentry Armor Trim Smithing Template JE1 BE1.png|32px]] [[File:Vex Armor Trim Smithing Template JE1 BE1.png|32px]] [[File:Wild Armor Trim Smithing Template JE1 BE1.png|32px]] [[File:Coast Armor Trim Smithing Template JE1 BE1.png|32px]] [[File:Dune Armor Trim Smithing Template JE1 BE1.png|32px]] [[File:Ward Armor Trim Smithing Template JE1 BE1.png|32px]] [[File:Tide Armor Trim Smithing Template JE1 BE1.png|32px]] [[File:Snout Armor Trim Smithing Template JE1 BE1.png|32px]] [[File:Rib Armor Trim Smithing Template JE1 BE1.png|32px]] [[File:Eye Armor Trim Smithing Template JE1 BE1.png|32px]] [[File:Spire Armor Trim Smithing Template JE1 BE1.png|32px]] Added smithing templates behind the "Update 1.20" experimental datapack.}}
{{History|||snap=23w05a|Smithing templates can be used to trim leather armor.
|Gold, iron, diamond, and netherite armor can be trimmed with their respective material.
|The dune, coast, wild, and sentry armor trims now always generate two templates in a chest when found.
|Increased the chances for all smithing templates that generate in chest loot to spawn:
*Netherite upgrade chance to find increased from 3.2% to 10%.
*Coast chance to find increased from 11.1% to 16.7%.
*Dune chance to find increased from 11.1% to 14.3%.
*Eye chance to find increased from 4.7% to 10% in alter chests, and to 100% in library chests.
*Rib chance to find increased from 4.7% to 6.7%.
*Sentry chance to find increased from 20% to 25%.
*Snout chance to find increased from 4.7% to 8.3%.
*Spire chance to find increased from 4.7% to 6.7%.
*Vex chance to find increased from 4.7% to 50%.
*Ward chance to find increased from 4.7% to 5%.
*Wild chance to find increased from 20% to 33%.}}
{{History||1.20|snap=23w12a|Smithing templates are now available without using the "Update 1.20" experimental datapack.|[[File:Wayfinder Armor Trim Smithing Template JE1 BE1.png|32px]] [[File:Raiser Armor Trim Smithing Template JE1 BE1.png|32px]] [[File:Shaper Armor Trim Smithing Template JE1 BE1.png|32px]] [[File:Host Armor Trim Smithing Template JE1 BE1.png|32px]] [[File:Silence Armor Trim Smithing Template JE1 BE1.png|32px]] Added wayfinder, raiser, shaper, host, and silence armor trim smithing templates.
|[[File:Sentry Armor Trim Smithing Template JE2 BE2.png|32px]] [[File:Dune Armor Trim Smithing Template JE2 BE2.png|32px]] Changed the textures of the sentry and dune armor trim smithing templates.
|The pattern textures of dune and sentry armor trims are changed from [[File:Armor Trim Dune (sample model) JE1 BE1.png|24px]] [[File:Armor Trim Sentry (sample model) JE1 BE1.png|24px]] to [[File:Armor Trim Dune (sample model) JE2 BE2.png|24px]] [[File:Armor Trim Sentry (sample model) JE2 BE2.png|24px]].<br>
Those previous patterns were left with different names: dune was renamed sentry and sentry was renamed shaper.}}
{{History|||snap=23w16a|Wayfinder, raiser, shaper, and host armor trim no longer generates in [[suspicious sand]] in [[trail ruins]].|Due to the split of the archaeological loot tables for the suspicious gravel within the [[trail ruins]]; wayfinder, raiser, shaper, and host armor trim now are in the rare loot.}}
{{History|||snap=23w17a|The probability of the wayfinder, raiser, shaper, and host armor trim to generate in [[suspicious gravel]] in [[trail ruins]] has been changed from 1/11 to 1/12.|The player now get the [[advancement]] "Crafting a new look" when they craft a trimmed armor at a [[smithing table]] using a smithing template, "Smithing with style" when they apply these smithing templates at least once on their armor: Spire, Snout, Rib, Ward, Silence, Vex, Tide, and Wayfinder.}}
{{History|bedrock}}
{{History||Next Major Update<br>(Experimental)|link=Bedrock Edition 1.19.80|snap=beta 1.19.80.21|[[File:Netherite Upgrade Smithing Template JE1 BE1.png|32px]] [[File:Sentry Armor Trim Smithing Template JE1 BE1.png|32px]] [[File:Vex Armor Trim Smithing Template JE1 BE1.png|32px]] [[File:Wild Armor Trim Smithing Template JE1 BE1.png|32px]] [[File:Coast Armor Trim Smithing Template JE1 BE1.png|32px]] [[File:Dune Armor Trim Smithing Template JE1 BE1.png|32px]] [[File:Ward Armor Trim Smithing Template JE1 BE1.png|32px]] [[File:Tide Armor Trim Smithing Template JE1 BE1.png|32px]] [[File:Snout Armor Trim Smithing Template JE1 BE1.png|32px]] [[File:Rib Armor Trim Smithing Template JE1 BE1.png|32px]] [[File:Eye Armor Trim Smithing Template JE1 BE1.png|32px]] [[File:Spire Armor Trim Smithing Template JE1 BE1.png|32px]] Added smithing templates behind the "[[Bedrock Edition 1.20.0|Next Major Update]]" [[experimental]] toggle.}}
{{History|||snap=beta 1.19.80.22|[[File:Wayfinder Armor Trim Smithing Template JE1 BE1.png|32px]] [[File:Raiser Armor Trim Smithing Template JE1 BE1.png|32px]] [[File:Shaper Armor Trim Smithing Template JE1 BE1.png|32px]] [[File:Host Armor Trim Smithing Template JE1 BE1.png|32px]] [[File:Silence Armor Trim Smithing Template JE1 BE1.png|32px]] Added wayfinder, raiser, shaper, host, and silence armor trim smithing templates.
|[[File:Sentry Armor Trim Smithing Template JE2 BE2.png|32px]] [[File:Dune Armor Trim Smithing Template JE2 BE2.png|32px]] Changed the textures of the sentry and dune armor trim smithing templates.
|The pattern textures of dune and sentry armor trims are changed from [[File:Armor Trim Dune (sample model) JE1 BE1.png|24px]] [[File:Armor Trim Sentry (sample model) JE1 BE1.png|24px]] to [[File:Armor Trim Dune (sample model) JE2 BE2.png|24px]] [[File:Armor Trim Sentry (sample model) JE2 BE2.png|24px]].<br>
Those previous patterns were left with different names: dune was renamed sentry and sentry was renamed shaper.}}
{{History||1.20.0|snap=beta 1.20.0.21|Smithing templates are now available without using the "Next Major Update" experimental toggle.}}
{{History|foot}}
== Issues ==
{{Issue list}}
== Trivia ==
* Smithing templates were named "Smithing Blueprints" in the prototype but was changed because the word "blueprint" sounded modern and technical.<ref>{{ytl|klP9SrJFDU8|Minecraft 1.20: Armor Trims - What Do They Mean?|Minecraft|May 4, 2023|t=98}}</ref>
* When Mojang developer Gnembon was working on armor trims, he accidentally messed up their rendering, making them jet through the player's body in a weird fashion, similar to what appears in {{w|Salvador Dalí}}'s paintings where a hand might poke through a forehead.<ref>{{ytl|ghQODkq4ITI|Mojang Dev Comes To Hermitcraft! (Mojang Developer Gnembom Interview)|GoodVodsWithScar|June 23, 2023|t=1980}}</ref>
* Some of the armor trims feature patterns based on a [[mob]] or [[block]] that is found in the same [[Generated structures|structure]] as the corresponding smithing template.<ref name=":0">"Some of the armor trims reflect the place where you found the template, for example bastions contain a piglin-inspired trim."-[[Sofia Dankis]]-{{Mcnet|armor-trims-coming-minecraft-1-20|Armor Trims Coming to Minecraft 1.20|January 24, 2023}}</ref>
** The spire armor trim resembles a [[shulker]].
** The vex armor trim resembles an [[evoker]]. As an item in the [[inventory]], it resembles the wing or the vein texture of a [[vex]].
** The wild armor trim has moss growing on 3 of its corners.
** The coast armor trim appears to have barnacles attached to it.
** The ward armor trim, as an item in the inventory, resembles the faces inside a [[warden]]'s chest.
** The silence armor trim appears to have sculk creeping onto / infecting it.
** The tide armor trim resembles [[Prismarine|prismarine bricks]].
** The snout armor trim resembles a [[piglin]]<ref name=":0" />.
** The rib armor trim resembles a [[wither skeleton]].
** The eye armor trim resembles an [[eye of ender]]. There are also two eyes on the head part of the armor trim that resemble those of an [[enderman]].
* ''Netherite upgrade smithing template'' (35 characters with "_" and 32 characters without "_") and ''sentry armor trim smithing template'' (35 characters with "_" and 31 characters without "_") are the current longest name for item ID, while ''[[polished blackstone pressure plate]]'' and ''[[cracked polished blackstone bricks]]'' have 34 characters with "_" and 31 characters without "_".
* The silence armor trim is the rarest trim, due to being found in ancient cities in the deep dark, and having only a 1.2% chance to be per chest.
* When [[lapis lazuli]] is used as trim material, it is called "Lapis" instead of its full name "Lapis Lazuli"; this is the only instance of the abbreviation "Lapis" being used in-game.<ref>{{bug|MC-262486|||WAI}}</ref>
== Gallery ==
=== Sprites ===
<gallery>
Netherite Upgrade Smithing Template.png|Netherite Upgrade
Sentry Armor Trim Smithing Template.png|Sentry Armor Trim
Vex Armor Trim Smithing Template.png|Vex Armor Trim
Wild Armor Trim Smithing Template.png|Wild Armor Trim
Coast Armor Trim Smithing Template.png|Coast Armor Trim
Dune Armor Trim Smithing Template.png|Dune Armor Trim
Wayfinder Armor Trim Smithing Template.png|Wayfinder Armor Trim
Raiser Armor Trim Smithing Template.png|Raiser Armor Trim
Shaper Armor Trim Smithing Template.png|Shaper Armor Trim
Host Armor Trim Smithing Template.png|Host Armor Trim
Ward Armor Trim Smithing Template.png|Ward Armor Trim
Silence Armor Trim Smithing Template.png|Silence Armor Trim
Tide Armor Trim Smithing Template.png|Tide Armor Trim
Snout Armor Trim Smithing Template.png|Snout Armor Trim
Rib Armor Trim Smithing Template.png|Rib Armor Trim
Eye Armor Trim Smithing Template.png|Eye Armor Trim
Spire Armor Trim Smithing Template.png|Spire Armor Trim
</gallery>
=== Armor trim patterns ===
<gallery>
Armor Trim Sentry (sample model).png|Sentry Armor Trim
Armor Trim Vex (sample model).png|Vex Armor Trim
Armor Trim Wild (sample model).png|Wild Armor Trim
Armor Trim Coast (sample model).png|Coast Armor Trim
Armor Trim Dune (sample model).png|Dune Armor Trim
Armor Trim Wayfinder (sample model).png|Wayfinder Armor Trim
Armor Trim Raiser (sample model).png|Raiser Armor Trim
Armor Trim Shaper (sample model).png|Shaper Armor Trim
Armor Trim Host (sample model).png|Host Armor Trim
Armor Trim Ward (sample model).png|Ward Armor Trim
Armor Trim Silence (sample model).png|Silence Armor Trim
Armor Trim Tide (sample model).png|Tide Armor Trim
Armor Trim Snout (sample model).png|Snout Armor Trim
Armor Trim Rib (sample model).png|Rib Armor Trim
Armor Trim Eye (sample model).png|Eye Armor Trim
Armor Trim Spire (sample model).png|Spire Armor Trim
</gallery>
=== Official Artwork ===
<gallery>
T&T Thumbnail.jpg|[[Sunny]] wearing amethyst armor trims.
Warden Chasing Alex with Silence Trim Pixel Art.png|A [[warden]] chasing Alex holding the silence armor trim.
Alex Trimming Armor in Smithing Table Pixel Art.png|Alex adding the silence armor trim and amethyst on iron armor.
Alex Wearing Iron Armor with Amethyst Pixel Art.jpg|Alex wearing the trimmed iron armor.
File:Live2023-01.jpeg|Noor working on trimmed iron armor.
</gallery>
=== Screenshots ===
<gallery>
Kingbdogz Armor Trim 1.jpg|Redstone trims on diamond armor.
Kingbdogz Armor Trim 2.jpg|Gold trims on netherite armor.
Too Many Trims.jpg|A large amount of armor trims.
Kingbdogz Armor Trim 3.jpg|Gold on netherite.
Kingbdogz Armor Trim 4.jpg|Diamond on diamond.
New Armor Trims in 23W12A.jpg|<ref>{{Tweet|kingbdogz|1638580472962850831|new trims got the drip The new "Silence" armor trim to the left is now the hardest trim to get, with only a 1% chance per chest to spawn in Ancient Cities. Definitely gonna be a challenge to get!|March 22, 2023}}</ref>
Emerald Armor.png|Emerald on gold.
Xilefian Armor Trims 1.png|[[Xilefian]] showing how armor trims work.
Xilefian Armor Trims 2.png|[[Xilefian]] showing how armor trims work.
Xilefian Armor Trims 3.png|[[Xilefian]] showing how armor trims work.
Armor Trims On Netherite Armors.png|A display of all eleven (before [[Java Edition 23w12a]]) armor trims and ten colors on netherite armors.
Armor Trim Showcase.png|A display of all eleven (before [[Java Edition 23w12a]]) armor trims, on netherite armor using emerald as the trim material.
Armor Trim Colors.png|A display of all ten armor trim colors, using the ward trim on a netherite helmet.
Silence Armor Trim on All Armors.png|A display of all ten colors of the silence armor trim on all armors.
Image 2023-06-07 154100087.png|A screenshot of every armor trim in every color(besides quartz) on leather armor.
Armor Trim Friends.jpg|Official screenshot of [[Alex]] and [[Zuri]] wearing armor trims.
LadyAgnes Armor Trims.jpg|Copper trims on netherite armor.
Trim Lineup.jpg
Fancy Delta.jpg|[[Kai]] wearing trimmed armor in a [[Basalt Delta]].
Trims & Pots.jpg
Noor Gold Armor Trim .jpeg
Noor Diamond Armor Trim.jpeg
Noor Netherite Armor Trim.jpeg
Noor Iron Armor Trim.jpeg
</gallery>
== References ==
{{Reflist}}
{{Items}}
[[Category:Bedrock Edition]]
[[Category:Non-renewable resources]]
[[de:Schmiedevorlage]]
[[es:Molde de herrería]]
[[fr:Modèle de forge]]
[[ja:鍛冶型]]
[[pl:Szablon kowalski]]
[[pt:Molde de ferraria]]
[[ru:Кузнечный шаблон]]
[[uk:Ковальський шаблон]]
[[zh:锻造模板]]</li></ul> |
22w13a | Blocks of redstone can now be found within redstone circuits in ancient cities. | |||
| Pocket Edition Alpha | |||||
v0.11.0{{Extension DPL}}<ul><li>[[Medicine|Medicine]]<br/>{{Redirect|Elixir", "Antidote", "Eye Drops", and "Tonic|s=1|the brewable items|Potion}}
{{Education feature}}
{{Exclusive|bedrock|education}}
{{Item
| image = <gallery>
Antidote.png | Antidote
Elixir.png | Elixir
Eye Drops.png | Eye Drops
Tonic.png | Tonic
</gallery>
| renewable = Yes
| stackable = No
}}
A '''medicine''' is a type of [[potion]] that cures the specified [[effect]] instead of applying it.
== Obtaining ==
=== Brewing ===
Cures are brewed from awkward potions using different [[element]]s.{{only|bedrock|education}} These drinks remove the specified effect when drank, and cannot be modified into splash, lingering, extended or enhanced versions.
{| class="wikitable" style="text-align: center;" data-description="Remedies"
! Potion
! Reagent, base
! Effect
! Notes
|-
! {{Inventory slot|Antidote}}<br>Antidote
| {{Brewing Stand
|Input= Silver
|Output2= Awkward Potion
}}
| Cures [[Poison]]
| Silver detects poison {{w|Silver#Symbolic role|in folklore}}, and possesses anti-microbial properties.
|-
! {{Inventory slot|Elixir}}<br>Elixir
| {{Brewing Stand
|Input= Cobalt
|Output2= Awkward Potion
}}
| Cures [[Weakness]]
|
|-
! {{Inventory slot|Eye Drops}}<br>Eye Drops
| {{Brewing Stand
|Input= Calcium
|Output2= Awkward Potion
}}
| Cures [[Blindness]]
|
|-
! {{Inventory slot|Tonic}}<br>Tonic
| {{Brewing Stand
|Input= Bismuth
|Output2= Awkward Potion
}}
| Cures [[Nausea]]
| In real life, {{w|bismuth subsalicylate}} is used as a nausea treatment.
|}
== Usage ==
Each type of medicine has an associated effect that it can cure (see {{slink||Brewing}} for details). Players can drink the medicine only if they have the corresponding effect. Drinking the medicine eliminates the effect. Although medicine does not resemble [[potion]]s, the player still gets the [[glass bottle]] back.
== Sounds ==
{{Sound table
|type=bedrock
|sound=Drink.ogg
|source=player
|description=When a player drinks medicine
|id=random.drink
|foot=1}}
== Data values ==
=== ID ===
{{ID table
|edition=bedrock
|shownumericids=y
|showforms=y
|generatetranslationkeys=y
|displayname=Medicine
|spritetype=item
|nameid=medicine
|id=599
|form=item
|notshowbeitemforms=y
|translationkey=item.medicine.poison.name,item.medicine.weakness.name,item.medicine.blindness.name,item.medicine.nausea.name
|foot=1}}
== History ==
{{History|bedrock}}
{{History||1.4.0|snap=beta 1.2.20.1|[[File:Antidote BE1.png|32px]] [[File:Elixir BE1.png|32px]] [[File:Eye Drops BE1.png|32px]] [[File:Tonic BE1.png|32px]] Added medicines.}}
{{History|education}}
{{History||1.0.27|[[File:Antidote BE1.png|32px]] [[File:Elixir BE1.png|32px]] [[File:Eye Drops BE1.png|32px]] [[File:Tonic BE1.png|32px]] Added medicines.}}
{{History|foot}}
== Issues ==
{{issue list|Cures|Medicine}}
== See also ==
* [[Potion]]
* [[Splash Potion]]
* [[Lingering Potion]]
{{Items}}
{{Education Edition}}
[[Category:Non-renewable resources]]
[[Category:Education Edition items]]
[[de:Medizin]]
[[it:Medicinale]]
[[ja:治療薬]]
[[lzh:藥]]
[[pl:Leki]]
[[pt:Remédio]]
[[zh:药物]]</li><li>[[Trial Key|Trial Key]]<br/>{{Item|
|image=Trial Key .webp
|renewable=Yes
|stackable=Yes (64)
}}
{{Stub}}
{{in dev|java|bedrock|1.21|1.21.0}}
A '''Trial Key''' is an item found in [[Trial Chambers]].
Its functionality remained a mystery for a pretty good time, but on the Minecraft Monthly of January 2024, it has been revealed to open vaults, which once opened will drop an item. It's still unknown what will the loot be, but was seen dispensing the following:
Enchanted iron helmet, enchanted iron leggings, enchanted crossbow, enchanted diamond chestplate, iron, gold and diamond horse armour, enchanted golden apple, saddle, enchanted diamond axe, enchanted iron pickaxe and enchanted iron Shovel.
The trial key can currently be obtained from trial spawners (50%), or from pots and chests (8%).
[[Category:Items]]
[[ja:Trial Key]]
[[lzh:煉管]]</li></ul> |
build 1 | ||||
| The only purpose of blocks of redstone is to store redstone dust. | |||||
v0.13.0{{Extension DPL}}<ul><li>[[Banner Pattern|Banner Pattern]]<br/>{{Item
| image = Banner Pattern.png
| rarity =
* '''Flower Charge, Field Masoned, Bordure Indented, Globe, Snout'''
* Common
* '''Creeper Charge, Skull Charge'''
* Uncommon
* '''Thing'''
* Epic
| renewable =
* '''Snout, Thing''': No
* '''All others''': Yes
| stackable = No
}}
'''Banner patterns''' are [[item]]s used to customize [[banner]]s inside [[loom]]s.
There are six patterns {{in|java}} and eight {{in|bedrock}}.
== Obtaining ==
[[File:Banner Patterns 20w15a.png|thumb|All six banner patterns {{in|java}} with their various sources.]]
=== Crafting ===
{{see also|Banner/Patterns|title1=List of patterned banners}}
4 out of 6 banner patterns {{only|JE}} and 2 more {{only|BE}} can be obtained by crafting. They are crafted by combining one [[paper]] along with a certain material.
{{Crafting
|head=1
|Paper
|Creeper Head
|Output=Banner Pattern Creeper
|type=Miscellaneous
|description=Creeper face
}}
{{Crafting
|Paper
|Wither Skeleton Skull
|Output=Banner Pattern Skull
|type=Miscellaneous
|description=Skeleton skull and crossbones
}}
{{Crafting
|Paper
|Oxeye Daisy
|Output=Banner Pattern Flower
|type=Miscellaneous
|description=Daisy
}}
{{Crafting
|Paper
|Enchanted Golden Apple
|Output=Banner Pattern Thing
|type=Miscellaneous
|showdescription=true
|description=Former [[Mojang Studios]] logo
}}
{{Crafting
|Paper
|Bricks
|Output=Banner Pattern Field Masoned
|type=Miscellaneous
|description={{only|bedrock}}
}}
{{Crafting
|Paper
|Vines
|Output=Banner Pattern Bordure Indented
|type=Miscellaneous
|description={{only|bedrock}}
|foot=1
}}
=== Trading ===
'''Globe banner pattern''' is obtained by trading with a master-level [[Trading#Cartographer|cartographer villager]] for a price of 8 emeralds.
=== Chest loot ===
'''Snout banner pattern''' is obtained in the [[Bastion Remnant]] as loot.
{{LootChestItem|snout-banner-pattern}}
== Usage ==
=== Loom ingredient ===
Banner patterns are used in [[loom]]s to add customization to [[banner]]s. The pattern must be combined with 1 banner and 1 [[dye]]. Upon usage in the loom, the banner pattern is not consumed.
{{Looming
|head=1
|showdescription=1
|name=[[Banner|Flower Charge Banner]]
|ingredients={{:Banner/recipe|ingredients}}
|{{:Banner/recipe|banner}}
|Matching Dye
|Banner Pattern Flower Charge
|Flower Charge
|{{:Banner/recipe|output|Flower Charge}}
|Blink=Banner
|Olink=Banner
|description=Emblazons a flower charge (flower icon)
}}
{{Looming
|name=[[Banner|Creeper Charge Banner]]
|ingredients={{:Banner/recipe|ingredients}}
|{{:Banner/recipe|banner}}
|Matching Dye
|Banner Pattern Creeper Charge
|Creeper Charge
|{{:Banner/recipe|output|Creeper Charge}}
|Blink=Banner
|Olink=Banner
|description=Emblazons a creeper charge (creeper face)
}}
{{Looming
|name=[[Banner|Skull Charge Banner]]
|ingredients={{:Banner/recipe|ingredients}}
|{{:Banner/recipe|banner}}
|Matching Dye
|Banner Pattern Skull Charge
|Skull Charge
|{{:Banner/recipe|output|Skull Charge}}
|Blink=Banner
|Olink=Banner
|description=Emblazons a skull charge (skull and crossbones)
}}
{{Looming
|name=[[Banner|Thing Banner]]
|ingredients={{:Banner/recipe|ingredients}}
|{{:Banner/recipe|banner}}
|Matching Dye
|Banner Pattern Thing
|Thing
|{{:Banner/recipe|output|Thing}}
|Blink=Banner
|Olink=Banner
|description=Emblazons a thing (old Mojang logo)}}
{{Looming
|name=[[Banner|Snout Banner]]
|ingredients={{:Banner/recipe|ingredients}}
|{{:Banner/recipe|banner}}
|Matching Dye
|Banner Pattern Snout
|Snout
|{{:Banner/recipe|output|Snout}}
|Blink=Banner
|Olink=Banner
|description=Emblazons a piglin snout
}}
{{Looming
|name=[[Banner|Globe Banner]]
|ingredients={{:Banner/recipe|ingredients}}
|{{:Banner/recipe|banner}}
|Matching Dye
|Banner Pattern Globe
|Globe
|{{:Banner/recipe|output|Globe}}
|Blink=Banner
|Olink=Banner
|description=Emblazons a globe (cube shaped earth)
}}
{{Looming
|name=[[Banner|Bordure Indented Banner]]
|ingredients={{:Banner/recipe|ingredients}}
|{{:Banner/recipe|banner}}
|Matching Dye
|Banner Pattern Bordure Indented
|Bordure Indented
|{{:Banner/recipe|output|Bordure Indented}}
|Blink=Banner
|Olink=Banner
|description=Emblazons a bordure indented (fancy border){{only|bedrock}}
}}
{{Looming
|name=[[Banner|Field Masoned Banner]]
|ingredients={{:Banner/recipe|ingredients}}
|{{:Banner/recipe|banner}}
|Matching Dye
|Banner Pattern Field Masoned
|Field Masoned
|{{:Banner/recipe|output|Field Masoned}}
|Blink=Banner
|Olink=Banner
|description=Emblazons a field masoned (brick pattern){{only|bedrock}}
|foot=1
}}
== Data values ==
=== ID ===
{{edition|java}}:
{{ID table
|edition=java
|firstcolumnname=Banner Pattern
|showforms=y
|generatetranslationkeys=y
|displayname=Flower Charge
|spritename=banner-pattern
|spritetype=item
|nameid=flower_banner_pattern
|form=item}}
{{ID table
|displayname=Creeper Charge
|spritename=banner-pattern
|spritetype=item
|nameid=creeper_banner_pattern
|form=item}}
{{ID table
|displayname=Skull Charge
|spritename=banner-pattern
|spritetype=item
|nameid=skull_banner_pattern
|form=item}}
{{ID table
|displayname=Thing
|spritename=banner-pattern
|spritetype=item
|nameid=mojang_banner_pattern
|form=item}}
{{ID table
|displayname=Globe
|spritename=banner-pattern
|spritetype=item
|nameid=globe_banner_pattern
|form=item}}
{{ID table
|displayname=Snout
|spritename=banner-pattern
|spritetype=item
|nameid=piglin_banner_pattern
|form=item
|foot=1}}
{{edition|bedrock}}:
{{ID table
|edition=bedrock
|firstcolumnname=Banner Pattern
|showaliasids=y
|shownumericids=y
|showforms=y
|notshowbeitemforms=y
|generatetranslationkeys=y
|displayname=Creeper Charge
|spritename=banner-pattern
|spritetype=item
|nameid=creeper_banner_pattern
|aliasid=banner_pattern / 0
|id=582
|form=item
|translationkey=item.banner_pattern.name, item.banner_pattern.creeper}}
{{ID table
|displayname=Skull Charge
|spritename=banner-pattern
|spritetype=item
|nameid=skull_banner_pattern
|aliasid=banner_pattern / 1
|id=583
|form=item
|translationkey=item.banner_pattern.name, item.banner_pattern.skull}}
{{ID table
|displayname=Flower Charge
|spritename=banner-pattern
|spritetype=item
|nameid=flower_banner_pattern
|aliasid=banner_pattern / 2
|id=581
|form=item
|translationkey=item.banner_pattern.name, item.banner_pattern.flower}}
{{ID table
|displayname=Thing
|spritename=banner-pattern
|spritetype=item
|nameid=mojang_banner_pattern
|aliasid=banner_pattern / 3
|id=584
|form=item
|translationkey=item.banner_pattern.name, item.banner_pattern.thing}}
{{ID table
|displayname=Field Masoned
|spritename=banner-pattern
|spritetype=item
|nameid=field_masoned_banner_pattern
|aliasid=banner_pattern / 4
|id=585
|form=item
|translationkey=item.banner_pattern.name, item.banner_pattern.bricks}}
{{ID table
|displayname=Bordure Indented
|spritename=banner-pattern
|spritetype=item
|nameid=bordure_indented_banner_pattern
|aliasid=banner_pattern / 5
|id=586
|form=item
|translationkey=item.banner_pattern.name, item.banner_pattern.vines}}
{{ID table
|displayname=Snout
|spritename=banner-pattern
|spritetype=item
|nameid=piglin_banner_pattern
|aliasid=banner_pattern / 6
|id=587
|form=item
|translationkey=item.banner_pattern.name, item.banner_pattern.piglin}}
{{ID table
|displayname=Globe
|spritename=banner-pattern
|spritetype=item
|nameid=globe_banner_pattern
|aliasid=banner_pattern / 7
|id=588
|form=item
|translationkey=item.banner_pattern.name, item.banner_pattern.globe
|foot=1}}
== Achievements ==
{{load achievements|Fruit on the Loom}}
== History ==
{{History|java}}
{{History||1.14|snap=18w43a|[[File:Banner Pattern JE1 BE1.png|32px]] [[File:Banner Pattern JE1 BE1.png|32px]] [[File:Banner Pattern JE1 BE1.png|32px]] [[File:Banner Pattern JE1 BE1.png|32px]] Added banner patterns for flower charge, creeper charge, skull charge and thing patterns.}}
{{History|||snap=19w11a|[[File:Banner Pattern JE1 BE1.png|32px]] Added banner pattern for globe.
|The banner pattern for globe can be [[trading|bought]] from master-level cartographer [[villager]]s for 8 [[emerald]]s.}}
{{History||1.16|snap=20w15a|[[File:Banner Pattern JE1 BE1.png|32px]] Added the piglin banner pattern.}}
{{History|||snap=20w16a|The piglin banner pattern can now be found in [[chest]]s in [[bastion remnants]].}}
{{History|||snap=20w18a|The piglin pattern has now been renamed to "Snout".}}
{{History||1.16.2|snap=20w30a|The chance of finding the "Snout" banner pattern in bastion remnant chests has been increased from 5.5% to 10.1%.}}
{{History|bedrock}}
{{History||1.10.0|snap=beta 1.10.0.3|[[File:Banner Pattern JE1 BE1.png|32px]] [[File:Banner Pattern JE1 BE1.png|32px]] [[File:Banner Pattern JE1 BE1.png|32px]] [[File:Banner Pattern JE1 BE1.png|32px]] [[File:Banner Pattern JE1 BE1.png|32px]] [[File:Banner Pattern JE1 BE1.png|32px]] Added banner patterns for creeper charge, skull charge, flower charge, thing, field masoned and bordure indented patterns.}}
{{History||1.11.0|snap=beta 1.11.0.4|The banner patterns flower charge, field masoned and bordure indented can now be [[trading|bought]] from cartographer [[villager]]s.}}
{{History||1.16.0|snap=beta 1.16.0.57|[[File:Banner Pattern JE1 BE1.png|32px]] Added the piglin banner pattern.}}
{{History|||snap=beta 1.16.0.59|The piglin pattern has now been renamed to "Snout".}}
{{History||1.16.100|snap=beta 1.16.100.55|The "Thing" banner pattern can now be crafted at the [[loom]].}}
{{History||1.16.100|snap=beta 1.16.100.56|The ID of banner patterns have been changed from <code>banner_pattern</code> to <code><type>_banner_pattern</code>.}}
{{History||1.18.10|snap=beta 1.18.10.24|[[File:Banner Pattern JE1 BE1.png|32px]] Added banner pattern for globe. It is currently unobtainable in survival.}}
{{History|||snap=beta 1.18.10.26|The banner pattern for globe are now obtainable in survival and can be [[trading|bought]] from master-level cartographer [[villager]]s for 8 [[emerald]]s.
|Removed flower charge, field masoned and bordure indented banner pattern from villager trading.}}
{{History|PS4}}
{{History||1.90|[[File:Banner Pattern JE1 BE1.png|32px]] [[File:Banner Pattern JE1 BE1.png|32px]] [[File:Banner Pattern JE1 BE1.png|32px]] [[File:Banner Pattern JE1 BE1.png|32px]] [[File:Banner Pattern JE1 BE1.png|32px]] [[File:Banner Pattern JE1 BE1.png|32px]] Added banner patterns for creeper charge, skull charge, flower charge, thing, field masoned and bordure indented patterns.}}
{{History|foot}}
== Issues ==
{{issue list}}
{{Items}}
[[de:Bannervorlage]]
[[es:Diseño de estandarte]]
[[fr:Motif de bannière]]
[[ja:旗の模様]]
[[ko:현수막 무늬]]
[[pl:Wzór sztandaru]]
[[pt:Desenho para estandarte]]
[[ru:Узор флага]]
[[th:ลวดลายธง]]
[[zh:旗帜图案]]</li><li>[[Enchanted Golden Apple|Enchanted Golden Apple]]<br/>{{Item
| image = Enchanted Golden Apple.png
| rarity = Epic
| heals = {{hunger|4}}
| effects =
* {{EffectLink|Absorption}} IV (2:00)
* {{EffectLink|Regeneration}} II (0:20){{only|java|short=yes}}/V (0:30){{only|bedrock|short=yes}}
* {{EffectLink|Fire Resistance}} (5:00)
* {{EffectLink|Resistance}} (5:00)
| renewable = No
| stackable = Yes (64)
}}
An '''enchanted golden apple''' ({{in|je}}), notch apple, or '''enchanted apple''' ({{in|be}}), is a rare, uncraftable variant of the [[golden apple]] that grants much more powerful effects when consumed.
== Obtaining ==
=== Chest loot ===
{{LootChestItem|enchanted-golden-apple}}
== Usage ==
{{see also|Tutorials/Hunger management|title1=Hunger management}}
To eat an enchanted golden apple, press and hold {{control|use}} while it is selected in the hotbar. It restores {{hunger|4}} points of hunger and 9.6 [[Hunger#Mechanics|saturation]].
The enchanted golden apple provides:
* [[Absorption]] IV for 2 minutes (providing {{hp|16|absorption=1}} points of absorption health)
* [[Regeneration]] level II {{in|java}} or V {{in|bedrock}} for 30 seconds ({{in|java}}, {{hp|1}} is restored every 25 ticks, {{hp|2|notag=1}} × 0.4 per second) for 20 seconds (long enough to heal {{hp|16}} points of damage; {{in|bedrock}}, {{hp|1}} is restored every 6 ticks, {{hp|2|notag=1}} × 1.66 per second for 30 seconds, which is long enough to heal up to {{hp|100}} points of damage.
* [[Fire Resistance]] I for 5 minutes
* [[Resistance]] I (20% reduced damage from all sources except the [[void]]) for 5 minutes
=== Horses ===
Enchanted golden apples can be used for improving the chances of taming a [[horse]] by 10%, for [[breeding]] and leading horses, and for speeding up the growth of [[baby]] horses by 4 minutes.
=== Crafting ingredient ===
{{crafting usage|Enchanted Golden Apple|match=start}}
===Piglins===
{{EntityLink|Piglin|Piglins}} are attracted to enchanted golden apples and run toward any enchanted golden apples on the ground, and inspect it for 6 to 8 seconds before putting it in their inventory. However, piglins do not eat enchanted golden apples (or any [[food]]).
== Sounds ==
{{Sound table/Entity/Food}}
== Data values ==
=== ID ===
{{edition|java}}:
{{ID table
|edition=java
|showforms=y
|generatetranslationkeys=y
|displayname=Enchanted Golden Apple
|spritetype=item
|nameid=enchanted_golden_apple
|form=item
|foot=1}}
{{edition|bedrock}}:
{{ID table
|edition=bedrock
|showaliasids=y
|shownumericids=y
|showforms=y
|notshowbeitemforms=y
|generatetranslationkeys=y
|displayname=Enchanted Golden Apple
|spritetype=item
|nameid=enchanted_golden_apple
|aliasid=appleenchanted
|id=259
|form=item
|translationkey=item.appleEnchanted.name
|foot=1}}
== Achievements ==
{{load achievements|Overpowered;Fruit on the Loom;Oooh, shiny!}}
== Advancements ==
{{load advancements|Oh Shiny;A Furious Cocktail;How Did We Get Here;Husbandry;A Balanced Diet}}
== History ==
{{History|java}}
{{History||1.3.1|snap=12w21a|[[File:Enchanted Golden Apple JE1 BE1.gif|32px]] Added enchanted golden apples.
|Enchanted golden apples highly resemble the golden apple prior to [[Java Edition 1.1|1.1]].
|Enchanted golden apples have [[Regeneration]] IV (30 seconds), [[Resistance]] (5 minutes) and [[Fire Resistance]] (5 minutes).
|Enchanted golden apples can be [[crafted]] with 8 [[blocks of gold]] and one apple, making them [[renewable]].
|Enchanted golden apples shine like an [[enchanting|enchanted]] [[item]] and have a purple tooltip while the standard golden apple's tooltip changed to blue. However, the standard golden apple's effects remain unchanged.}}
{{History|||snap=12w21b|Added Enchanted Golden Apples to the Creative inventory.}}
{{History||1.6.1|snap=13w24b|Enchanted golden apples now give the player Absorption as well, and Regeneration IV has been increased to Regeneration V.}}
{{History|||snap=?|Enchanted golden apples can now be used to tame, breed and heal horses and donkeys.}}
{{History||1.8|snap=14w06a|[[Crafting]] an enchanted golden apple now gives the [[player]] the [[Achievements/Java_Edition|''achievement'']] "Overpowered."}}
{{History||1.9|snap=15w37a|Enchanted golden apples now give Regeneration II (down from V) and [[Absorption]] IV (up from I), in addition to the unchanged [[Resistance]] and [[Fire Resistance]] effects. The duration of the Regeneration effect has now also been decreased to 20 seconds.}}
{{History|||snap=15w44a|Enchanted golden apples are now uncraftable, making them no longer renewable.
|Enchanted golden apples have been added to [[dungeon]], [[desert temple]] and [[mineshaft]] chests.}}
{{History||1.11|snap=16w39a|Enchanted golden apples are now found in the new [[woodland mansion]] chests.}}
{{History||1.13|snap=17w47a|The names and IDs have been split into golden apple and enchanted golden apple.
|Prior to [[1.13/Flattening|''The Flattening'']], this [[item]]'s numeral ID was 322.}}
{{History||1.14|snap=18w43a|[[File:Enchanted Golden Apple JE2 BE2.gif|32px]] The texture for enchanted golden apples has been changed.}}
{{History||1.16|snap=20w16a|Enchanted golden apples can now be found inside [[ruined portal]] chests.}}
{{History||1.16.2|snap=20w30a|Enchanted golden apples can now be found inside [[bastion remnant]] chests.}}
{{History||1.18|snap=experimental snapshot 6|Horses, donkeys and mules now follow players holding enchanted golden apples.}}
{{History||1.19|snap=22w13a|Enchanted golden apples may now be found in [[ancient city]] [[chest]]s.}}
{{History|pocket alpha}}
{{History||v0.12.1|snap=build 1|[[File:Enchanted Golden Apple JE1 BE1.gif|32px]] Added enchanted golden apples.}}
{{History|||snap=build 4|A crafting recipe has been added for enchanted golden apples.}}
{{History|pocket}}
{{History||1.1.0|snap=alpha 1.1.0.0|Enchanted golden apples are now known as "Enchanted Apple."}}
{{History|bedrock}}
{{History||1.2.0|snap=?|Enchanted apples now give [[Absorption]] IV rather than Absorption I.}}
{{History||1.2.13|snap=?|Enchanted golden apples are now uncraftable, making them no longer [[renewable resource|renewable]].}}
{{History||?|Enchanted apples now give [[Regeneration]] V rather than IV.}}
{{History||1.10.0|snap=beta 1.10.0.3|Enchanted apples are no longer used to [[crafting|craft]] patterns on [[banner]]s directly, but are now used to craft Thing [[banner pattern]]s.
|[[File:Enchanted Golden Apple JE2 BE2.gif|32px]] The texture for the enchanted golden apple has been changed.}}
{{History||1.16.0|snap=beta 1.16.0.57|Enchanted golden apples can now be found inside [[ruined portal]] chests.}}
{{History||1.16.100|snap=beta 1.16.100.56|The ID of enchanted apples has been changed from <code>appleenchanted</code> to <code>enchanted_golden_apple</code>.}}
{{History|console}}
{{History||xbox=TU14|xbone=CU1|ps=1.04|wiiu=Patch 1|switch=1.0.1|[[File:Enchanted Golden Apple JE1 BE1.gif|32px]] Added enchanted golden apples.}}
{{History||xbox=none|xbone=none|ps=1.90|wiiu=none|switch=none|[[File:Enchanted Golden Apple JE2 BE2.gif|32px]] The texture for the enchanted golden apple has been changed.}}
{{History|New 3DS}}
{{History||0.1.0|[[File:Enchanted Golden Apple JE1 BE1.gif|32px]] Added enchanted golden apples.}}
{{History|foot}}
== Issues ==
{{issue list}}
== Trivia ==
* The damage tag of an enchanted apple obtained {{in|be}} is 1, although setting it to 0 makes no difference.
== Gallery ==
<gallery>
GoldenAppleComparison.png|A comparison of the two golden apple variations.
EnchantedGoldenAppleEffects.png|The effects of consuming an enchanted golden apple.
Notch Apple In Mansion Chest.png|An extremely rare occasion where a regular golden apple and an enchanted apple being found in the same woodland mansion chest {{in|ee}}.
GoldenAppleDungeonChest.png|Golden apple in a [[dungeon]] chest, prior to 1.3.1. It resembles the enchanted golden apple.
GodPortal.png|An enchanted golden apple found in a ruined portal chest.
GodSpawner.png|An enchanted golden apple found in a monster room chest.
</gallery>
{{Items}}
[[Category:Non-renewable resources]]
[[Category:Food]]
[[de:Verzauberter goldener Apfel]]
[[es:Manzana dorada encantada]]
[[fr:pomme dorée enchantée]]
[[ja:エンチャントされた金のリンゴ]]
[[pt:Maçã dourada encantada]]
[[th:แอปเปิ้ลทองร่ายมนตร์]]
[[zh:附魔金苹果]]</li></ul> |
build 1 | Redstone blocks now have an unspecified proper purpose. | |||
| Bedrock Edition | |||||
1.10.0{{Extension DPL}}<ul><li>[[Sparkler|Sparkler]]<br/>{{About|the Education Edition exclusive item|the new melee weapon available from the ''Minecraft Dungeons'' anniversary event|MCD:Sparkler}}
{{Item
| image = <gallery>
Orange Sparkler.png | Orange
Blue Sparkler.png | Blue
Red Sparkler.png | Red
Purple Sparkler.png | Purple
Green Sparkler.png | Green
</gallery>
| image2 = <gallery>
Active Orange Sparkler.png | Active Orange
Active Blue Sparkler.png | Active Blue
Active Red Sparkler.png | Active Red
Active Purple Sparkler.png | Active Purple
Active Green Sparkler.png | Active Green
</gallery>
| renewable = No
| stackable = No
}}
{{education feature}}
{{exclusive|bedrock|education}}
A '''sparkler''' is a [[Chemistry Update|chemistry]]-related [[item]] that emits particles when lit.
Sparklers are available in orange, blue, red, purple, and green colors.
== Obtaining ==
=== Crafting ===
{{Crafting
|showdescription=1
|B1=Chloride |B2=Magnesium |B3=Stick
|Output=Sparkler
|description= Calcium Chloride: Orange<br>Cerium Chloride: Blue<br>Mercuric Chloride: Red<br>Potassium Chloride: Purple<br>Tungsten Chloride: Green<br>{{only|bedrock|education}}
|type=Miscellaneous
}}
== Usage ==
{{ctrl|Using}} a sparkler ignites it, causing its texture to change. When lit, the sparkler emits colored [[particles]]; the [[durability]] meter depletes while the sparkler is burning. Sparklers are one of the few [[item]]s that can be held in the [[off-hand]] {{in|be}}. Unlit sparklers have normal lighting like most items, while lit sparklers appear to glow when held in the player's hand, similarly to [[glow stick]]s.
When the [[player]] uses another item while a sparkler is lit, or holds the sparkler in the off-hand, the sparkler's durability stops depleting.
If the player has a lit sparkler in their [[inventory]] and goes into the [[water]], the sparkler is destroyed immediately. However, it does not get destroyed if dropped in water. It also cannot float.
Despite having durability, sparklers cannot be enchanted with [[Unbreaking]] or [[Mending]].
== Sounds ==
{{Sound table
|type=bedrock
|sound=Fuse.ogg
|source=sound
|description=While a sparkler is active
|id=sparkler.active
|volume=0.25
|pitch=0.8/1.2}}
{{Sound table
|sound=Fizz.ogg
|source=block
|description=While a sparkler is being lit
|id=random.fizz
|volume=1.0
|pitch=2.4/2.6
|foot=1}}
== Data values ==
=== ID ===
{{ID table
|edition=bedrock
|shownumericids=y
|showforms=y
|notshowbeitemforms=y
|generatetranslationkeys=y
|displayname=Sparkler
|spritename=sparklers
|spritetype=item
|nameid=sparkler
|id=600
|form=item
|translationkey=item.sparkler.orange.name,item.sparkler.blue.name,item.sparkler.red.name,item.sparkler.purple.name,item.sparkler.green.name
|foot=1}}
== History ==
{{History|bedrock}}
{{History||1.4.0|snap=beta 1.2.20.1|[[File:Orange Sparkler BE1.png|32px]] [[File:Blue Sparkler BE1.png|32px]] [[File:Red Sparkler BE1.png|32px]] [[File:Purple Sparkler BE1.png|32px]] [[File:Green Sparkler BE1.png|32px]] <br>[[File:Active Orange Sparkler BE1.png|32px]] [[File:Active Blue Sparkler BE1.png|32px]] [[File:Active Red Sparkler BE1.png|32px]] [[File:Active Purple Sparkler BE1.png|32px]] [[File:Active Green Sparkler BE1.png|32px]] Added sparklers.}}
{{History|education}}
{{History||1.0.27|[[File:Orange Sparkler BE1.png|32px]] [[File:Blue Sparkler BE1.png|32px]] [[File:Red Sparkler BE1.png|32px]] [[File:Purple Sparkler BE1.png|32px]] [[File:Green Sparkler BE1.png|32px]] <br>[[File:Active Orange Sparkler BE1.png|32px]] [[File:Active Blue Sparkler BE1.png|32px]] [[File:Active Red Sparkler BE1.png|32px]] [[File:Active Purple Sparkler BE1.png|32px]] [[File:Active Green Sparkler BE1.png|32px]] Added sparklers.}}
{{History|foot}}
== Issues ==
{{issue list}}
== Trivia ==
* The formula for sparkler roughly works in real life. Magnesium itself burns white in air, while the metal salts add [[wikipedia:flame test|color to the flame]].
{{items}}
{{Education Edition}}
[[Category:Non-renewable resources]]
[[Category:Education Edition items]]
[[de:Wunderkerze]]
[[ja:手持ち花火]]
[[ko:스파클러]]
[[pl:Zimne ognie]]
[[pt:Vela-Faísca]]
[[zh:烟花棒]]</li><li>[[Suspicious Stew|Suspicious Stew]]<br/>{{For|the block|Suspicious Sand}}
{{Item
| title = Suspicious Stew
| heals = {{hunger|6}}
| renewable = Yes
| stackable = No
|effects=See {{slink||Food}}
}}
'''Suspicious stew''' is a [[food]] item that can give the [[player]] a [[effect|status effect]] that depends on the [[flower]] used to craft it.
== Obtaining ==
{{IN|Bedrock}}, suspicious stew is the only food item in the game that can be obtained from the [[Creative]] inventory only by searching. However, it can be crafted and can also be found in [[shipwreck]] chests. Suspicious stew can be given with [[commands]] like {{cmd|give}}, but {{in|java}}, unless NBT data like that listed in the data values section is included, consuming it has no effect and still restores the same hunger points as a normal suspicious stew. In [[Bedrock Edition]], giving the player a suspicious stew through commands causes the stew to choose an allowable status effect at random.
=== Harvesting ===
Suspicious stew can be obtained by "milking" a brown [[mooshroom]] with a [[bowl]] after using a small flower on it. When a small flower is used on a brown mooshroom, the brown mooshrom produces a suspicious stew related to that small flower the next time it is milked with a bowl. Red mooshrooms do not produce suspicious stew. The brown mooshroom returns to producing [[mushroom stew]] until fed another small flower.
=== Crafting ===
{{Crafting
|Red Mushroom
|Brown Mushroom
|Bowl
|Any Flower
|Output=Suspicious Stew
|shapeless=true
|type=Foodstuff
}}
Suspicious stew is not listed in the recipe book. However, it can be quickly assembled by clicking the [[Mushroom Stew|mushroom stew]] recipe and adding one small flower to it.
=== Chest loot ===
{{LootChestItem|suspicious-stew}}
=== Mob loot ===
After being given a flower, a brown [[mooshroom]] can be "milked" for suspicious stew by {{control|using}} a [[bowl]] on it. The flower type determines the stew's effect using the same rule as a crafted stew. Milking a red mooshroom after feeding it a flower does not yield a suspicious stew specific to that flower.
=== Trading ===
{{IN|java}}, expert-level farmer [[villager]]s can offer either 1 or 2 suspicious stew trades, each stew for one [[emerald]].
{{IN|bedrock}}, expert-level farmer villager offers to sell suspicious stew for one emerald as well.
The [[trading]] interface does not indicate the type of suspicious stew being sold, but each trade entry consistently yields the same type of stew, so the player can remember or make a note of the types offered by a given villager, such as "this villager's first stew gives [[blindness]], and their second entry gives saturation".
== Usage ==
=== Food ===
{{see also|Tutorials/Hunger management}}
To eat suspicious stew, press and hold {{control|use}} while it is selected in the hotbar. Eating one restores {{hunger|6}} hunger and 7.2 hunger [[Hunger#Mechanics|saturation]] and gives a few seconds of a [[effect|status effect]] that varies depending on which flower was used to craft it. The effect is not displayed in the tooltip, texture, etc., meaning that the player cannot know in advance what the effect is without knowing which flower was used.
{{/Effects}}
The [[bowl]] is emptied and returned to the player after the suspicious stew has been eaten, and can be re-used to craft more stews. Unlike most foods, suspicious stew can be eaten even if the player's hunger bar is full.
The Saturation effect effectively makes those two stews a superfood: In those 6 or 7 ticks it can restore up to 6(7) hunger and 12(14) saturation points ''on top of'' their food value, for a total of at least {{hunger|12}} hunger, and effectively maximizing saturation. This is the largest amount of hunger and saturation the player can get from a single food item. Regeneration can restore up to {{Health|3}} health, and Poison or Wither can inflict up to {{Health|4}} damage.
Consuming suspicious stew is the only way to obtain the Saturation and Blindness effects in vanilla ''Minecraft'' without the use of commands.
== Sounds ==
=== Generic ===
{{Sound table/Entity/Food}}
=== Unique ===
{{edition|java}}:
{{Sound table
|sound=Mooshroom eat1.ogg
|sound2=Mooshroom eat2.ogg
|sound3=Mooshroom eat3.ogg
|sound4=Mooshroom eat4.ogg
|subtitle=Mooshroom eats
|source=neutral
|description=Plays when a brown mooshroom is fed a flower.
|id=entity.mooshroom.eat
|translationkey=subtitles.entity.mooshroom.eat
|volume=2.0
|pitch=''varies'' <ref group=sound>Can be 1.0, 0.95, or 1.05 for each sound</ref>
|distance=16}}
{{Sound table
|sound=Mooshroom milk1.ogg
|sound2=Mooshroom milk2.ogg
|sound3=Mooshroom milk3.ogg
|subtitle=Mooshroom gets milked suspiciously
|source=neutral
|description=Plays when a brown mooshroom is milked with a bowl after being fed a flower.
|id=entity.mooshroom.suspicious_milk
|translationkey=subtitles.entity.mooshroom.suspicious_milk
|volume=1.0
|pitch=''varies'' <ref group=sound>Can be 1.0, 0.9, or 1.1 for each sound</ref>
|distance=16
|foot=1}}
{{edition|bedrock}}:
{{Sound table
|type=bedrock
|sound=Mooshroom eat1.ogg
|sound2=Mooshroom eat2.ogg
|sound3=Mooshroom eat3.ogg
|sound4=Mooshroom eat4.ogg
|subtitle=Mooshroom eats
|source=Friendly Creatures
|description=When a brown mooshroom is fed a flower
|id=mob.mooshroom.eat
|volume=1.0/0.95/1.05
|pitch=0.8-1.2}}
{{Sound table
|sound=Mooshroom milk1.ogg
|sound2=Mooshroom milk2.ogg
|sound3=Mooshroom milk3.ogg
|subtitle=Mooshroom gets milked
|source=Friendly Creatures
|description=When a mooshroom is milked with a bowl
|id=mob.mooshroom.suspicious_milk
|volume=1.0/0.9/1.1
|pitch=1.0
|foot=1}}
== Data values ==
=== ID ===
{{edition|java}}:
{{ID table
|edition=java
|showforms=y
|generatetranslationkeys=y
|displayname=Suspicious Stew
|spritetype=item
|nameid=suspicious_stew
|form=item
|foot=1}}
{{edition|bedrock}}:
{{ID table
|edition=bedrock
|shownumericids=y
|showforms=y
|notshowbeitemforms=y
|generatetranslationkeys=y
|displayname=Suspicious Stew
|spritetype=item
|nameid=suspicious_stew
|id=590
|form=item
|foot=1}}
=== Item data ===
{{IN|je}}, suspicious stew uses the following NBT data:
<div class="treeview">
* {{nbt|compound|tag}}: The item's '''tag''' tag.
{{:Player.dat format/Suspicious Stew}}
</div>
=== Metadata ===
{{IN|be}}, suspicious stew uses the following data values:
{{dvt|spritetype=item|sprite=suspicious-stew|{{EffectLink|Night Vision}} from {{BlockLink|Poppy}}}}
{{dvt|sprite=suspicious-stew|{{EffectLink|Jump Boost}}}}
{{dvt|sprite=suspicious-stew|{{EffectLink|Weakness}}}}
{{dvt|sprite=suspicious-stew|{{EffectLink|Blindness}}}}
{{dvt|sprite=suspicious-stew|{{EffectLink|Poison}}}}
{{dvt|sprite=suspicious-stew|{{EffectLink|Saturation}} from {{BlockLink|Dandelion}}}}
{{dvt|sprite=suspicious-stew|{{EffectLink|Saturation}} from {{BlockLink|Blue Orchid}}}}
{{dvt|spritetype=item|sprite=suspicious-stew|{{EffectLink|Fire Resistance}}}}
{{dvt|sprite=suspicious-stew|{{EffectLink|Regeneration}}}}
{{dvt|sprite=suspicious-stew|{{EffectLink|Wither}}}}
{{dvt|sprite=suspicious-stew|{{EffectLink|Night Vision}} from {{BlockLink|Torchflower}}|foot=1}}
== Achievements ==
{{load achievements|Time for Stew}}
== Advancements ==
{{load advancements|A Furious Cocktail;How Did We Get Here;Husbandry;A Balanced Diet}}
== History ==
{{History|java}}
{{History||1.14|snap=18w43a|[[File:Suspicious Stew JE1 BE1.png|32px]] Added suspicious stew.
|Suspicious stew is not obtainable in the [[Creative inventory]].}}
{{History|||snap=19w08a|Suspicious stew can be obtained by milking brown [[mooshroom]]s.}}
{{History|||snap=19w11a|[[Trading]] has been changed, expert-level farmer villagers now sell suspicious stew for an [[emerald]].}}
{{History||1.14.4|snap=Pre-Release 1|Suspicious stew made from [[poppies]] now gives [[Night Vision]] to the [[player]] instead of [[Speed]].}}
{{History||1.16|snap=Pre-release 1|Mooshrooms can now be milked for suspicious stew in Creative mode.<ref>{{bug|MC-90969}}</ref>}}
{{History||1.17|snap=21w13a|Suspicious stew can now be eaten even if the player is at full [[hunger]].}}
{{History||1.19|snap=22w13a|Suspicious stew may now be found in [[ancient city]] [[chest]]s.}}
{{History||1.19.3|snap=22w45a|Suspicious stew is now available in the [[Creative]] [[inventory]].}}
{{History||1.20<br>(Experimental)|link=1.19.4|snap=23w07a|Suspicious stew now drops when brushing [[suspicious sand]] in [[desert well]]s.}}
{{History|||snap=1.19.4-pre1|[[Torchflower]]s can now be used to make suspicious stew.}}
{{History||1.20|snap=23w12a|The probability for the suspicious stew to generate in the [[suspicious sand]] in [[desert well]] has been changed from 1/7 to 1/8.}}
{{History|bedrock}}
{{History||1.13.0|snap=beta 1.13.0.9|[[File:Suspicious Stew JE1 BE1.png|32px]] Added suspicious stew.
|Suspicious stew is not obtainable in the Creative inventory.}}
{{History|||snap=beta 1.13.0.15|Master-level farmer [[villager]]s can now [[trading|sell]] suspicious stew.}}
{{History||1.16.0|snap=beta 1.16.0.57|[[Trading]] has been changed, expert-level farmer villagers now sell suspicious stew for an [[emerald]].}}
{{History||1.20.0<br>(Experimental)|link=Bedrock Edition 1.19.70|snap=beta 1.19.70.23|Suspicious stew now drops when brushing [[suspicious sand]] in [[desert well]]s.}}
{{History||1.20.10|Added one type of suspicious stew to the Items tab in the Creative inventory.}}
{{History||1.20.30|snap=beta 1.20.20.20|Suspicious stew can no longer be found in the Creative inventory.}}
{{History|foot}}
== Issues ==
{{Issue list}}
== Trivia ==
* Suspicious stew was introduced because developers wanted a way of communicating that [[wikipedia:Lily_of_the_valley|lilies of the valley]] are poisonous.<ref>{{ytl|YUM7XiEX1DI|Items: Ten Things You Probably Didn't Know About Minecraft @ 3:32|Minecraft|November 29, 2019|t=212s}}</ref>
== References ==
{{Reflist}}
<references group="loot"/>
{{Items}}
[[Category:Food]]
[[de:Seltsame Suppe]]
[[es:Estofado sospechoso]]
[[fr:Soupe suspecte]]
[[ja:怪しげなシチュー]]
[[ko:수상한 스튜]]
[[nl:Geheimzinnige stoofpot]]
[[pl:Podejrzana potrawka]]
[[pt:Ensopado suspeito]]
[[ru:Подозрительный суп]]
[[th:สตูว์พิศวง]]
[[zh:迷之炖菜]]
[[Category:Renewable resources]]</li></ul> |
beta 1.10.0.3 | ||||
| Legacy Console Edition | |||||
| TU19 | CU7 | 1.12 | Patch 1 | 1.0.1 | |
| 1.90 | |||||
| New Nintendo 3DS Edition | |||||
0.1.0{{Extension DPL}}<ul><li>[[Phantom Membrane|Phantom Membrane]]<br/>{{Item
| title = Phantom Membrane
| image = Phantom Membrane.png
| renewable = Yes
| stackable = Yes (64)
}}
'''Phantom membranes''' are items obtained from killing [[phantom]]s. They are used to repair [[elytra]] and brew [[Potion of Slow Falling|potions of Slow Falling]].
== Obtaining ==
=== Mob loot ===
[[Phantom]]s drop 0–1 phantom membrane when killed by a [[player]] or tamed [[wolf]]. [[Looting]] increases the maximum drops by 1 per level, for a maximum of 4 with Looting III.
=== Cat gifts ===
{{main|Cat#Gifts}}
Tamed [[cat]]s have a 70% chance to bring the player a gift when they wake up from a [[bed]], and the gift has a 3.22% chance to be a phantom membrane.
== Usage ==
=== Repairing ===
Phantom membranes can be used in an [[anvil]] to repair [[elytra]], restoring 108 durability points (25% of the pair's total durability) per membrane while preserving their [[enchantments]].
{| class="wikitable" data-description="Repairing elytra"
! scope="col" style="width:64px;" | Name
! Ingredients
! [[Anvil]] usage
|-
! scope="row" style="text-align: center;" | '''Elytra'''
| [[Elytra]] +<br>[[Phantom Membrane]]
| style="width: 260px; padding: 1px;" | {{Anvil| title = Elytra|Input1=Damaged Elytra|Input2=Phantom Membrane, 2|Output=Elytra}}
|-
|}
=== Brewing ingredient ===
Phantom membranes are used to [[brewing|brew]] [[Potion of Slow Falling|slow falling potions]] from an [[awkward potion]].
{{Brewing
|Phantom Membrane
|Potion of Slow Falling
|showname=3
}}
== Data values ==
=== ID ===
{{edition|java}}:
{{ID table
|edition=java
|showforms=y
|generatetranslationkeys=y
|displayname=Phantom Membrane
|spritetype=item
|nameid=phantom_membrane
|form=item
|foot=1}}
{{edition|bedrock}}:
{{ID table
|edition=bedrock
|shownumericids=y
|showforms=y
|notshowbeitemforms=y
|generatetranslationkeys=y
|displayname=Phantom Membrane
|spritetype=item
|nameid=phantom_membrane
|id=574
|form=item
|foot=1}}
== History ==
{{History|java}}
{{History||1.13|snap=18w14a|[[File:Phantom Membrane JE1 BE1.png|32px]] Added phantom membranes.}}
{{History||1.14|snap=18w44a|Tamed [[cat]]s now have a chance to give the [[player]] phantom membranes as [[Cat#Gifts|gifts]].}}
{{History|||snap=19w08a|[[File:Phantom Membrane JE2 BE2.png|32px]] The texture of phantom membranes has now been changed.}}
{{History|bedrock}}
{{History||1.6.0|snap=beta 1.6.0.5|[[File:Phantom Membrane JE1 BE1.png|32px]] Added phantom membranes.}}
{{History||1.8.0|snap=beta 1.8.0.8|Tamed [[cat]]s now have a chance to give the [[player]] phantom membranes as gifts.}}
{{History||1.10.0|snap=beta 1.10.0.3|[[File:Phantom Membrane JE2 BE2.png|32px]] The texture of phantom membranes has now been changed.}}
{{History|console}}
{{History||xbox=TU69|ps=1.76|wiiu=Patch 38|[[File:Phantom Membrane JE1 BE1.png|32px]] Added phantom membranes.}}
{{History||xbox=none|xbone=none|ps=1.90|wiiu=none|switch=none|[[File:Phantom Membrane JE2 BE2.png|32px]] The texture of phantom membranes has now been changed.}}
{{History|foot}}
== Issues ==
{{issue list}}
== References ==
{{reflist}}
== External Links ==
*[https://www.minecraft.net/en-us/article/taking-inventory--phantom-membrane Taking Inventory: Phantom Membrane] – Minecraft.net on August 2, 2019
{{items}}
[[de:Phantomhaut]]
[[fr:Membrane de Phantom]]
[[ja:ファントムの皮膜]]
[[ko:팬텀 막]]
[[pl:Błona fantoma]]
[[pt:Membrana de phantom]]
[[ru:Мембрана фантома]]
[[th:เนื้อเยื่อแฟนท่อม]]
[[uk:Перетинка фантома]]
[[zh:幻翼膜]]
[[Category:Renewable resources]]
[[Category:Brewing recipe]]</li><li>[[Gold Nugget|Gold Nugget]]<br/>{{About|the nugget|the block that can drop nuggets|Gilded Blackstone|the ore|Gold Ore|the ingot form|Gold Ingot|the mineral block|Block of Gold}}
{{Item
| image = Gold Nugget.png
| renewable = Yes
| stackable = Yes (64)
}}
'''Gold nuggets''' are items used to make [[gold ingot]]s and other various golden items. One gold nugget is effectively worth one-ninth of a gold ingot.
== Obtaining ==
=== Mob loot ===
[[Zombified Piglin|Zombified piglin]]s, when killed, may drop 0-1 gold nuggets. When killed using a weapon enchanted with [[Looting]], they may drop an additional gold nugget per level of Looting used, up to a maximum of 4.
=== Crafting ===
{{Crafting
|Gold Ingot
|Output= Gold Nugget, 9
|type= Material
}}
=== Smelting ===
{{Smelting
|Golden Sword; {Any golden tools}; {Any golden armor}; Golden Horse Armor
|Gold Nugget
|0,25
}}
=== Chest loot ===
{{LootChestItem|gold-nugget}}
=== Mining ===
[[Nether gold ore]] mined using a [[pickaxe]] drops 2-6 gold nuggets. If the pickaxe is enchanted with [[Fortune]], it has a 33.3% chance to multiply the drops by 2, Fortune II has a 25% chance to multiply the drops by 2 or 3 and Fortune III has a 20% chance each to multiply the drops by 2, 3, or 4 for a maximum possible drop of 24 golden nuggets. The average drop rate for a Fortune III pickaxe is 8.8, while the drop rate for a [[Silk Touch]] pickaxe is a single ingot, or a flat rate of 9. It is slightly more efficient to mine with a Silk Touch pickaxe.
[[Gilded Blackstone|Gilded blackstone]] mined using a pickaxe has a 10% chance to drop 2-5 gold nuggets. If the pickaxe is enchanted with Fortune I, the chance gold nuggets drop is increased 14.29%, Fortune II increases the drop chance to 25%, and Fortune III guarantees the drop.
== Usage ==
Gold nuggets can be used to craft a [[golden carrot]] or [[glistering melon]] for brewing. Also, gold nuggets can be combined with gunpowder and dye to create a [[firework star]] that bursts in a star-shaped explosion.
[[Piglin]]s instantly pick up any gold nuggets that are within 1 [[block]] of them. Unlike other gold-related items, they do not intentionally seek out gold nuggets to pick up and only pick them up if they walk near it. Unlike gold ingots, gold nuggets picked up are dropped upon the piglin's death.
=== Crafting ingredient ===
{{crafting usage}}
== Data values ==
=== ID ===
{{edition|java}}:
{{ID table
|edition=java
|showforms=y
|generatetranslationkeys=y
|displayname=Gold Nugget
|spritetype=item
|nameid=gold_nugget
|form=item
|foot=1}}
{{edition|bedrock}}:
{{ID table
|edition=bedrock
|shownumericids=y
|showforms=y
|notshowbeitemforms=y
|generatetranslationkeys=y
|displayname=Gold Nugget
|spritetype=item
|nameid=gold_nugget
|id=425
|form=item
|foot=1}}
== History ==
{{History|Java}}
{{History||1.0.0|snap=Beta 1.9 Prerelease|[[File:Gold Nugget JE1.png|32px]] Added gold nuggets.
|Gold nuggets are [[drops|dropped]] by [[zombie pigmen]].
|Gold nuggets can be used to craft [[gold ingot]]s.
|Gold nuggets currently do not have a mouseover name.}}
{{History|||snap=Beta 1.9 Prerelease 2|Gold nuggets now have a mouseover name.}}
{{History|||snap=Beta 1.9 Prerelease 4|Gold nuggets are now used to craft [[glistering melon]]s.
|Gold nuggets can now be [[crafting|crafted]] from a single [[gold ingot]].}}
{{History||1.1|snap=release|Normal [[golden apple]]s are now crafted with gold nuggets.}}
{{History||1.3.1|snap=1.3|[[File:Gold Nugget JE2 BE1.png|32px]] The texture of gold nuggets has been changed.}}
{{History||1.4.2|snap=12w34a|Gold nuggets are now used to craft [[golden carrot]]s.}}
{{History||1.4.6|snap=12w49a|Gold nuggets can now be used to craft a [[firework star]] for a star shaped effect on a [[firework rocket|firework]].}}
{{History||1.6.1|snap=13w23a|Gold nuggets can no longer be used to [[crafting|craft]] a [[golden apple]].}}
{{History||1.9|snap=15w43a|Gold nuggets may now be found among the loot in [[igloo]] basement [[chest]]s.}}
{{History||1.11.1|snap=16w50a|Gold nuggets can now be [[smelting|smelted]] from golden [[tool]]s and [[armor]].}}
{{History||1.13|snap=17w47a|Prior to [[1.13/Flattening|''The Flattening'']], this [[item]]'s numeral ID was 371.}}
{{History|||snap=18w09a|Gold nuggets can now be found in [[underwater ruins]] loot [[chest]]s.}}
{{History|||snap=18w11a|Gold nuggets now generate in the chests of [[shipwreck]]s.}}
{{History||1.14|snap=18w43a|[[File:Gold Nugget JE3 BE2.png|32px]] The texture of gold nuggets has been changed.}}
{{History|||snap=18w48a|Gold nuggets can now be found in chests in [[plains]] [[village]] houses.}}
{{History|||snap=18w49a|Gold nuggets can now be found in chests in [[savanna]] village houses.}}
{{History||1.16|snap=20w12a|[[Nether gold ore]] now [[drops]] 2-6 gold nuggets, affected by [[Fortune]].}}
{{History|||snap=20w15a|[[Gilded blackstone]] now has 10% chance to drop 2-5 gold nuggets. Only the drop chance is affected by [[Fortune]].}}
{{History|||snap=20w16a|Gold nuggets now generate in [[bastion remnant]]s and [[ruined portal]] chests.}}
{{History|||snap=Pre-release 1|Gold nuggets can now be used to distract [[piglin]]s.}}
{{History|||snap=Pre-release 3|Gold nuggets can no longer be used to distract [[piglin]]s.}}
{{History||1.20|snap=23w12a|Gold nuggets can now be found in [[suspicious gravel]] and [[suspicious sand]] in cold and warm [[ocean ruins]] and in [[trail ruins]].}}
{{History|||snap=23w16a|Gold nuggets no longer generate in [[suspicious sand]] in [[trail ruins]].|Due to the split of the archaeological loot tables for suspicious gravel within [[trail ruins]], gold nuggets are now common loot.}}
{{History|pocket alpha}}
{{History||v0.12.1|snap=build 1|[[File:Gold Nugget JE2 BE1.png|32px]] Added gold nuggets. |Gold nuggets can be used to craft [[glistering melon]]s, [[gold ingot]]s and [[golden carrot]]s.|[[Gold ingot]]s can now be [[crafting|crafted]] into 9 gold nuggets.|[[Zombie pigmen]] now [[drops|drop]] gold nuggets upon being killed.}}
{{History|pocket}}
{{History||1.0.0|snap=alpha 0.17.0.1|Gold nuggets can now be found inside [[igloo]] basement [[chest]]s.}}
{{History||1.1.0|snap=alpha 1.1.0.0|Gold nuggets can now be [[smelting|smelted]] from golden [[tool]]s and [[armor]].}}
{{History|bedrock}}
{{History||1.2.0|snap=beta 1.2.0.2|Gold nuggets can now be used to craft [[firework star]]s.}}
{{History||1.4.0|snap=beta 1.2.14.2|Gold nuggets can now be found in some [[shipwreck]] [[chest]]s.}}
{{History|||snap=beta 1.2.20.1|Gold nuggets can now be found in [[underwater ruins]] chests.}}
{{History||1.10.0|snap=beta 1.10.0.3|The gold nugget can now be found in [[plains]] [[village]] house chests.|[[File:Gold Nugget JE3 BE2.png|32px]] The texture of gold nuggets has been changed.}}
{{History||1.11.0|snap=beta 1.11.0.1|The gold nugget can now be found in [[savanna]] village house [[chest]]s.}}
{{History||1.16.0|snap=beta 1.16.0.57|[[Nether gold ore]] now [[drops]] 2-6 gold nuggets.|[[Gilded blackstone]] now has 10% chance to drop 2-5 gold nuggets.}}
{{History||1.16.100|snap=beta 1.16.100.50|Gold nuggets can now be used as fuel for a [[furnace]].<ref>{{bug|MCPE-114216}}</ref>}}
{{History||1.18.30|snap=beta 1.18.30.26|Gold nuggets can no longer be used as fuel for a furnace.}}
{{History|Legacy Console}}
{{History||xbox=TU7|xbone=CU1|ps=1.0|wiiu=Patch 1|switch=1.0.1|[[File:Gold Nugget JE2 BE1.png|32px]] Added gold nuggets.}}
{{History||xbox=TU53|xbone=CU43|ps=1.49|wiiu=Patch 23|switch=1.0.3|Gold nuggets can now be [[smelting|smelted]] from golden [[tool]]s and [[armor]].}}
{{History||xbox=none|xbone=none|ps=1.90|wiiu=none|switch=none|[[File:Gold Nugget JE3 BE2.png|32px]] The texture of gold nuggets has been changed.}}
{{History|3DS}}
{{History||0.1.0|[[File:Gold Nugget JE2 BE1.png|32px]] Added gold nuggets.}}
{{History||1.9.19|Gold nuggets can now be [[smelting|smelted]] from golden [[tool]]s and [[armor]].}}
{{History|foot}}
== Issues ==
{{issue list}}
== See also ==
* [[Iron Nugget]]
* [[Gold]]
{{Items}}
[[cs:Zlatý nuget]]
[[de:Goldklumpen]]
[[es:Pepita de oro]]
[[fr:Pépite d'or]]
[[hu:Aranyrög]]
[[it:Pepita d'oro]]
[[ja:金塊]]
[[ko:황금 조각]]
[[nl:Goudklompje]]
[[pl:Bryłka złota]]
[[pt:Pepita de ouro]]
[[ru:Кусочек золота]]
[[uk:Золотий самородок]]
[[zh:金粒]]
[[Category:Renewable resources]]</li></ul> |
|||||
Issues[]
Issues relating to "Block of Redstone" are maintained on the bug tracker. Report issues there.
Trivia[]
- As the block of redstone is not fully opaque, chests can be opened when covered by one and so can shulker boxes.
Gallery[]
-

Block of redstone as a circuit component.
-
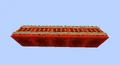
Example of how blocks of redstone can be used to power rails (from beneath).


References[]
External Links[]
- Block of the Week: Redstone – Minecraft.net on March 2, 2018