How to Shade an Anime Face in Different Lighting
This tutorial explains how to shade an anime or manga style face to show different lighting conditions.
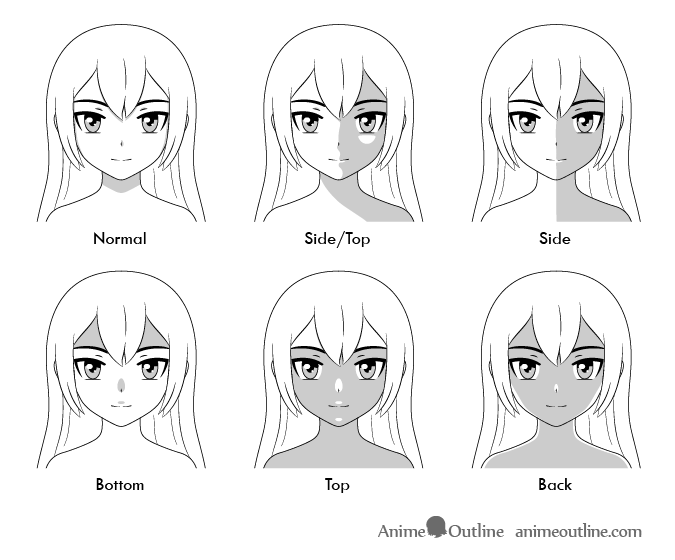
Anime and manga generally use a technique known as “Cel” shading which is shading without gradients. Cel shading is generally much faster and easier to apply to a drawing than realistic shading which makes it great for shading quickly shading multiple frames of an animation or many panels of manga.
General Lighting Anime Face Shading
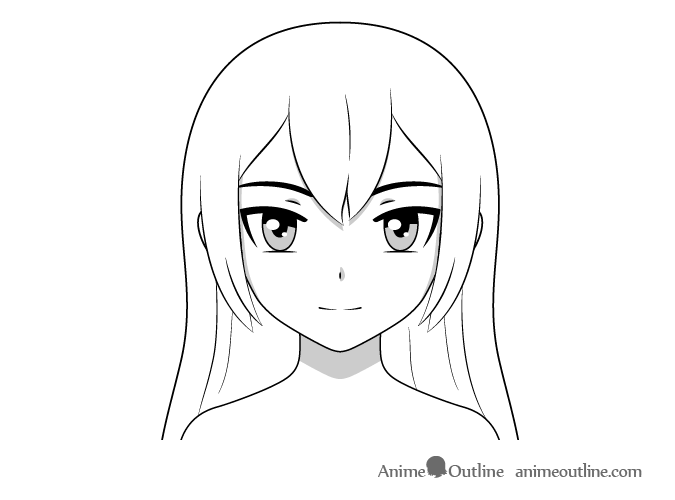
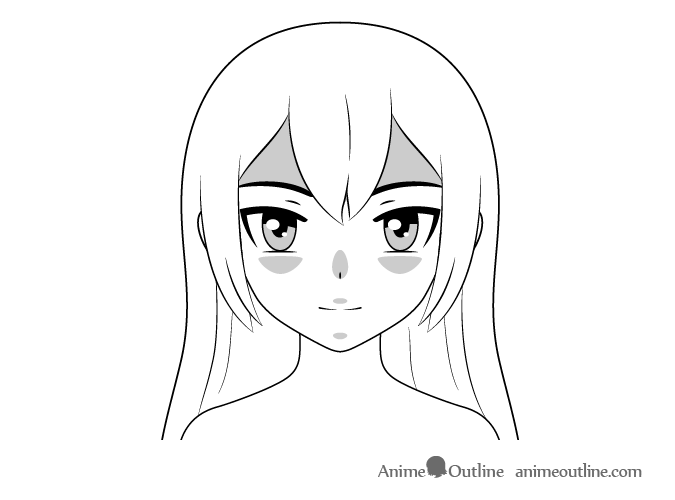
This shading option is usually suitable to most common lighting conditions where there is no particularly strong one directional light source.
In this type of general lighting the shadows will usually be drawn as follows:
- Forehead – shadows cast by the hair
- Eyelids – tiny shadows as these areas are indented in the head
- Nose – small shadow to one side
- Neck – a large shadow cast by the head
Side/Top Lit Anime Face Shading
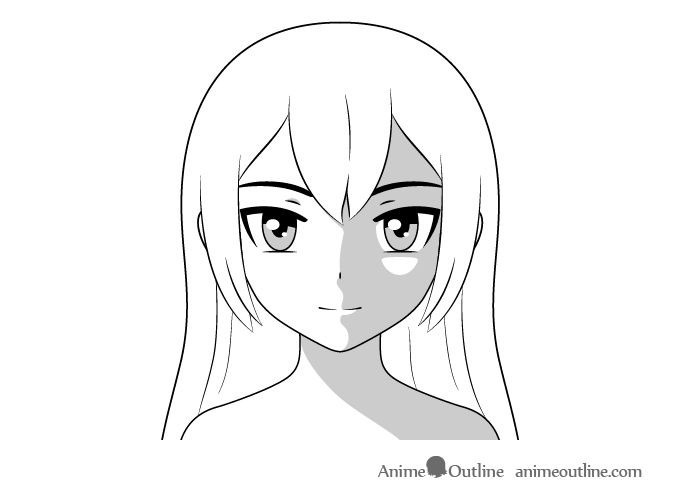
When the light is coming from above and to one side of the character the shadows will be cast on an angle. One side of the face will mostly be light and one will be dark. On the dark side there will generally be a light spot around the cheek bone as that area will catch some light. On the light side there will be a tiny shadow around the eyelid.
The shadow on the neck will be angled opposite of the light source.
Side Lit Anime Face Shading
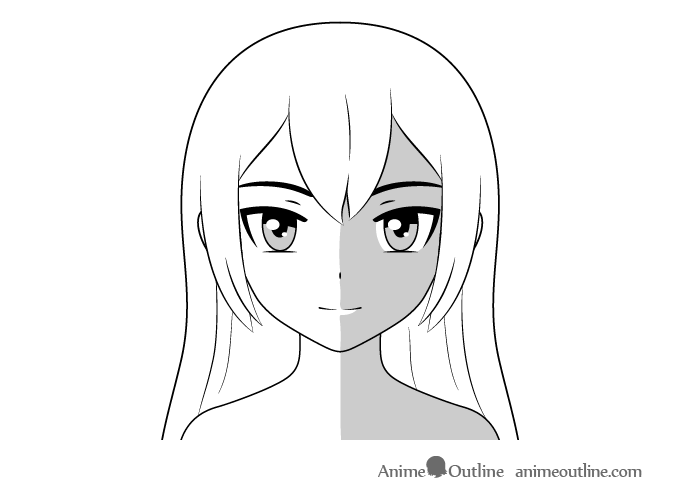
When the light is coming directly from one side you will pretty much have an evenly split (down the middle) light and a dark side of the face.
Bottom Lit Anime Face Shading
When the light is coming from the bottom pretty much the entire face will be lit up with the shadows being cast as follows:
- Chin – a small shaded area at the top of the chin as the chin usually tends to stick out a bit and that bump will cast a tiny shadow
- Upper Lip – the upper lip will cast a very small shadow as it sticks out just a little bit blocking some of the light
- Nose – upper area as the nose will block some of the light going upwards casting a shadow
- Cheeks – as the cheekbones also tend to stick out a little they will create some shadows
- Forehead – will pretty much be entirely dark as it curves away from the bottom light source
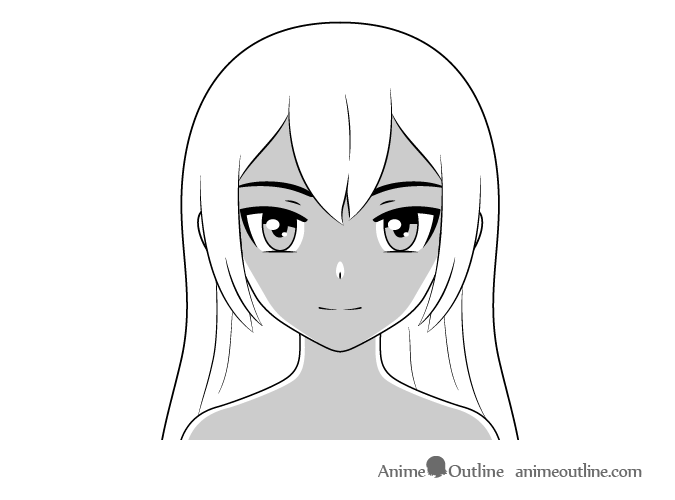
Top Lit Anime Face Shading
Top lighting will basically be the reverse of the bottom lighting described above. Most of the face will be shaded with the lighter areas being placed as follows:
- Forehead – will be completely lit up as it curves towards the above light source
- Nose – the upper side as it faces towards the light
- Cheeks – the upper area of the cheekbones
- Upper Lip – as it sticks out just a little bit and will catch some of the light
- Chin – upper area of chin as the chin curves a little bit outwards from the face
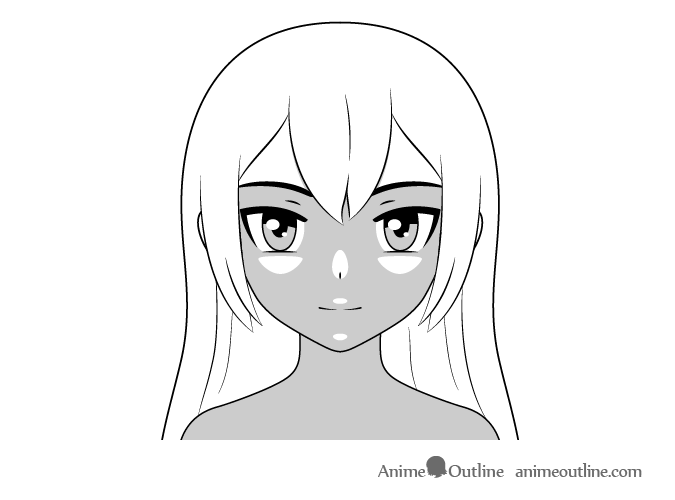
Back Lit Anime Face Shading
Back lighting will pretty much create a sort of “outline” of light around the character. Most of the light will be on the cheeks and sides of neck.
On a real face there will also be some light on each side of the nose but for an anime nose you can simply do one small light spot on the tip.
Conclusion
While Cel shading is fairly easy to apply as long as you have a general understanding of where to place the shadows. Hopefully this tutorial helped you gain a better understanding of how to shade an anime or manga style face in different lighting.
If you liked this tutorial you can also check out:
Beginner Guide to Picking Colors When Drawing Anime & Manga