Category Archives: Malta Links

Zalzett Malti ~ Maltese Sausage

Maltese Sausage
Maltese Sausage

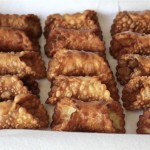
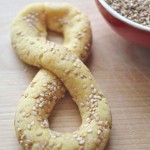
OMG!!  Yes!!!  This is how excited I am at finding the right recipe to make these garlicky Maltese sausages!

Parsley
Parsley

Ask any Maltese person which food they miss the most when living abroad and the top three answers would probably be…Ftira, Gbejniet and Maltese Sausage!  So far I’ve attempted the first two with great success but somehow making sausages seemed a little bit daunting for me. Just the thought of handling meats and the idea of stuffing casings and actually getting the results I craved for, just didn’t seem possible. Until I saw how Karl, from A Maltese in NY, does them and that took away all the mystery. Having a sausage stuffer attachment or a sausage machine would definitely help the process but if you’re like me, and have no room for any more gadgets, you can certainly stuff them by hand.

Coke Funnel
Coke Funnel

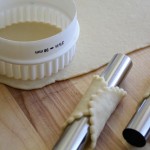
When I want to make something there is very little that can stand in my way. So the first stop was to go and find a funnel with a tip wide enough to get the ground meat through and into the casings.  Of course, as luck would have it, none of the stores nearby carried any and since time was of the essence (I had waited 20 yrs and could  not wait a moment longer) the next best thing was to make my own.  And it worked like a charm! I got a small 500ml coke bottle and cut the top 1/3 off and used that.

Garlic Cloves
Garlic Cloves

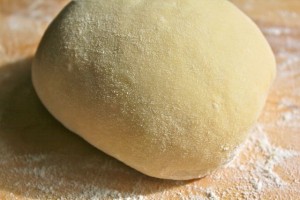
So once I had the funnel, the ground pork, the casings and all the rest, I set about making them.  I am not going to say it is easy to fill these sausage manually as I got pretty frustrated at times. Like when I tried to take a short cut and stuffed more than I should and ended up ripping the casings only to have to start all over again.  But once I got going, and realised I had to be patient and take my time, it was ok.  I shall be making these again and again.  They are worth all the work involved!

Ingredients 

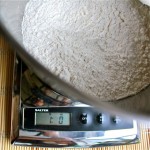
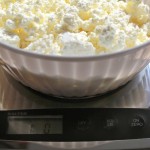
4.5 lbs of ground pork butt or shoulder (2kg)
1oz black pepper ground (30g)
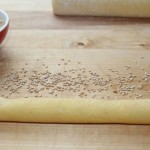
0.5-1oz coriander seeds crushed (15g-30g)
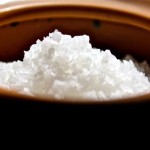
1-2oz sea salt (30g-55g)
10 garlic cloves minced
bunch of parsley finely chopped

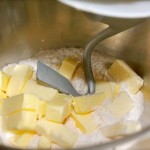
I asked the butcher at Whole Foods to mince the meat for me and he was very helpful and even explained to me the difference between the pork butt and shoulder.  How the pork butt has the fat in the meat and the pork shoulder has the fat all around.  I took his word for it. He also said that they use what they call the Picnic to make their sausages as it is “more economical and more flavourful”, and that’s what I used.

Ingredients
Ingredients

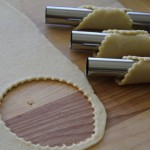
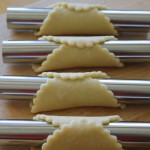
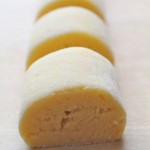
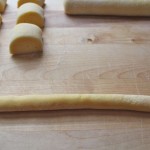
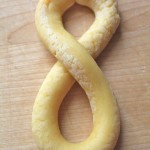
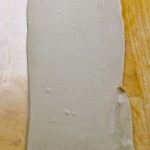
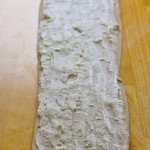
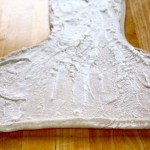
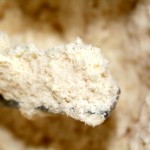
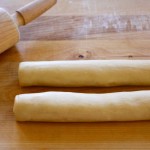
Put all the ingredients together and mix well. Fill the casings according to your machine’s instructions.  Or, if you don’t have the machine…start by putting the opening of the casings to the funnel, hold on tight to it and stuff the filling until you get enough to have two sausages any length you like.  Leave about two inches of casing on either side, cut and tie a knot at both ends and twist in the middle.  Prick them all over so they don’t explode when you cook them.  Rinse them and hang them to dry for two to four days in a cool place.

Thank you Karl for sharing your wonderful recipe. Now everybody will be able to taste of Malta wherever they may be.

Drying Maltese Sausage

Kannoli ~ Cannoli

Cannoli
Cannoli


Rose
Rose

This recipe has been in my to do list for about three months and the reason I had not attempted it before now is because it is a recipe shared with me by my very talented baker friend Rose and I was so blown away by the taste and presentation of her Cannoli that I felt a bit intimidated to try them myself in case I did not do it justice.

But now that the kids are off from school and I have a lot more time on my hands, I thought I’d give it a try and hope hope hope that I make them half as good as you Rose!

I am probably the only living soul on this planet that is not crazy about cannolis. I love ricotta but mainly in savoury  dishes and find ricotta desserts to  be a bit too heavy for my liking.

So when offered dessert at one of our get togethers at Rose’s house, I opted for the fruit salad, but couldn’t help eyeing the cannoli which were on the top tier of the dessert stand looking down on the other pastries acting holier than thou. But as I reached over for a taste, it took me all of two seconds to realise why.

Cannoli Molds
Cannoli Molds

Cannoli Shells

1 3/4 cups all purpose flour
2 tbsp sugar
1/2 tsp salt
2 tbsp butter
1 egg slightly beaten
1/4 cup Sauterne wine
egg white + tbsp of water

Cut in the 2 tbsp cold butter in with the flour, sugar and salt.

Add 1 egg slightly beaten.

Add the wine and form into a dough.

Roll out the dough to a 5 setting on the pasta machine.  If you don’t have a pasta machine, then roll the dough quite thin, as you would ravioli.

Cut dough into 4″ circles and form loosely onto metal tubes.

Beat the egg white and brush the ends of the dough to glue the ends making sure not to get any on the metal tube. Make sure you seal properly.

Deep fry in melted Crisco when it reaches 400 degrees, until golden brown and drain the shells on paper towels.

These make about 30 shells depending on how big you make them.

Cannoli Filling

Candied Peel
Candied Peel

2lbs ricotta
2-4 tbsp powdered sugar to taste
2 tsp vanilla
1/2 cup chopped orange candied peel
1/2 cup chopped candied citron peel
1/2 cup chopped good quality milk or dark chocolate
1-2 drops of cinnamon oil or to taste

Mix all the ingredients until well combined

To assemble Cannolis :

Pipe or spoon ricotta filling into the shells and sprinkle powdered sugar on top.

Perfect dessert to have on hand when you’re hosting a dinner because you can prepare both the shells and ricotta ahead of time and assemble them just before dessert time.

Thank you Rose!

Yummmmm!!
Yummmmm!!

Cannoli Tips :

I did not have cinnamon oil so I used ground cinnamon instead.  I hear it makes a difference and it’s on my list of things to add to my baking ingredients for sure. Some people prefer the taste of Fiori di Sicilia…I still have to try that one too.  Apparently it’s a wonderful addition to a lot of baked goods.

Do yourselves a favour and make sure to use egg whites to seal the cannoli dough before you fry them cause they do unfurl if you don’t.

Another tip is, that if you have a pasta machine, USE it.  It gives the cannoli perfect thickness and consistency.  I was a bit lazy to take mine out at first and tried to roll it out with a rolling pin.  It worked ok…BUT towards the end, I decided to use the machine and and realised how much better the shells turned out.

I fried the shells one at a time as they brown really quick and a few seconds makes all the difference between golden brown to charcoal black.

If you made the ricotta from scratch, do not let it drip too dry.  If that happens, add some whey to make it creamy.

If it’s not sweet enough, add more sugar to taste.

Follow all this and you’ll be left with cannolis to be proud of…

Ruġġata Tal-Lewz ~ Almond Cordial

Ruggata Tal-Lewz
Ruggata Tal-Lewz

Now that the summer is starting to make it’s mark, I always like to have a bit of Ruġġata tal-Lewz in my refrigerator, diluted with water and ready to pour and enjoy. It’s the perfect thirst quencher and goes down like honey on those hot hot days when it feels like you’re being cooked from the inside out.

Back in the 70’s, my mum would take my sister, brother and me to Valletta on those well known hot Maltese summer days, and after a morning at the market, we would always look forward to going to Zachary Street in Valletta for that chilled ruġġata that would cool our senses or rather induce instant brain freeze. I believe that shop no longer sells ruġġata there as Valletta’s changed a lot since the 70’s.

There would always be a crowd huddled at that little corner window shop with everybody shouting

“Hey, boy, it’s my turn” while waving their liras about to get “the boy’s” attention.

And with great patience he would serve everyone with a smile, knowing that in that heat, everyone’s hot temper would be just about ready to explode.

This is the home made version of our delectable almond cordial…

It might seem like it has a lot of sugar, but don’t forget that you have to dilute this and you only use about a quarter cup to about eight ounces of water and ice!

Ingredients
Cinnamon & Cloves
Cinnamon & Cloves


Ingredients

5 cups water
600gr sugar
lemon rind
12 cloves
1-2 sticks cinnamon
2 tsp almond essence (or more to taste)
1 tsp vanilla essence
evaporated milk (about a quarter cup)


Method

Place the water, sugar, lemon rind, cloves and cinnamon in a pot and let it boil.
Reduce the heat and let simmer for 15 minutes.
Remove from heat.
When the mixture cools, pass it through a sieve to remove rind and cloves.
Add essences and a little bit of evaporated milk.
Pour in clean bottles and place them in the fridge.
Dilute with water to taste.


Ruġġata Tal-Lewz
Ruġġata Tal-Lewz

Ottijiet ~ Figure Eight Cookies

Ottijiet
Ottijiet

I have to tell you that today’s recipe goes against everything I believe in  and that is using boxed cake mixes in baking.  I have used them maybe twice in my life and it was only because my kids begged me to.  Does that make me a cake snob I wonder…

Even though they have a nice light and moist texture and they keep for such a long time unlike most home baked cakes, I find them to be very artificial.  If I do come across a recipe, and one of the ingredients says “one boxed yellow cake mix”, I run as fast as I can.

So when my friend Mary offered me some of her home made biscotti with my tea, my eyes lit up until she said those dreaded words!!

“It was such an easy recipe Georgina!  It calls for one boxed cake mix…….” and everything started fading after that.  My ears shut out the rest of the recipe, and my nose wrinkled and I just nodded and smiled as though everything was ok in the world.

Original Recipe
Original Recipe

But I felt I owed it to Mary to try them out because she did make them especially for me…and was prepared to politely say something like…

“Mmm, nice Mary”…
…but instead found myself actually saying…
“OMG…these biscotti remind me of the Ottijiet we used to have in Malta growing up…please please share the recipe”

So now I am a snob no more and you will find at least three boxed cake mixes at any given time in my kitchen.

Today was a rather cool day and I really felt the need for something sweet with my nice cuppa tea. Something to dunk…whatever it was, it had to be strong enough to withstand a three second dunk in my hot beverage and not fall apart before it makes its way to my mouth.

Ottijiet, which translated means the figure eights are perfect for such a deed.  They are hard and crunchy Maltese type cookies and can be dunked with success every time.   I used to make these Ottijiet using the Figolli dough  but have since converted to using this recipe.  The original recipe is used to make biscotti but I’ve adapted the recipe to make these lovely dunkers.

Ottijiet

1 package yellow cake mix
2 large eggs
1 egg yolk
8 tbsp cooled melted butter
1 cup all purpose flour
zest of half a lemon
sesame seeds optional

Preheat oven to 350 degrees
Form the dough by putting all the ingredients together and forming into a ball.
Let rest for half an hour.
Cut the dough in half.
Form into 2 equal rolls.
Cut into two inch sections.
Form each section into a foot long thin rope.
If using sesame seeds, sprinkle some on the cutting board and roll the dough over them so they will stick and not fall off.
Form into the figure 8
Bake for about 18 minutes until golden in colour
Makes 2 dozen 8’s

Figolli ~ Traditional Maltese Easter Cookies

Figolli
Figolli


Figolli
Figolli


Hey, it’s that time of year again!  Time to make figolli!

There are a handful of occasions  throughout the year that my kids look forward to!  And they have to be Birthdays, Halloween, Christmas and Easter time! And this is probably because each holiday has something sweet attached to it.

Halloween Figolli
Halloween Figolli


The funny thing is, we have been known celebrate each occasion with Figolli.  I have made pumpkin and ghost  figolli for Halloween, Christmas Tree figolli for Christmas and even a birthday cake figolla for Dylan’s birthday.  Yes, any day can be figolli day at my house!  We love them that much!


Broken Ear
Broken Ear

Traditionally, figolli were given to kids on Easter Sunday after 40 days of lent.  They come in all shapes and sizes, from ducks and lamb to guitars and cars.  As kids we’d look forward to the broken ones because that meant we could scoff it straight out of the oven!

So get your work station ready.  It’s not a hard recipe to make.  Just time consuming so I suggest you divide the work over a few days.  I usually start with making the dough and the filling, forming the figolli and baking them on day 1.  I leave the decorating for day 2.  Then I wrap them on day 3! And best part is eating them on day 4!  They will vanish like magic…you’ll see!!


Dough

400g self raising flour

400g all purpose flour

400g margarine

300g sugar

juice and zest of one lemon

1tsp vanilla

4 egg yolks

milk or orange juice to bind

If you don’t have self raising flour, you can use 800g of all purpose flour and add two tsp of baking powder.

Sieve flour into a large bowl or stand mixer. Rub in the margarine to a bread crumb consistency. Add the sugar and lemon rind and mix again. Lightly mix in the eggs, juice, vanilla essence and enough milk to form a soft dough. Let rest in the refrigerator.

Filling

Almond Meal and Sugar

500g almond meal

300g sugar

4 egg whites

2tsp almond essence

Mix all the ingredients together in a bowl.

Add the egg whites and stir.  If it’s too dry, add some orange juice to the mixture.

Dust a work surface with flour and roll out the pastry. Use cookie cutters or custom-created cardboard shapes to cut out two identical shapes for each figolla.

Spread a thick (about 1 centimeter) layer of the almond filling onto half the pastry shapes you’ve made, leaving about 1 cm of space around the edges of each one. Brush edges with some evaporated milk. Then cover each with its corresponding half. Push the edges together slightly and bake for about 30 mins in a moderate oven (325-350F, 175C).

Allow to cool and decorate with chocolate or icing as desired.

Icing
Icing

Cherry On Top ~ Pastini biċ-Ċirasa


Pastini biċ-Ċirasa

My mum knows me more than I know myself and lucky for me, she takes what I say with a grain of salt.

IMG_9985
Success Bil-Helu 2
By Edward Calleja

She had been telling me about this Maltese Recipe Book  for months and just how good the recipes were. We’d be sharing a cup o’ coffee together over skype when I’d catch a glimpse of a tray of cookies she’d just made and every time she would say that she had followed  a recipe from Edward’s  Book!  And every time she’d say that she’ll send it to me, and every time I tell her not to.  It was a game we played quite often, with me having the last word of course!

Or so I thought because she sent it to me anyway…knowing fully well that she’d get told off for it but also that I’d love it and sure enough, my mum was right as she always is.

This book is fast becoming my go to book for Maltese Baking.  I have had excellent results with all the recipes I’ve tried so far and I thought I’d share this one with you.  These are my favourite traditional Almond Cookies.  They are a staple at weddings and baptisms and  Cafes any time of the year!

Almond Cookies
Almond Cookies

So for those of us who can’t just pop into a cafe and order a dozen or two to take home, this is a simple recipe that will definitely satisfy your craving.  One thing you have to remember is that you need to start these the night before as they need to dry overnight or from 6-8 hours!

Another thing is that even though these are easy to make, you do need a bit of muscle as the consistency of the dough does not pipe easily. So consider yourselves warned!!


The recipe makes about 3 dozen and is adapted from Suċċess Bil-Helu by Edward Calleja.

Ingredients

250g pure ground almond

250g powdered sugar

3/8 cup egg whites or the whites of 3 eggs

rind of half a lemon

1tsp almond essence

rice paper optional

cherries for decoration

Place the dry ingredients together in a bowl.

Beat egg whites in a separate bowl.

Slowly pour egg whites in with the almonds and sugar and stir until you see it’s well mixed.  The mixture should not be too soft.

Put rice paper in the pan.

Scoop the mixture and put in a 16-18 inch piping bag with a Wilton 1M tip. Pipe the mixture on top of rice paper or silpat as shown about an inch apart.

Place a quarter cherry on top.

Let dry overnight.

IMG_0001
Let them dry overnight

Next morning preheat oven at 375 degrees and bake for about 10-12 mins until light golden colour depending on your oven.

Cherry On Top
Cherry On Top


Pastizzi – Camenzuli Style

Flaky Pastizzi
Flaky Pastizzi

Pastizzi ta’ l-Irkotta or Pastizzi tal-Pizelli!  Those are only two of the most popular fillings you will find because nowadays you  may find many more types of fillings…from sweet to savoury but I still think that the original are the best! Pastizzi get a bad rap because the dough contains a little more than your average fat.  Usually a basic dough has half the amount of fat as flour. The pastizzi dough has slightly more but is oh sooo worth it.

Pastizzi for Breakfast

It is also slightly more work.  Well, when I say slightly, I mean a lot! And also slightly messier…ok a lot messier…but I don’t want to scare you away and really want you to try it, cause when you make it and taste it, you’re going to fall in love. There’s just nothing like that rich, crunchy but melt in your mouth pastry!!   And this recipe delivers! Pastizzi are also great to freeze so you can always have some on hand. Then just pop two in the toaster oven and have them for your lazy Sunday morning breakfast!

Uncle Fredu Making Pastizzi

This recipe is one of those that has been passed down to me by my relatives who had emigrated to the US in the early 60’s which means they’d been here for 30 years before I made my appearance and had all that time to finesse everything Maltese!! I have a big family here and rest assured that there’s pastizzi at every gathering and not surprising at all, it would be the pastizzi that would be the first to disappear.

Uncle Alex Making Pastizzi

Pastizzi call for a mixture of butter and lard OR crisco.  There was a time when just the word LARD would make  me cringe and seeing anyone using it in cooking would immediately make me lose my appetite.  But here is an article I read recently that made me think differently.

Dough

  • 1lb all purpose flour
  • 1/4 cup oil
  • pinch of salt
  • 9oz water
  • 9oz lard or crisco
  • 3oz butter
Butter and Lard
Mix Butter and Lard

Make the dough by putting the dry ingredients in the bowl of a stand mixer. Add the oil and water and let it knead for about 12 mins until you have a nice smooth dough. Let it rest for about half an hour. Cut the dough in half. Open one of the halves into a long strip as shown in the photo beneath.

Take both fats and mix them together. Divide in two. Take one part of the mixed fat and slather it all over the rolled out dough.

From the end closest to you, start stretching and rolling while widening the dough as shown. Keep doing this until you reach the other end. You’ll end up with a long rope like piece of dough.

Take one end and roll it into a spiral shape. Put some fat over the top, cover and store in the fridge until ready to use. Do the same with the other piece of dough and remaining fat.

Ricotta Filling
Ricotta Filling


Filling
Make the pastizzi filling by mixing 1lb ricotta, 2 eggs and pinch of salt together.

Forming Pastizzi
Take the end of the spiral shaped dough and cut about two inches off the end. Flatten it with your hand as you turn it round and round between your fingers so you can see the ridges of the dough forming. Form it into a circle about 3-4 inches in diameter. Put a dollop of ricotta in the middle.


Ready for Baking or Freezing
Ready for Baking or Freezing.

Fold over and seal and place on a greased dish or on a silpat. Do this until you’ve used up all the dough and ricotta.

You can freeze them at this point. Or you can bake them in a 375 degree oven for about 20-30 mins until golden brown.

As with everything, moderation is the key.  Pastizzi are not the the healthiest of foods, but then neither are croissants or eclairs and it would be a shame if we couldn’t have them once in a while, so go on…have one…you know you want to.


Pastizzi Camenzuli Style


Ricotta Qassatat

Qassata
Qassata

Two very popular snacks in Malta are Qassatat and Pastizzi.  You can call them cousins with pastizzi being the posher or richer of the two.  I find qassatat are the easier ones to make so we’ll be tackling that one first and then later on, we’ll try our hand at making pastizzi.

There’s all sort of different fillings you can use for the qassatat and ricotta ones seem to be the most favoured.  You can add raisins or sauteed onions or fresh fava beans with the ricotta.  These types of fillings are sought after during Lent when it’s customary to fast.

Other types of fillings include meat and anchovies, but really, you can make as many types of filling as your creativity and taste will take you.

So this is your basic Ricotta Qassatat Recipe

Dough

Dough
Dough

1 lb all purpose flour
8 oz chilled butter cut up in cubes
1 egg (optional)
pinch of salt
about 1/2 cup water

Start by putting the flour and butter and salt in your stand mixer and work it until it looks like breadcrumbs.
Add the egg and water and knead until it comes together.
Take it out and knead it into a ball and let it rest at room temperature for about half an hour.


Filling

1lb ricotta
2 eggs
pinch of salt
1/2 cup grated pecorino romano cheese (optional)

Some ricotta is more creamy than others and you might only need one egg…so use your judgement.  The filling should not be too liquidy or it would ooze out of the dough.


Put all the ingredients together and stir vigorously.


Qassatat

Roll half the dough into two long ropes about two inches thick and cut it up into two inch chunks.

Take one piece and open it up into a circle about 3-4 inch diameter depending on how big you like them.

Put a dollop of the ricotta mixture in the middle.

Take the outside of the dough and start pleating while turning the dough about an inch each time until you get to the first pleat.

Continue this until you’ve used up the dough and ricotta.

Brush on a bit of egg wash.

Bake at 400 degree oven for about half an hour depending on your oven until they’re golden brown


Gbejniet (Maltese Cheese)


Gbejna
Gbejna

I didn’t know I missed gbejniet until my dear friend Mary shared some with me a few years ago.

Mary was the first Maltese person I met when we first moved to the Bay Area.  In 1996, the internet was still in the early stages and there was hardly any information or even links to Malta.  The only source of interest at the time was a “chat room” for Maltese people.

Feeling very homesick, I left a message in this chat room to see if there were any other Maltese people in the area. A few days later I found a message from Mary and the best thing was that she lived only about half hour away from me.  We soon realised that her husband Tom used to play soccer with my uncle Guz when they were kids!! That’s how small Malta is.

I’ve known Mary now over 15 years and we chat and visit regularly!  We share recipes and I love going over her house to to catch up and visit her lovely garden which is like stepping into a Maltese Giardina with caper bushes and prickly pears. I think the only thing that’s missing is a Bambinella Tree…I’m still hoping!

Cheese Baskets (Qwieleb)

So this is a recipe she so graciously shared with me.  I’ve tried to tweak it a few times.  I tried adding yoghurt and once I tried adding cream.  I’ve made it with whole milk and with goats milk.  Sheep’s milk would be ideal…but I gave up  trying to find some to buy a long time ago.

You do need these cute little gbejniet baskets called Qwieleb.  I believe there are a few online websites who carry them.  They’re 3 inches in diameter and 2 1/2 inches in height.

It is very important that you do NOT use ultra pasteurised milk or homogenised milk when you are making gbejniet. Ultra-pasteurization heats the milk to 280 degrees, effectively killing any micro-organisms in the milk. You want these microbes in the milk in order for the cheese to curdle properly and for the final cheese product to actually have flavor. 

Goat Milk
2 litres of Goat’s Milk

This recipe will yield about 8 Gbejniet.

Ingredients

  • 2 litres of Goat’s Milk
  • 1 cup low fat milk powder
  • 2 Rennet Junkets
  • 2 tbsp water
  • salt

Directions

First you need to sterilise all equipment.

Heat the milk with the milk powder in a non reactive pot on low and stir until the milk powder is dissolved.

Stir the Mixture
Stir briefly

Add 2 tblsp of water to the rennets and stir until dissolved and set aside.

When the milk temperature reaches 98 degrees, take it off the heat.

Add the rennet tablet mixture to the milk and stir briefly.

Cover and let set at room temperature for about 3 hours.

In the meantime, prepare a draining container with the baskets on top.

Ladle the curd into the baskets and let drain overnight.

Ladle curds into baskets

(You can pour the collected whey in a glass container and  store in the refrigerator. You can use this instead of the water for the ftira and maltese bread.)

Next morning, flip the cheese and put them  back in the baskets and let them continue to drain overnight.

Flip the cheese
Flip the cheese

Cover with a net.

Cover with net
Cover with net

Next morning, making sure that they’re strong enough to handle, take them out of the baskets and sprinkle about 1/4 tsp salt all over and around each gbejna and let drip for a few hours more.  Make sure to always keep them covered in case of bugs.

 If you like them dried and peppered…you can do this at this stage.  Grind some pepper in the plate and pat each gbejna into the pepper and cover all over and let them dry for another day (always depending on how hot and dry the day is…please use your judgement).

I don’t like a lot of pepper, so I let them air dry without the pepper.  That’s the good thing about a recipe…you can adjust and substitute to your liking.

Here they are drying before being soaked into the vinegar.

Air dry
Air dry

Here they’ve been dried for a couple of days indoors.

After 2 days of drying

I then fill a bowl with pickle vinegar and let them soak for 2-3 hours. You can use a vinegar of your choice.

Soak in vinegar
Soak in vinegar

Store them in a sterilised jar.  I add about 2 tbsp of vinegar and olive oil and a bit more pepper.  Some people cover them in vinegar.

Store in sterilized jar


I like to store them in the fridge and give them a good shake every now and again.

The great thing about gbejniet is that they are tasty at any stage.  They are delicious fresh after you flip them.  They go well with toasted bread and butter or in Soppa ta’ l-Armla (Widow’s Soup).  Personally I like them after they’d been dried and soaked in vinegar.  Love them on my ftira with tomato paste and olive oil!

Happy Cheese Making!

Sprinkled with pepper
Ready to enjoy!
Ready to enjoy!

A little bit of home…

Fountain in Valletta

On certain days I feel more homesick than others.  Even though I’ve been living away from Malta for twenty years, I still feel that twinge of sadness when I see photos of Malta or read what’s going on on my little Island.  One thing that helps on days like these, is baking Maltese goods…but yesterday I found another way to feel the closeness and get that good old fuzzy home feeling.

Captain's Window in Gozo


My friend Karl sent me a link to a show on HGTV called House Hunters where they feature couples and people from all over the world, looking for real estate in Malta.  I tell you…it’s just what the doctor’s ordered!!


View from Upper Barrakka

I’m afraid this link can only be accessed by residents in the US.