Tag Archives: baking

Cherry On Top ~ Pastini biċ-Ċirasa


Pastini biċ-Ċirasa

My mum knows me more than I know myself and lucky for me, she takes what I say with a grain of salt.

IMG_9985
Success Bil-Helu 2
By Edward Calleja

She had been telling me about this Maltese Recipe Book  for months and just how good the recipes were. We’d be sharing a cup o’ coffee together over skype when I’d catch a glimpse of a tray of cookies she’d just made and every time she would say that she had followed  a recipe from Edward’s  Book!  And every time she’d say that she’ll send it to me, and every time I tell her not to.  It was a game we played quite often, with me having the last word of course!

Or so I thought because she sent it to me anyway…knowing fully well that she’d get told off for it but also that I’d love it and sure enough, my mum was right as she always is.

This book is fast becoming my go to book for Maltese Baking.  I have had excellent results with all the recipes I’ve tried so far and I thought I’d share this one with you.  These are my favourite traditional Almond Cookies.  They are a staple at weddings and baptisms and  Cafes any time of the year!

Almond Cookies
Almond Cookies

So for those of us who can’t just pop into a cafe and order a dozen or two to take home, this is a simple recipe that will definitely satisfy your craving.  One thing you have to remember is that you need to start these the night before as they need to dry overnight or from 6-8 hours!

Another thing is that even though these are easy to make, you do need a bit of muscle as the consistency of the dough does not pipe easily. So consider yourselves warned!!


The recipe makes about 3 dozen and is adapted from Suċċess Bil-Helu by Edward Calleja.

Ingredients

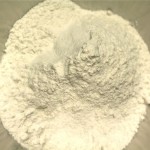
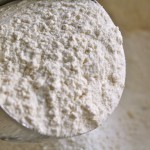
250g pure ground almond
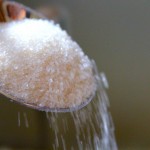
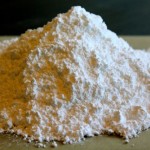
250g powdered sugar

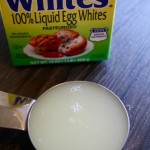
3/8 cup egg whites or the whites of 3 eggs

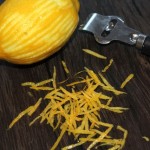
rind of half a lemon
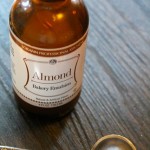
1tsp almond essence

rice paper optional

cherries for decoration

Place the dry ingredients together in a bowl.

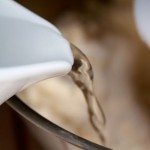
Beat egg whites in a separate bowl.

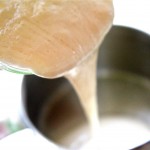
Slowly pour egg whites in with the almonds and sugar and stir until you see it’s well mixed.  The mixture should not be too soft.

Put rice paper in the pan.

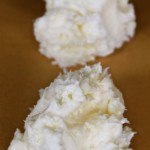
Scoop the mixture and put in a 16-18 inch piping bag with a Wilton 1M tip. Pipe the mixture on top of rice paper or silpat as shown about an inch apart.

Place a quarter cherry on top.

Let dry overnight.

IMG_0001
Let them dry overnight

Next morning preheat oven at 375 degrees and bake for about 10-12 mins until light golden colour depending on your oven.

Cherry On Top
Cherry On Top


Pastizzi – Camenzuli Style

Flaky Pastizzi
Flaky Pastizzi

Pastizzi ta’ l-Irkotta or Pastizzi tal-Pizelli!  Those are only two of the most popular fillings you will find because nowadays you  may find many more types of fillings…from sweet to savoury but I still think that the original are the best! Pastizzi get a bad rap because the dough contains a little more than your average fat.  Usually a basic dough has half the amount of fat as flour. The pastizzi dough has slightly more but is oh sooo worth it.

Pastizzi for Breakfast

It is also slightly more work.  Well, when I say slightly, I mean a lot! And also slightly messier…ok a lot messier…but I don’t want to scare you away and really want you to try it, cause when you make it and taste it, you’re going to fall in love. There’s just nothing like that rich, crunchy but melt in your mouth pastry!!   And this recipe delivers! Pastizzi are also great to freeze so you can always have some on hand. Then just pop two in the toaster oven and have them for your lazy Sunday morning breakfast!

Uncle Fredu Making Pastizzi

This recipe is one of those that has been passed down to me by my relatives who had emigrated to the US in the early 60’s which means they’d been here for 30 years before I made my appearance and had all that time to finesse everything Maltese!! I have a big family here and rest assured that there’s pastizzi at every gathering and not surprising at all, it would be the pastizzi that would be the first to disappear.

Uncle Alex Making Pastizzi

Pastizzi call for a mixture of butter and lard OR crisco.  There was a time when just the word LARD would make  me cringe and seeing anyone using it in cooking would immediately make me lose my appetite.  But here is an article I read recently that made me think differently.

Dough

  • 1lb all purpose flour
  • 1/4 cup oil
  • pinch of salt
  • 9oz water
  • 9oz lard or crisco
  • 3oz butter
Butter and Lard
Mix Butter and Lard

Make the dough by putting the dry ingredients in the bowl of a stand mixer. Add the oil and water and let it knead for about 12 mins until you have a nice smooth dough. Let it rest for about half an hour. Cut the dough in half. Open one of the halves into a long strip as shown in the photo beneath.

Take both fats and mix them together. Divide in two. Take one part of the mixed fat and slather it all over the rolled out dough.

From the end closest to you, start stretching and rolling while widening the dough as shown. Keep doing this until you reach the other end. You’ll end up with a long rope like piece of dough.

Take one end and roll it into a spiral shape. Put some fat over the top, cover and store in the fridge until ready to use. Do the same with the other piece of dough and remaining fat.

Ricotta Filling
Ricotta Filling


Filling
Make the pastizzi filling by mixing 1lb ricotta, 2 eggs and pinch of salt together.

Forming Pastizzi
Take the end of the spiral shaped dough and cut about two inches off the end. Flatten it with your hand as you turn it round and round between your fingers so you can see the ridges of the dough forming. Form it into a circle about 3-4 inches in diameter. Put a dollop of ricotta in the middle.


Ready for Baking or Freezing
Ready for Baking or Freezing.

Fold over and seal and place on a greased dish or on a silpat. Do this until you’ve used up all the dough and ricotta.

You can freeze them at this point. Or you can bake them in a 375 degree oven for about 20-30 mins until golden brown.

As with everything, moderation is the key.  Pastizzi are not the the healthiest of foods, but then neither are croissants or eclairs and it would be a shame if we couldn’t have them once in a while, so go on…have one…you know you want to.


Pastizzi Camenzuli Style


Bonding over Bread (Maltese Bread or Ftira Recipe)

I don’t think it would be appropriate to have a blog called Tal-Forn and not include the best bread recipe ever!  Anyone who has ever tried it has given it 5 stars and I guarantee that if you try this,  you won’t be disappointed and we’ll be bread friends for life!

Ftira

In fact, this recipe has made me quite a few friends, from around the world.  But first let me tell you a little bit about how it came to be.

When we came to live in the United States, back in 1994, there were quite a few things I missed, but nothing more than a good loaf of Maltese Bread!  I tried the fancy bakeries and the not so  fancy stores but nothing came close, so within a week of settling down, I got my first bread machine! It was and still is the most used gadget in my kitchen to date!  I’m actually on my third one which is less than a month old and a gift from my lovely family in Malta…love you guys soo much!

So I’ve been making bread for years and years but I still had not come close to the taste and texture of the Maltese Ftira that everyone falls in love with on their first visit to the lovely Island of Malta.   Every now and then, I’d do a search for nothing, but never gave up.  Then  along came fb and there it was…the recipe I’d been looking for all these years on Ilovefood.com. It was quite a detailed recipe from a Linda Speight from London!!    The thing that captured my interest  from the get go, was her first sentence, which went something like “This is much easier than it sounds…”.   Plus she had written the recipe in so much detail that I thought there was no way I could fail!  And so I set on another mission to see if this was the recipe of my dreams.

Being an avid baker, I had all the ingredients on hand and started making the starter, which I’d always found intimidating.  And the rest is history.   The best part though, is that Linda and I are best of friends.  We bonded over bread and we now chat all the time, sharing recipes and talk about food and weather and everything in between!!

Ok…so if you googled Maltese Bread or Ftira and Google brought you to my blog, you must be eager to get started and make this delicious bread in your own kitchen.  I have tried making this recipe with AND without a  bread machine and I have to admit that this ONLY works with a bread machine.

Recipe…

You have to have a starter….if you don’t, don’t worry,  it’s really easy to make your own…

All you need is a clean jar and some flour and water.

Put a tablespoon each of water and flour in a clean jar and stir with a plastic spoon or chopstick which is what I use and cover.   They say metal is not good…not sure why and I don’t ask questions. Store in a warm place away from direct sunlight.

Do this every day…each morning, add another tablespoon of water and a tablespoon of flour, and stir and cover…for seven days…and on the eighth day, you’re ready to start on your first loaf/rolls/ftira/pizza/focaccia…oh so many things you can make!!

In the bread machine pan, put

Ingredients

120gr starter
300gr cups water
(together the starter and water should weigh 420gr)

420gr-450g high gluten flour (depending where you live)
2 tsp sugar
2 tsp salt

2 tblsp olive oil
1 1/2 tsp yeast

Put everything in the bread machine on the dough cycle.  When it’s done, take out the dough and let it rest for about five minutes.  Divide in 3 equal parts.  Take each part and flatten it a bit to about 8-10 inch rounds.  Tear a hole in the middle. Cover and let it rest until double in size for about half an hour but it really all depends on how warm your kitchen is.  Bake at 425 for about 12-15 mins.  Again, it depends on your oven, so keep an eye on it.

Now that you made this, don’t forget to feed your starter every day.  Just add equal amounts of water and flour and this can go on for years!  If you need to go on holiday or just need a break from making bread, just store the starter in the fridge.  When you’re ready to use again, take it out, feed it and use it at room temperature.

Hope you enjoyed this post and if you make this bread, I’ll be very happy to hear how it turned out for you or answer any questions.  Here’s to bread!!