Seems like Fall is in the air as I’m finding myself seeking all kinds of excuses to stay home and bake.
Yesterday I stumbled upon this blog Almond Cornerand was absolutely thrilled by the recipes on there and fascinated by the photography. A Maltese saying goes L-ewwel Ma Tiekol L-Ghajn…and it is so true with anything. Loosely translated, it means that the eye is the first to eat…as now I’m completely hooked.
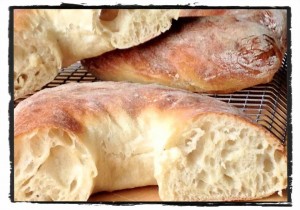
As soon as I saw these braided buns, I knew I had to make them. I felt slightly uneasy at first as I had to convert the weight to my lbs and ozs…I know, I’m still living in the middle ages. But besides that, I also halved the recipe and used my bread machine. I thought the recipe called for a bit too much yeast so I adjusted it to what I thought was a good amount. And even after all that, I was blown away by the result!
So here’s my adaptation for these delightful buns. As you can see from my photos, I attempted braiding them but after the second try, I aborted the mission and resorted to forming them my way as I was getting myself into a knot too.
Ingredients
1lb all purpose unbleached flour
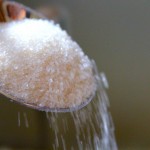
1 oz sugar
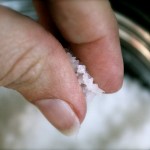
1/2 tsp salt
10 oz milk
4 1/2 oz butter
3 tbs oil
1 egg
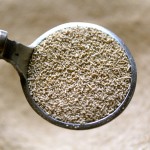
2 1/4 tsp yeast
Preheat oven at 375 degrees.
Warm the milk until it’s luke warm.
Put all the ingredients in your bread machine and set on the dough cycle.
When the cycle is done, take out the dough, cut into about sixteen equal portions and form into rolls or if you’re brave enough, into braids. You can find instructions on here
Brush each with a beaten egg and bake. After they’re done baking for about 15-18 mins, brush with some melted butter and put them back in the oven for a short while. (I skipped this step this time, but will definitely do it next time.) These are best eaten on the first day.
I can’t think of a more appropriate time to post this recipe than now.
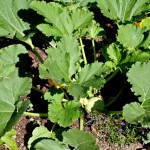
This is the first year that I planted zucchini…or rather that the zucchini that I planted are actually rewarding me with its fruit. Did you know that?? Zucchini is actually a fruit? A fruit that is prepared as a vegetable. I thought that was very interesting, because to me, anything green is a vegetable…except watermelon of course.
Happy Birthday Dylan
So this is a quite an old recipe…18 yrs old in fact! As old as my first born and it’s a known fact that I spent the better part of nine months eating this bread. I’d go visit my family out on Long Island and my cousin Dianne would never let me go back home without a loaf, all sliced up and ready to eat on the one hour long trip back home. And by the time I got home, there’d be nothing left but a few crumbs.
Dylan Graduation
So this morning, when I went out to the garden and noticed that some zucchini were ready for picking, I had to use it to make this bread. Also, it’s Dylan’s b’day next week…18 yrs young!! Where has the time gone?? Seems like only yesterday we were so excited at welcoming our newborn. And now it’s almost time to say goodbye as he heads off to a new beginning…the college years.
And it all started with zucchini bread!
It’s a simple recipe and makes two medium sized loaves. Perfect for sharing with friends…your friends will love you for it! Also freezes very well.
Zucchini Plant
Qarabali~Maltese Zucchini
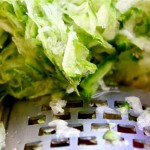
Grated Zucchini
Ingredients
3 cups flour
2 tsp baking powder
1 tsp baking soda
1 tsp salt
2 tsp cinnamon
2 tsp vanilla extract
2 cups peeled and grated zucchini
2 cups sugar
1 cup salad oil
3 eggs
Just mix everything together.
Pour into prepared greased and floured loaf pans.
Bake in preheated oven at 375 for about 45 mins.
Zucchini Bread
In my opinion, the next best thing to cookies and a glass of cold milk is zucchini bread and a glass of cold milk. So satisfying and comforting anytime. Thank you Dianne for sharing this with me…still one of my favourites and not just for the memories!
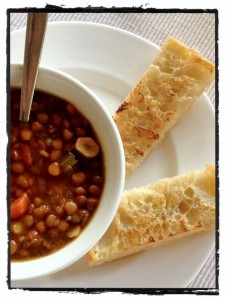
Now that we’ve mastered the Maltese Bread and Ftira, we can work on the filling!! In Malta, our most favourite way to have the bread is with kunserva. Hobz biz zejt u l-kunserva…nothing like it. So that’s bread with tomato paste and olive oil.
Of course you can also go all gourmet and add anything that you like…maltese sausage, gbejniet, which is a type of maltese cheese, canned tuna fish, chopped up onion, cannelini beans, pickled veggies, capers, olives…the list is endless…make up your own combination of your favourite things. Parsley or Basil, some olive oil, salt and pepper and oh it’s just heaven on earth!
I don’t think it would be appropriate to have a blog called Tal-Forn and not include the best bread recipe ever! Anyone who has ever tried it has given it 5 stars and I guarantee that if you try this, you won’t be disappointed and we’ll be bread friends for life!
In fact, this recipe has made me quite a few friends, from around the world. But first let me tell you a little bit about how it came to be.
When we came to live in the United States, back in 1994, there were quite a few things I missed, but nothing more than a good loaf of Maltese Bread! I tried the fancy bakeries and the not so fancy stores but nothing came close, so within a week of settling down, I got my first bread machine! It was and still is the most used gadget in my kitchen to date! I’m actually on my third one which is less than a month old and a gift from my lovely family in Malta…love you guys soo much!
So I’ve been making bread for years and years but I still had not come close to the taste and texture of the Maltese Ftira that everyone falls in love with on their first visit to the lovely Island of Malta. Every now and then, I’d do a search for nothing, but never gave up. Then along came fb and there it was…the recipe I’d been looking for all these years on Ilovefood.com. It was quite a detailed recipe from a Linda Speight from London!! The thing that captured my interest from the get go, was her first sentence, which went something like “This is much easier than it sounds…”. Plus she had written the recipe in so much detail that I thought there was no way I could fail! And so I set on another mission to see if this was the recipe of my dreams.
Being an avid baker, I had all the ingredients on hand and started making the starter, which I’d always found intimidating. And the rest is history. The best part though, is that Linda and I are best of friends. We bonded over bread and we now chat all the time, sharing recipes and talk about food and weather and everything in between!!
Ok…so if you googled Maltese Bread or Ftira and Google brought you to my blog, you must be eager to get started and make this delicious bread in your own kitchen. I have tried making this recipe with AND without a bread machine and I have to admit that this ONLY works with a bread machine.
Recipe…
You have to have a starter….if you don’t, don’t worry, it’s really easy to make your own…
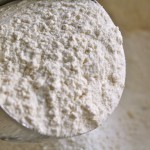
All you need is a clean jar and some flour and water.
Put a tablespoon each of water and flour in a clean jar and stir with a plastic spoon or chopstick which is what I use and cover. They say metal is not good…not sure why and I don’t ask questions. Store in a warm place away from direct sunlight.
Do this every day…each morning, add another tablespoon of water and a tablespoon of flour, and stir and cover…for seven days…and on the eighth day, you’re ready to start on your first loaf/rolls/ftira/pizza/focaccia…oh so many things you can make!!
In the bread machine pan, put
1/2 cup starter
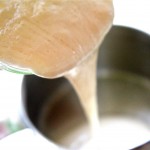
slightly less than 1.5 cups water or, in this case, whey
3 cups strong hi gluten flour (very very important you use strong flour with at least 11gr of protein)
2 tsp sugar
1½ tsp salt
1 tbsp olive oil
1.5 tsp yeast
Ingredients
120gr starter
300gr cups water
(together the starter and water should weigh 420gr)
420gr-450g high gluten flour (depending where you live) 2 tsp sugar 2 tsp salt
2 tblsp olive oil
1 1/2 tsp yeast
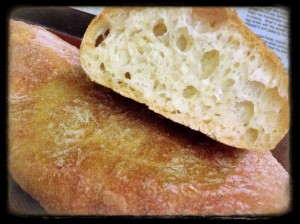
Put everything in the bread machine on the dough cycle. When it’s done, take out the dough and let it rest for about five minutes. Divide in 3 equal parts. Take each part and flatten it a bit to about 8-10 inch rounds. Tear a hole in the middle. Cover and let it rest until double in size for about half an hour but it really all depends on how warm your kitchen is. Bake at 425 for about 12-15 mins. Again, it depends on your oven, so keep an eye on it.
Now that you made this, don’t forget to feed your starter every day. Just add equal amounts of water and flour and this can go on for years! If you need to go on holiday or just need a break from making bread, just store the starter in the fridge. When you’re ready to use again, take it out, feed it and use it at room temperature.
Hope you enjoyed this post and if you make this bread, I’ll be very happy to hear how it turned out for you or answer any questions. Here’s to bread!!